The Troubleshooting and Repair for On-board Charger (OBC) Thread

Mitsubishi i-MiEV Forum

Help Support Mitsubishi i-MiEV Forum:

This site may earn a commission from merchant affiliate links, including eBay, Amazon, and others.
Hello everyone. I was given a charger for repair.
Problem in chocolate bar (Waffle Plate)
Short circuit 0R on the pins (in the photo)
Replaced 2 FGB20N60SFD transistors (that I could find) and STTH5R06B diode.
It worked :)

0.png

1.jpg

2.jpg

3.jpg

4.jpg

5.jpg


https://imgur.com/a/ALdyFXa

The car has already gone through three full charges, everything is ok :)
 
My repair is just about done (in part due to some offline help from Kiev - thanks!). Photos will follow. Being an ME with electronics packaging experience, I have an assembly suggestion that may help other electrical noobs. And I have a question that only an electrical dolt like me would ask.

My suggestion is for those who have had to de-solder the waffle plate. It didn't occur to me until late in the game that the only thing locating the waffle plate relative to the lower PCB is a single ring at the middle of the waffle plate. That helps with distance, but not much with keeping the two parallel. This is crucial, because one of the worst things you can do to a solder joint is to put in under stress and then heat cycle it repeatedly - which is exactly what the life of a charrger will subject it to if those two parts aren't in proper alignment from the start, which eliminates any stress.

What I did was to clean up all the old thermal paste from the waffle plate and the floor of the enclosure, then fit the PCB and waffle plate together without soldering and drop the loose assembly in place. Install all the fasteners and snug them into place. Then solder several joints at the ends and middle of each double row of diode prongs. (Just hit the ones that are easy to reach.) Then pull it back out, put it back on the bench and finish up soldering all the joints. Some are tricky to reach. (Especially with my $10, 50-year-old iron.)

Having it out of the vehicle allows you to check all your joints carefully. De-soldering the waffle plate is not a smooth and easy process, so the area will likely be ragged in places. Some of those pairs of through-holes are not supposed to be connected, so check for bridges where they shouldn't be.

The idea here is that properly soldering these two parts together demands a proper alignment jig. There is no better jig than the housing in which the assembly will be installed.

And finally, don't glop on the thermal paste for the final install. Don't squirt out a few lines of goo and smoosh it down. Apply a thin, uniform, complete film to both parts. Be sure to tighten the standoffs and screws in the order of the numbers printed on the PCB. The point of those numbers is to ensure an even, gap-free, thinnest possible film of thermal paste. Wait a minute or two between tightening the waffle plate standoffs to give the paste some time to flow.

As for my question, it's pretty basic: If I want to do a continuity check across the flex circuit, can I do that with a decent multimeter in "beep" mode without endangering any components on the boards? There's gotta be some energy being injected, not sure about voltage, polarity, etc.
 
ctromley said:
If I want to do a continuity check across the flex circuit, can I do that with a decent multimeter in "beep" mode without endangering any components on the boards?
Yes, that will be safe. Modern multimeters have a resistance range (including the one with the beep) that is low enough in voltage to not turn on most semiconductors. Also, the current is low, of the order of a milliamp. The diode range, by contrast, is designed to turn on even blue LEDs. This one could turn things on if you use it in-situ, but because the current is so low, there is essentially zero chance of damaging anything.

That connector is a weak point of the charrger design. It's incredibly easy to damage the flimsy tab that holds it in place. I know of a charrger repair that had to come into the workshop twice to have that connector fixed. The first fix (not by me) was with silicone, and it didn't hold strongly enough. Hopefully the second attempt worked better.
 
What I'm choosing to see as cautiously optimistic good news is the fact that my car is charging. It's been a long, anxiety-producing and frequently interrupted journey, which isn't quite over yet, but it looks like I'm on the home stretch.

I re-assembled everything but didn't seal it up yet. Re-connected the pack and 12V battery. Since I'm not sure if my 12V had something to do with the problem, I put a charrger on it and turned it up to 13.8V. When I turned the car on it went up to 14.4V as expected. I'm leaving the charrger on this cycle to eliminate the 12V battery as a potential problem. If all goes well, I'll yank it out and have it tested under load.

While it was on and Ready I checked for trouble codes and only found two. They were U-prefix comm errors which I figured were inconsequential.

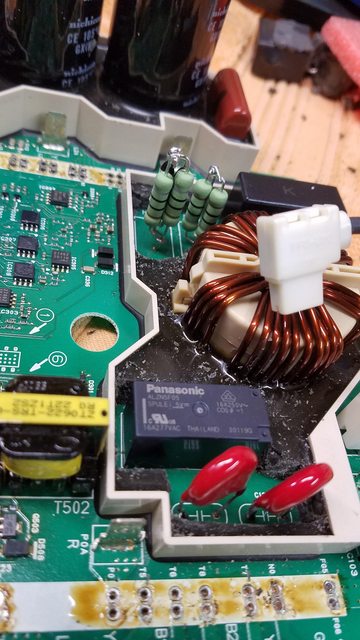
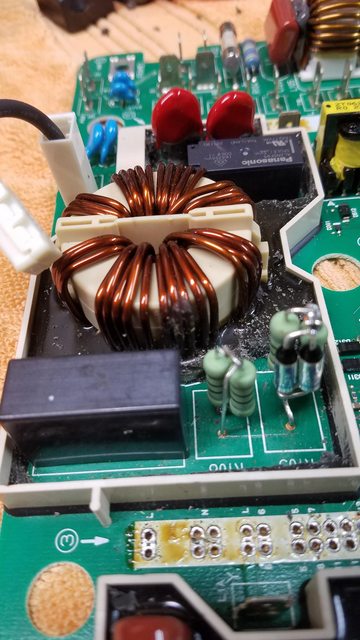
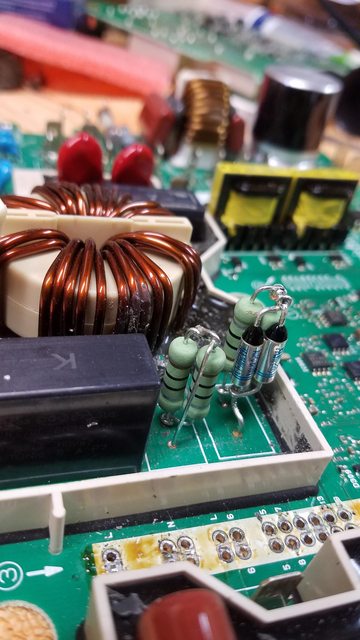
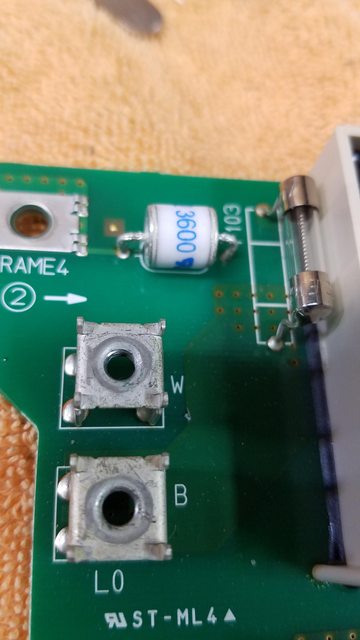
My issues were fairly normal. No problems with snubbers, but they had a slightly brownish tint so I replaced them. (Thanks to @Kiev for saving me from my electrical dolt anxiety over what constitutes a proper snubber cap.) Also replaced the relay with a Panasonic unit I found with a 105 °C rating and coil specs similar to the original: https://www.digikey.com/en/products...467574?s=N4IgTCBcDaIIYBsBeA7ArAMwAxoO4gF0BfIA. Also my surge arrestor (gas discharge tube) had a crack that was visible under magnification, so I replaced it with this: https://www.digikey.com/en/products...=N4IgTCBcDaIM4EMwFoDMA2ADJgxgGwBdk4CATEAXQF8g

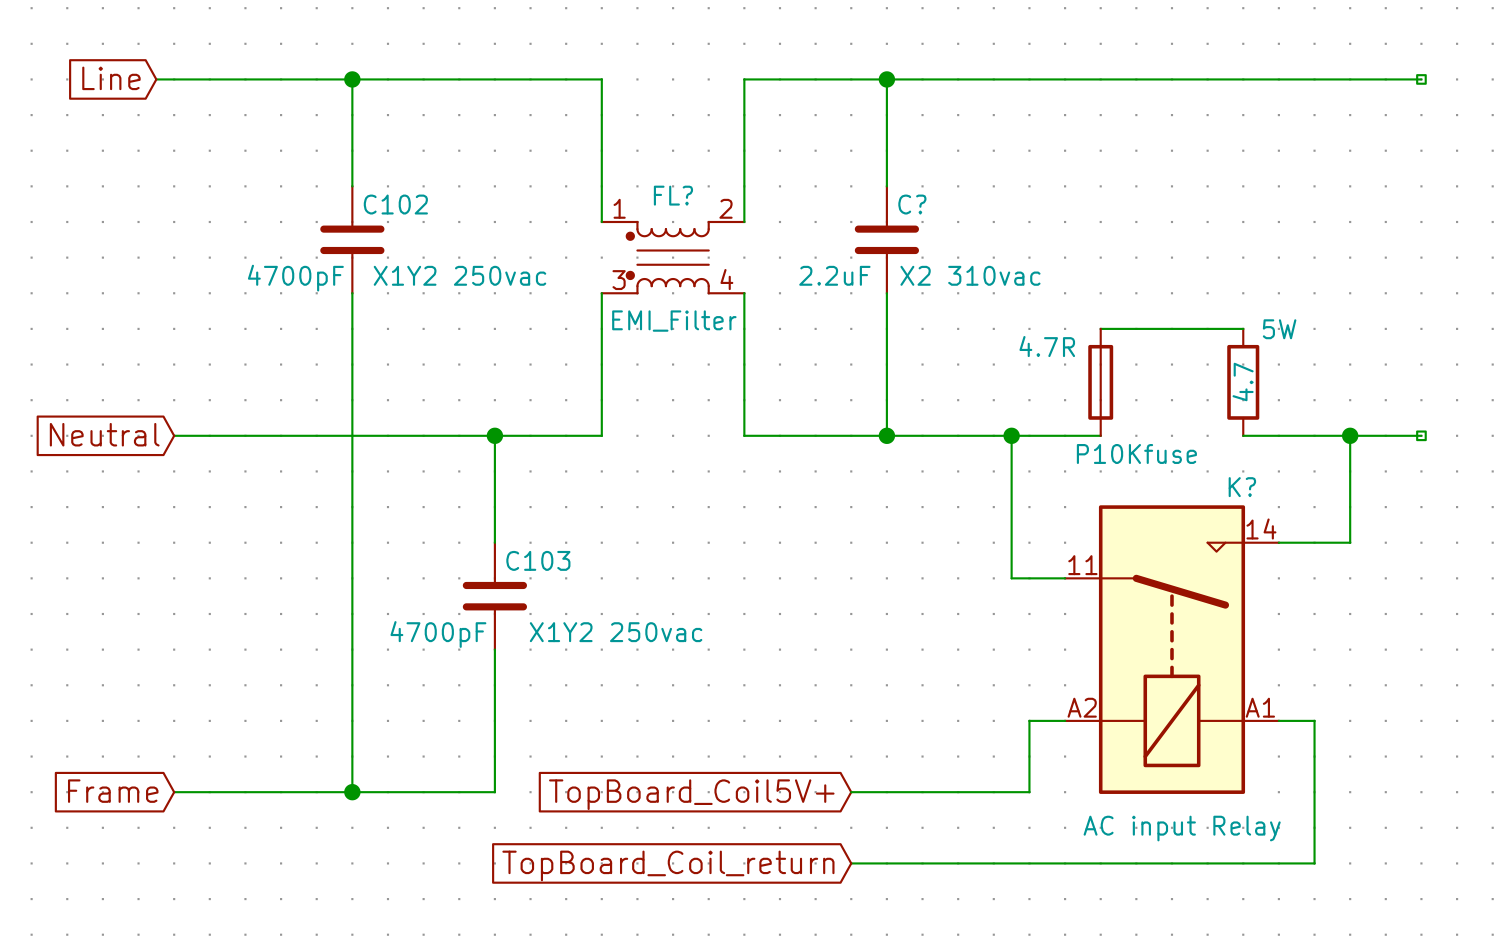
Those were precautionary. My blown parts were the 2.2 µF caps (both, one on the lower charrger board and one in the AC inlet box on top of the charrger enclosure) and the big ceramic 4.7 Ω resistors. The resistors had become very hot (the non-fused one cracked), but both still conducted. The non-fused one is closest to the 2.2 µF cap, which oozed a lot of schmutz seemingly just from heat. (Not sure what blew the other cap.) The resistor with the internal fuse had a scorched spot near the windings, but the resistor still conducted. The fuse had popped.

The resistors were the biggest challenge because direct replacements don't exist. Some have made some inventive hacks, but I thought I'd try @Coulomb's idea of 2 fat 10 Ω resistors in parallel for the resistor part, in series with some 157 °C, 16 A thermal fuses (paired in parallel) that I found here: https://www.tme.com/us/en-us/details/bf157x/thermal-fuses/aupo/. They're cheap, but the shipping from Poland is anything but. (I still have a spare pair of those that I'm willing to pass on if this repair sticks.)

I started out with the car charging on 120 VAC at 10 A. Then bumped that up to 15 A. If it goes well I'll find a proper 240 VAC L2 charrger. (The initial failure happened while charging on 120 VAC at 15 A.)

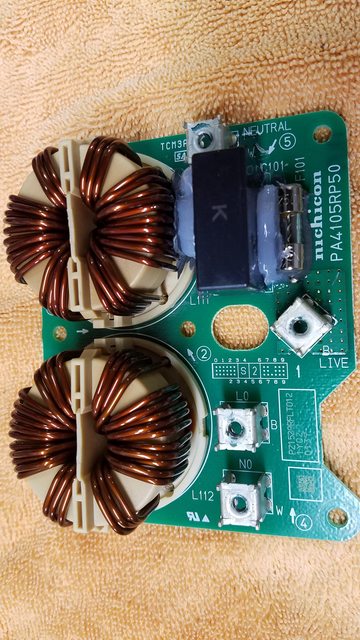
Some new photos:

lYZ823xl.jpg
E2UnroBl.jpg

OYHDc1Sl.jpg
9sfxyCIl.jpg

LErXZWTl.jpg


So all of this brings me to an important question. This failure happened while I was researching my next EV. I decided, found the one I wanted (out of state) and bought it while the i-MiEV repair was underway. (It's an Ionic(q) 6 Limited RWD, a bit of a unicorn. Absolutely love it.) Now it's time to let the i-MiEV go. My question is, if you were considering buying an i-MiEV with a known charrger failure that was repaired by a DIYer, how many trouble-free charges would you want it to have under its belt before you'd be confident that the repair was as robust as anything else out there? I know there are plenty of people who would sell a questionable vehicle and figure any problems were the buyer's, but that's not me. I'm happy to use it instead of the new car until it's proven reliable. How/when do I know that?

Also, I bought a de-soldering station to pull the waffle plate. It's this one: https://www.amazon.com/Digital-Deso...-1-spons&sp_csd=d2lkZ2V0TmFtZT1zcF9hdGY&psc=1. It's not top-of-the-line, but it's popular and the consumables are available from multiple sources for cheap. I'd never used one before, but it worked fine for me.

Once my car is well and truly fixed I can't see myself needing a desolder station again. So I thought I'd sell it for half price plus shipping. If the next person uses it and sells it for half price to the next person who needs it, etc., pretty soon it'll be available to anyone who needs one for the price of shipping. I guess the only flaw in that plan might be that there aren't that many i-MiEVs in the US. (This unit runs on 120 VAC.) But OTOH, many of the ones on the road here are at ever-higher risk of a charrger failure. So maybe it would be well-traveled after all.
 
Follow-up:

My car successfully completed its first post-repair charge, and everything seems eerily normal. I wanted to eliminate the 12V battery as a contributing cause, so I took it to the local AutoZone to have it load tested.

It checked out perfectly fine. Mind you, this was done with a hand-held device with cables to the battery that were #8 AWG at best. (More likely #10.) The screen readout said it had 357 cold cranking amps (spec was 340). No way was there 357 A flowing through those spaghetti cables. The voltage reading was 13.10V. The counter guy said that was little low, it should be something over 14V.

Color me puzzled, since a fully charged lead-acid battery sits at around 12.8V when fully charged, only seeing 14+ when getting charged by the car or whatever's connected to it. Could it be that this is a low-power and low-load test that merely simulates the operational environment of an ICEV starting battery, and the basic assumptions for all that software simulation have no application to the same battery used in an EV? What to do with this information?

The deciding factor was the sticker on the side of the battery that I couldn't see in the car: "Ship date Sep. 2016" There was no way I'm putting a near-7-year-old battery back in the car, no matter how good the little test tool says it is. I got a new battery.

While I'm curious how the tester came up with that diagnosis, I'm also wondering if there's a market opportunity here. Would it be useful to create a diagnostic tool that you could plug into a cigarette lighter to assess the 12V battery's condition for EV use?
 
What is the power rating of those green resistors used to replace the ceramics?

i use liquid electrical tape from home depot to dribble into the fenced region to replace the black rubbery compound--put a layer, let it dry, add some more, let it dry, build it up, etc. They have it in other colors now too.

Good call on replacing a 2016 starter battery, the risk and con$equence$ of failure far exceeds squeezing the last little bit out of that thang.
 
The resistor power rating is 1 W. Seems low, but as I recall (I'd find it and add a link but I'm on my phone at the moment), @Coulomb found in the specs that they could handle more than enough Joules of energy. (Or something similar, don't quote me.)

So far I've started a charge twice. (One charge to full, but two starts to change the amp rate.) Both were very boring, just as I like it. I'm going to seal it up and put it in service soon to get some charging cycles on it to see if it holds.

As for potting, I grabbed some GE 100% silicone I had. It's non-acetic, but GE specifically recommends NOT using it on electronics. So I got a tube of ASI 388 (specifically designed for electronics) and glopped it all over the repair areas pretty thoroughly. Not pretty, but effective. I'll use the same stuff to seal the enclosure lids.
 
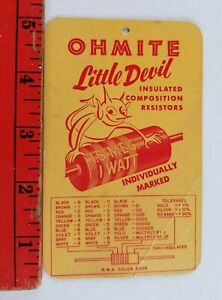
Oh yeah i think i've seen those resistors [Ohmite OX100KE] in an old package or storage bin where they were called "Green Meanies", maybe i can find it and post a picture. Deceptively small size for their capability.

There were some metal film resistors in storage bins called "Little Devils" metal devils had impressive power rating for their size too.
s-l300.jpg

s-l300.jpg


They also have a carbon film series of resistors called "Little Rebels".
https://www.ohmite.com/assets/docs/res_little_rebel.pdf
 
ctromley said:
The resistor power rating is 1 W. Seems low,
Yes, the continuous power rating of these resistors is only a paltry 1 W. But they are ceramic composition resistors, basically a solid lump of ceramic doped to conduct just the right amount, and they have excellent pulse power absorption ability.

And... not made of pure unobtanium.
 
Below is a photo of the output module for a 2010 iMiEV on-board charger. It basically rectifies the square (?) waves from the transformers and filters them. The output goes to the battery and to the DC-DC that charges the auxiliary battery and powers the 12 V system when the vehicle is in ready mode. This photo is courtesy of Phil Suth:

file.php


On the one I'm attempting to repair, I see some strange gunk at the interface between some white material, that I think may be like potting material but stiffer and possibly intended to conduct heat, and the PCB. It seems to be thickest directly under the 330 μF 450 V capacitor, and thins towards the edges. There is no such gunk on the other side.

file.php

file.php


Anyone care to suggest what it is? It might simply be flux from soldering large components, or it might be what heat does to the white material when it gets hot over time. But then that suggests that the large electrolytic capacitor may be getting hot, and therefore either is faulty or on the way out. If it was due to heat, I'd expect it to be thicker near the two large inductors, but it isn't.

I don't actually think that this is a problem, but it would be nice to put my mind at ease about it.
 
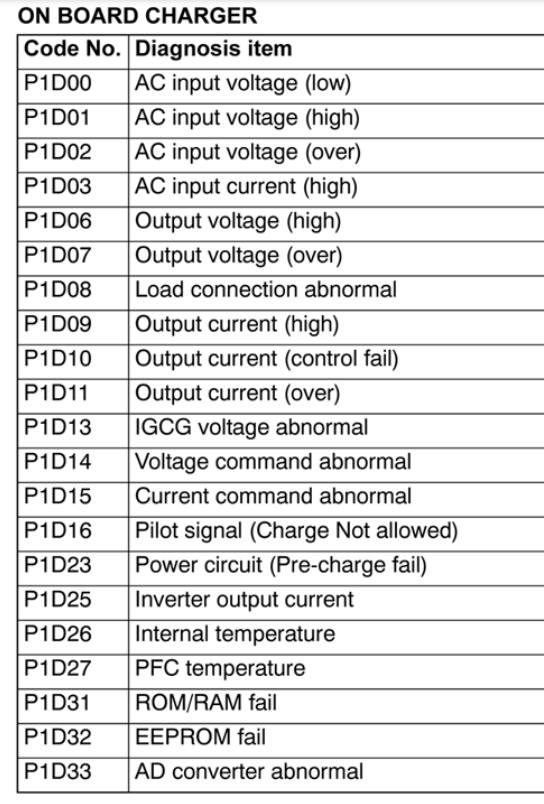
For those with the new on board charger, I came across the document linked below. It seems that with the new charger, you get proper diagnostic codes without having to dig into the data list with a MUT-3: P1Dxx for the OBC, and P1Cxx for the DC-DC.

https://static.nhtsa.gov/odi/tsbs/2020/MC-10175779-9999.pdf

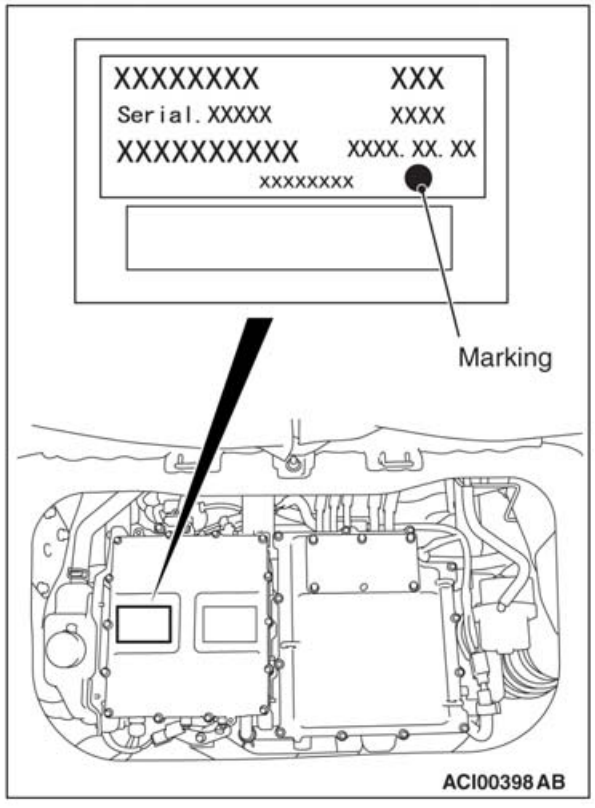
You find out if you have a new model by the presence of a spot (you can't make this stuff up):

C1aljNG.png


Here are the new OBC codes:

1d6zY1O.png

94lOu1V.png


Not much help to the vast majority stuck with older faulty charrgers.
 
Interesting. I believe I get the U1100 error all the time. The MUT3 says that Ev ECU Can bus is not supported. I get U1081 U1161 U1108 and U111B as well.
 
ctromley said:
Those were precautionary. My blown parts were the 2.2 µF caps (both, one on the lower charrger board and one in the AC inlet box on top of the charrger enclosure) and the big ceramic 4.7 Ω resistors. The resistors had become very hot (the non-resistor one cracked), but both still conducted. The non-resistor one is closest to the 2.2 µF cap, which oozed a lot of schmutz seemingly just from heat. (Not sure what blew the other cap.) The resistor with the internal fuse had a scorched spot near the windings, but the resistor still conducted. The fuse had popped.

The resistors were the biggest challenge because direct replacements don't exist. Some have made some inventive hacks, but I thought I'd try @Coulomb's idea of 2 fat 10 Ω resistors in parallel for the resistor part, in series with some 157 °C, 16 A thermal fuses (paired in parallel) that I found here: https://www.tme.com/us/en-us/details/bf157x/thermal-fuses/aupo/. They're cheap, but the shipping from Poland is anything but. (I still have a spare pair of those that I'm willing to pass on if this repair sticks.)

Nice job on the repair and good to hear it worked. I have similar blown parts and want to try the same solution.
I wrote my first questions on another thread (https://myimiev.com/forum/viewtopic.php?t=5171&start=20), but that one doesn't seem that active. I have pictures of the repair in the following link: https://flic.kr/s/aHBqjAuj3S.

My failed components also are the 2.2µF cap on the lower charger board C106 (Okaya LE225 310V X2 2.2µF) and the big ceramic 4.7 Ω resistors R105 and R106. Did you find a replacement for the Okaya LE225 310V X2 2.2µF?
For the resistors I will try your solution of 2 fat 10 Ω resistors in parallel for the resistor part, in series with some 157 °C, 16 A thermal fuses (paired in parallel). Your solder job looks nice, but how did you do it in practice? Did you wrap one lead around the other once, solder the space in between and clip the rest of the lead? What did you use to refill the potting area?

I checked F701 and whether the AC input Relay clicks with 5V applied. Both seem to be OK. On diode D301 I measured a diode drop of 0.63V in forward bias and 1.23V in the other direction. Is this an acceptable result for this diode in the circuit? If not, what should I replace it with?

Like you I also noticed bent pins on the flat ribbon cable. How did you solve this? I think I'll order these (https://www.distrelec.be/nl/platte-flexibele-kabel-5mm-50-kernen-102mm-molex-153660541/p/30222361) as a replacement.

And finally, how did you read the trouble codes? I have a Vgate iCar Pro Bluetooth 4.0 (BLE) OBD2 reader. Can I use this to read and clear any remaining fault codes? Which app is recommended for this?
 
Nice set of pictures there.

The diode D301 lays across the traces to the coil in parallel to the coil, with the diode arrow pointing up from the return to the positive voltage. So in one case you can measure the diode drop, but in the other direction you are measuring the drop across the resistance of the coil winding. You could desolder one end of the diode and lift it from the board to get a clean measurement.
bJUQDQi.png


Looks like a good source for the flat ribbon cable.
For repair of a flat ribbon cable, those copper traces can be carefully bent back, then a very thin micro-drop layer of super glue could be applied to the back side and press the pin into position. If you can see the drop without a microscope then it is too much glue. Dip the tip of a sewing needle into a drop of glue and use that to put glue on the trace. The connector has a black plastic release that slides to open and close the gap; it looks like you tried to insert the cable while it was still closed; it should slide in easily with no friction when opened.
 
Back
Top