DBMandrake
Posts: 301
Joined: Mon Mar 20, 2017 4:57 am
Location: Scotland

Re: Troubleshooting and repair for On-board Charger (OBC), DC-DC Converter

More progress. With a scapel and wooden scraper I managed to clear out a neat rectangular area to remove the old capacitors. I cut them off their own legs part way up which gave me about 2mm of leg left in the board to work with.

The caps I ordered have a slightly wider leg spacing than the originals but that actually worked out perfectly as I was able to wrap them around the pins in a U shape to create a good solder fillet joint:

Image

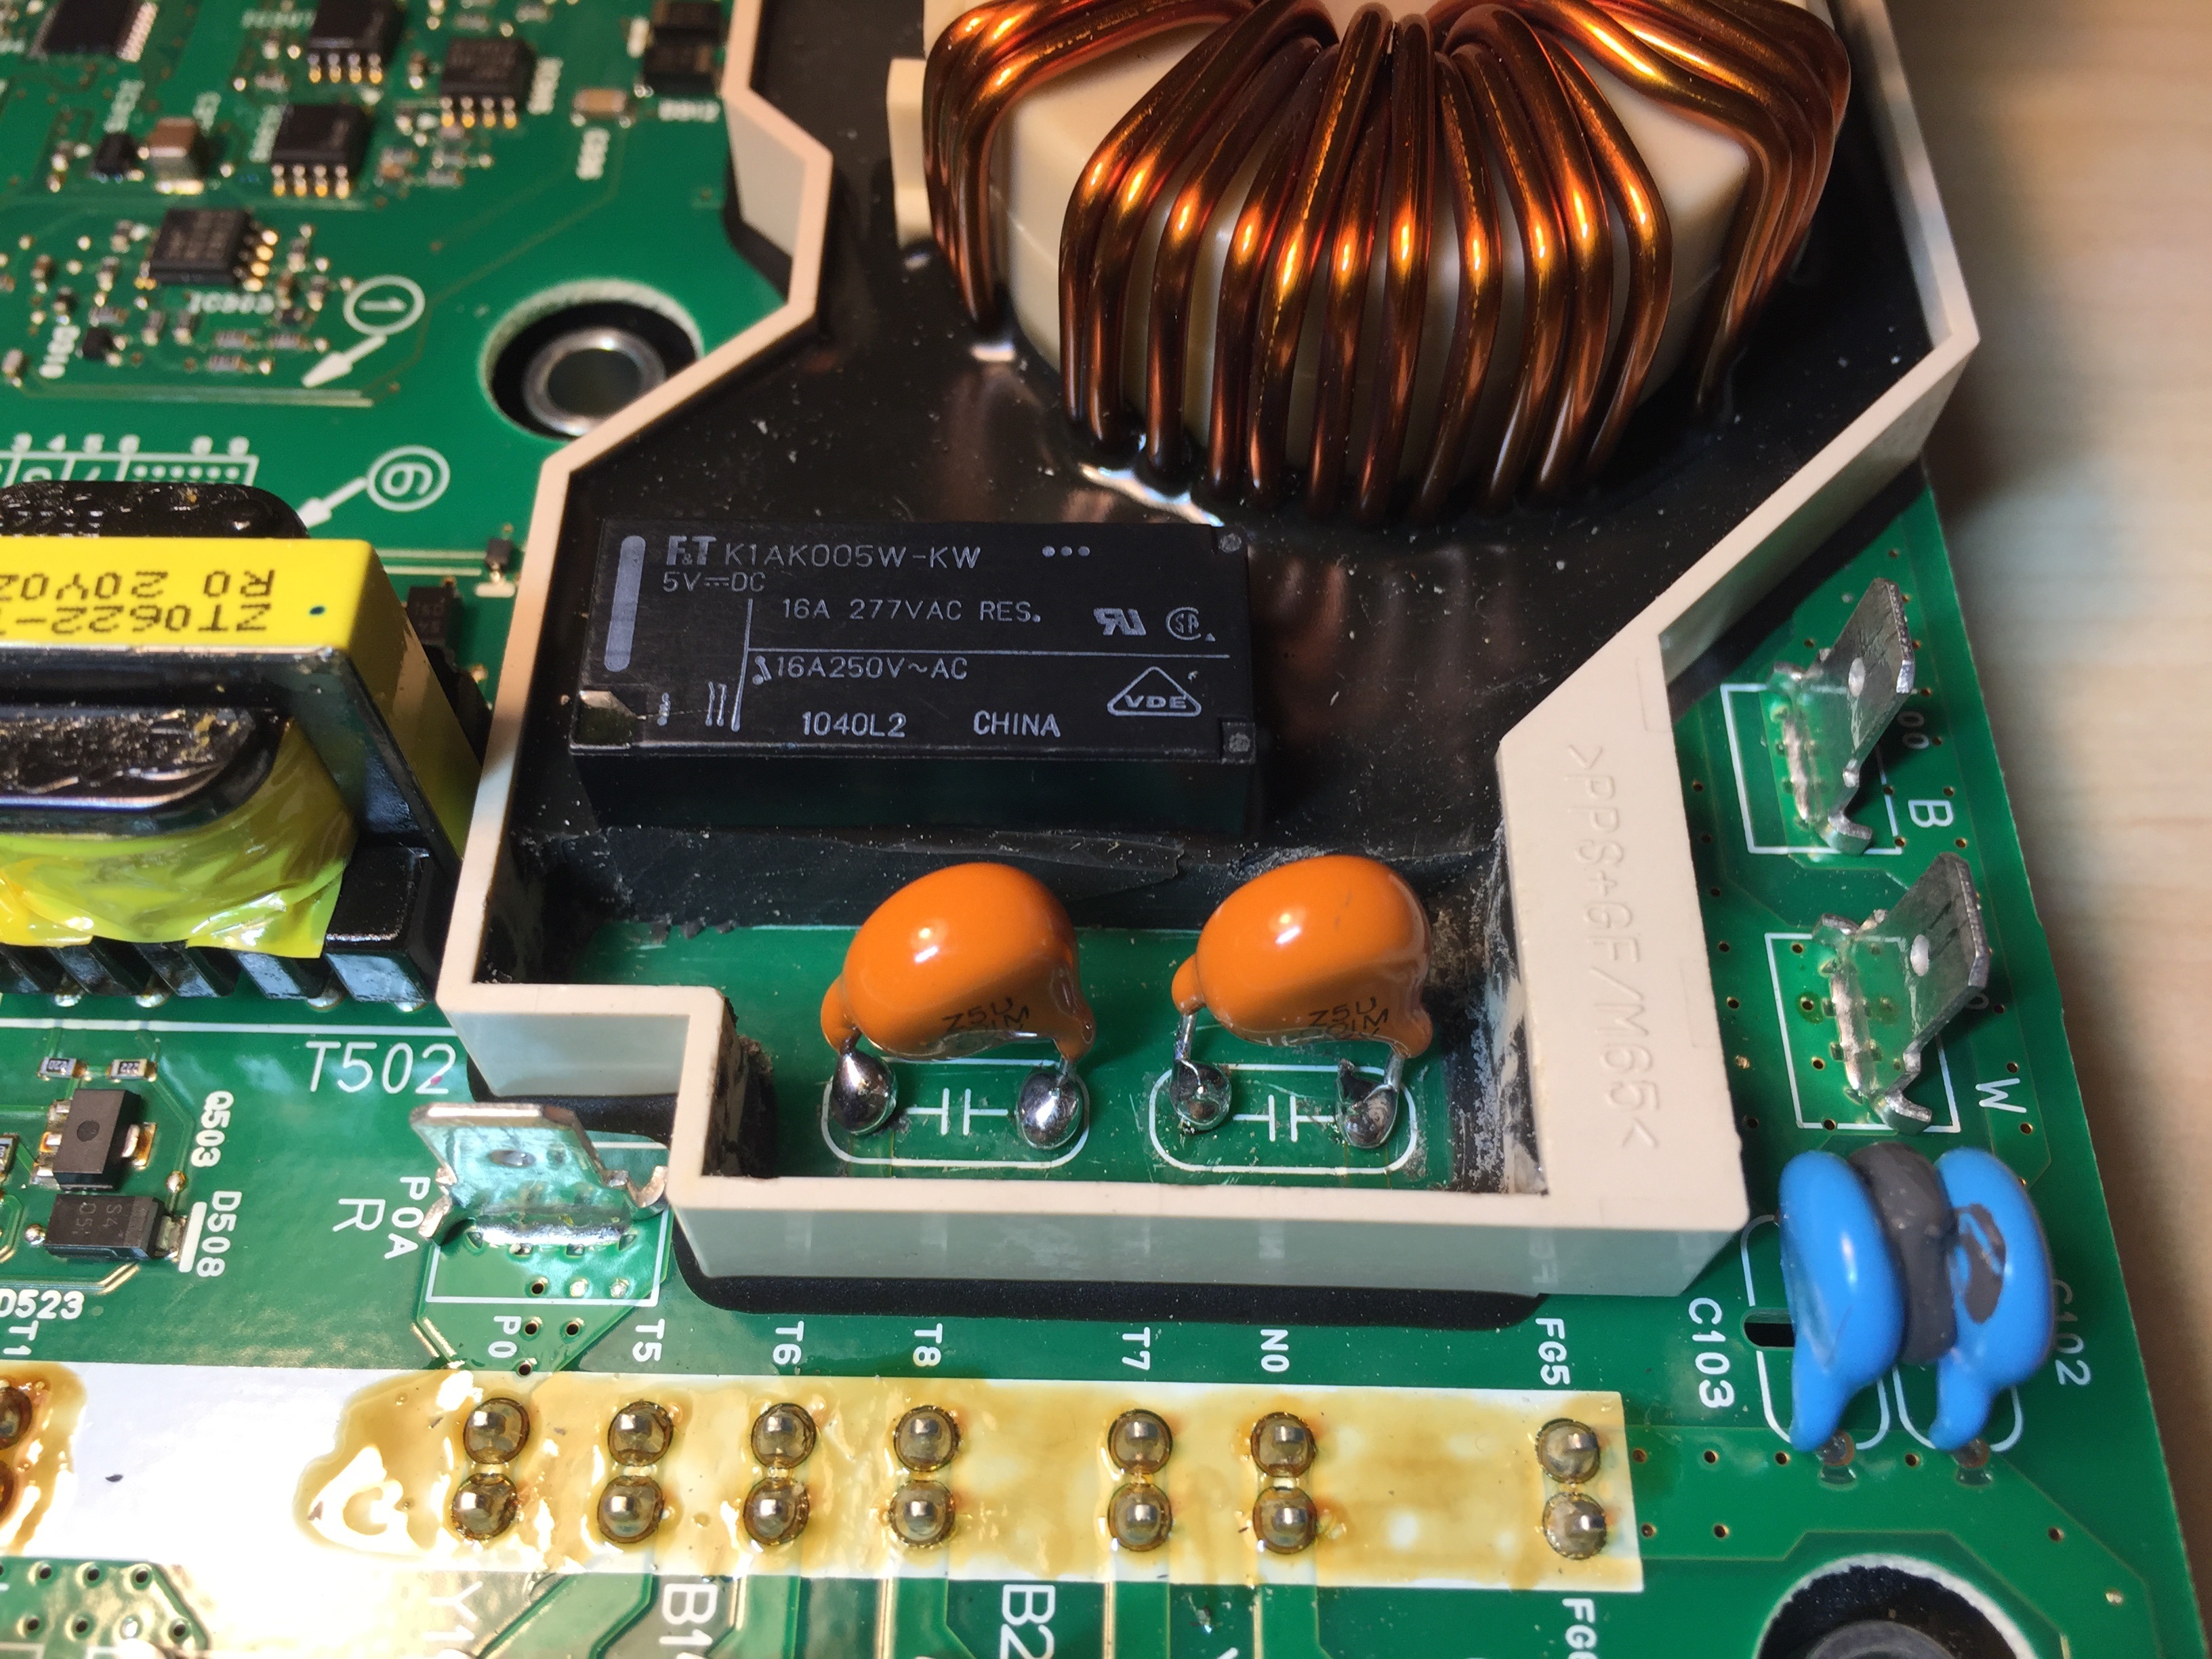
It's not until seeing them side by side that I realised just how much beefier these caps are than the original - they're 6kV rated instead of the 2kV of the originals, only slightly larger in diameter, but about 3 times as thick! :twisted:

I was able to solder onto the leg stumps at the top without melting or causing a dry joint on the soldered joints under the board - there is quite a large gap between the waffle plate and the PCB so you can shine a torch into the gap and see the original soldered joints to make sure they're not disturbed.

The gap is so large that I reckon if there were no stumps to solder to you could possibly insert the component right through the hole, apply the soldering iron to the component leg on the top side (with the caps sitting a little higher than normal) and apply solder to the underside of the board in the gap to the waffle plate... I considered doing it that way but decided to try soldering to the old stumps first.

I have some black high voltage high temperature neutral cure electrical RTV silicone that should be a pretty good match with the original - firm but still rubbery in case anyone ever has to go back in there again, however I'm not going to put it in until I've tested the relay.

So now I need to test the resistors and relay and components on the waffle board...
Last edited by DBMandrake on Sat Feb 22, 2020 12:09 pm, edited 1 time in total.
- Simon

EV: 2011 Peugeot Ion
ICE: 1997 Citroen Xantia V6
kiev
Posts: 1955
Joined: Sun May 03, 2015 7:15 am
Location: The Heart o' Dixie
Contact: Website

Re: Troubleshooting and repair for On-board Charger (OBC), DC-DC Converter

Those are great looking snubber caps and a super find to get 6kV rating. Awesome solder job too.

This isn't very pretty but has the measured diode drop voltages on a good waffle plate, with no caps or inductors connected with the fastons.

Image
kiev = kenny's innovative electric vehicle
DBMandrake
Posts: 301
Joined: Mon Mar 20, 2017 4:57 am
Location: Scotland

Re: Troubleshooting and repair for On-board Charger (OBC), DC-DC Converter

kiev wrote:Those are great looking snubber caps and a super find to get 6kV rating. Awesome solder job too.
Thanks. :)

These are the caps I ordered, however I notice that the picture shown is NOT accurate as the ones I received were orange, not yellow, and a lot thicker:

https://uk.rs-online.com/web/p/ceramic- ... s/8313240/

I suspect the picture is from a lower rated capacitor in the same series.
This isn't very pretty but has the measured diode drop voltages on a good waffle plate, with no caps or inductors connected with the fastons.
When you say with no capacitors connected do you mean the electrolytics were removed ?
- Simon

EV: 2011 Peugeot Ion
ICE: 1997 Citroen Xantia V6
kiev
Posts: 1955
Joined: Sun May 03, 2015 7:15 am
Location: The Heart o' Dixie
Contact: Website

Re: Troubleshooting and repair for On-board Charger (OBC), DC-DC Converter

No just the flying leads from anything on a faston tab, (the leaf charger has a big cap on the fastons and uses the same waffle plate)
kiev = kenny's innovative electric vehicle
DBMandrake
Posts: 301
Joined: Mon Mar 20, 2017 4:57 am
Location: Scotland

Re: Troubleshooting and repair for On-board Charger (OBC), DC-DC Converter

kiev wrote:No just the flying leads from anything on a faston tab, (the leaf charger has a big cap on the fastons and uses the same waffle plate)
Ah OK. The board is right out with nothing connected to it, so I'm off to measure it...

Interesting that the Leaf has the same waffle plate - since the i-Miev launched nearly 2 years before the Leaf, does that mean the Leaf copied the i-Miev here ? :)
- Simon

EV: 2011 Peugeot Ion
ICE: 1997 Citroen Xantia V6
kiev
Posts: 1955
Joined: Sun May 03, 2015 7:15 am
Location: The Heart o' Dixie
Contact: Website

Re: Troubleshooting and repair for On-board Charger (OBC), DC-DC Converter

Same vendor - Nichicon
kiev = kenny's innovative electric vehicle
DBMandrake
Posts: 301
Joined: Mon Mar 20, 2017 4:57 am
Location: Scotland

Re: Troubleshooting and repair for On-board Charger (OBC), DC-DC Converter

kiev wrote: This isn't very pretty but has the measured diode drop voltages on a good waffle plate, with no caps or inductors connected with the fastons.

Image
Thanks for that, I've been through and measured all the diodes on your schematic and they all measure healthy. :)

I've also checked the two 4.7 ohm resistors and relay using skyloggers method - the neutral path measures 9.6 ohms with the relay off and <0.1 ohms with the relay active. The relay has a satisfactory click and I clicked it on and off many times to make sure the reading always went to near zero ohms and it did.

The black mark on the 4.7 ohm resistor corner I mentioned before turns out to be a very thin film of silicone resin - it peels right off if I slip a blade under it with clean white resistor underneath so I can only assume that it is factory "over spray" when the resin was sprayed in, and therefore a red herring. There is no sign of heating of the resistor or nearby capacitor.

I've repotted the capacitors using the black high voltage silicone - quite difficult to smooth it out nicely because it's so incredibly sticky, also it needs one to two days to fully cure, however it should do the job nicely.

So the board is ready to go back in the car. The only thing holding it up now is I don't have the thermal paste (should arrive on Monday) and I don't have the MCU fuse yet either - which will probably arrive on Tuesday.

By the way earlier in the thread you said that your waffle plate had lots of thermal compound on it - mine was quite the opposite, with a very thin stingy application. So much so that significant chunks of the waffle plate didn't have any compound on it at all!
- Simon

EV: 2011 Peugeot Ion
ICE: 1997 Citroen Xantia V6
kiev
Posts: 1955
Joined: Sun May 03, 2015 7:15 am
Location: The Heart o' Dixie
Contact: Website

Re: Troubleshooting and repair for On-board Charger (OBC), DC-DC Converter

i get a old credit card and use it like a putty knife to spread the thermal paste as thin as possible and into any voids in the surface. same on the plate. Metal to metal is the best transfer, the paste is just to fill tiny voids where metal is not touching metal.

if you need to drive the car then you can make a temporary jumper to replace the fuse--just a short length of 26 to 20 AWG would work since it only carries about 10 Amps when charging.
kiev = kenny's innovative electric vehicle
DBMandrake
Posts: 301
Joined: Mon Mar 20, 2017 4:57 am
Location: Scotland

Re: Troubleshooting and repair for On-board Charger (OBC), DC-DC Converter

The thermal paste arrived today so I have fully re-assembled the OBC unit including sticking the lid down with new silicone. (I ended up just using the same neutral cure stuff I used in the doghouse around the capacitors) So now I'm just waiting for the fuse which I hope will be arriving tomorrow. I got an email to say that it had arrived in the UK at customs this morning from Japan, so fingers crossed!

I think my advice to anyone attempting this repair is don't bother removing the OBC box from the car - it's a lot of extra work, especially if all the mountings are rusted, and means draining and refilling the coolant, disturbing all the external connectors etc and there really isn't any need to do this unless the actual DC/DC converter on the under side was faulty which is almost never the case.

Just unscrew the top lid in the car, (no need to disconnect the cables to the filter box on top) carefully prise it up (there is a small bead of silicon sticking the lid down so it will be reluctant to let go at first) remove the top board, then remove the main PCB. Make sure you label all the spade connectors as you remove them and take photos so you get them overlaying each other in the right configuration so they fit comfortably under the lid of the box. Be careful with the white ribbon cable on reassembly. You'll need thermal paste to reapply between the waffle plate and cooling channels on reassembly and be careful not to drop anything like screws down the holes in the corners otherwise you will have to remove the box to retreive them from the DC/DC compartment...

Taking the PCB out of the box and leaving the box in the car makes for a MUCH easier job IMO than either taking the whole box out, or trying to work on the top side of the PCB while it's still in the box.
Last edited by DBMandrake on Tue Feb 25, 2020 9:44 am, edited 1 time in total.
- Simon

EV: 2011 Peugeot Ion
ICE: 1997 Citroen Xantia V6
JoeS
Site Moderator
Posts: 4249
Joined: Thu Dec 15, 2011 5:47 am
Location: Hills above Silicon Valley, California

Re: Troubleshooting and repair for On-board Charger (OBC), DC-DC Converter

Simon and Kenny, thank you both for such wonderfully detailed information about fixing the OBC and thus making it easier for those of us who will have to face this in the future. :ugeek: Wishing you all the best as the moment of truth arrives today when you fire up the car :!: ....
EVs: Two '12 Wht/Blu SE Premium, '13 Tesla MS85, '20 Hyundai Kona Ultimate, three 156v Li(NMC) Corbin Sparrows, 24v LiFePO4) EcoScoot
EV Conv.: 156v '86 Ram PU, 48v1kW bike wheel
Mothballed ICE: '88 Isuzu Trooper
RIP: '67 Saab 96V4 owned 54 years

Return to “Batteries and Battery Management”