Inside Look of 2018 On-Board Charger (OBC2) OBC Gen 2

Mitsubishi i-MiEV Forum

Help Support Mitsubishi i-MiEV Forum:

This site may earn a commission from merchant affiliate links, including eBay, Amazon, and others.

kiev

Moderator
Staff member
Joined
May 3, 2015
Messages
2,629
Location
The Heart o' Dixie
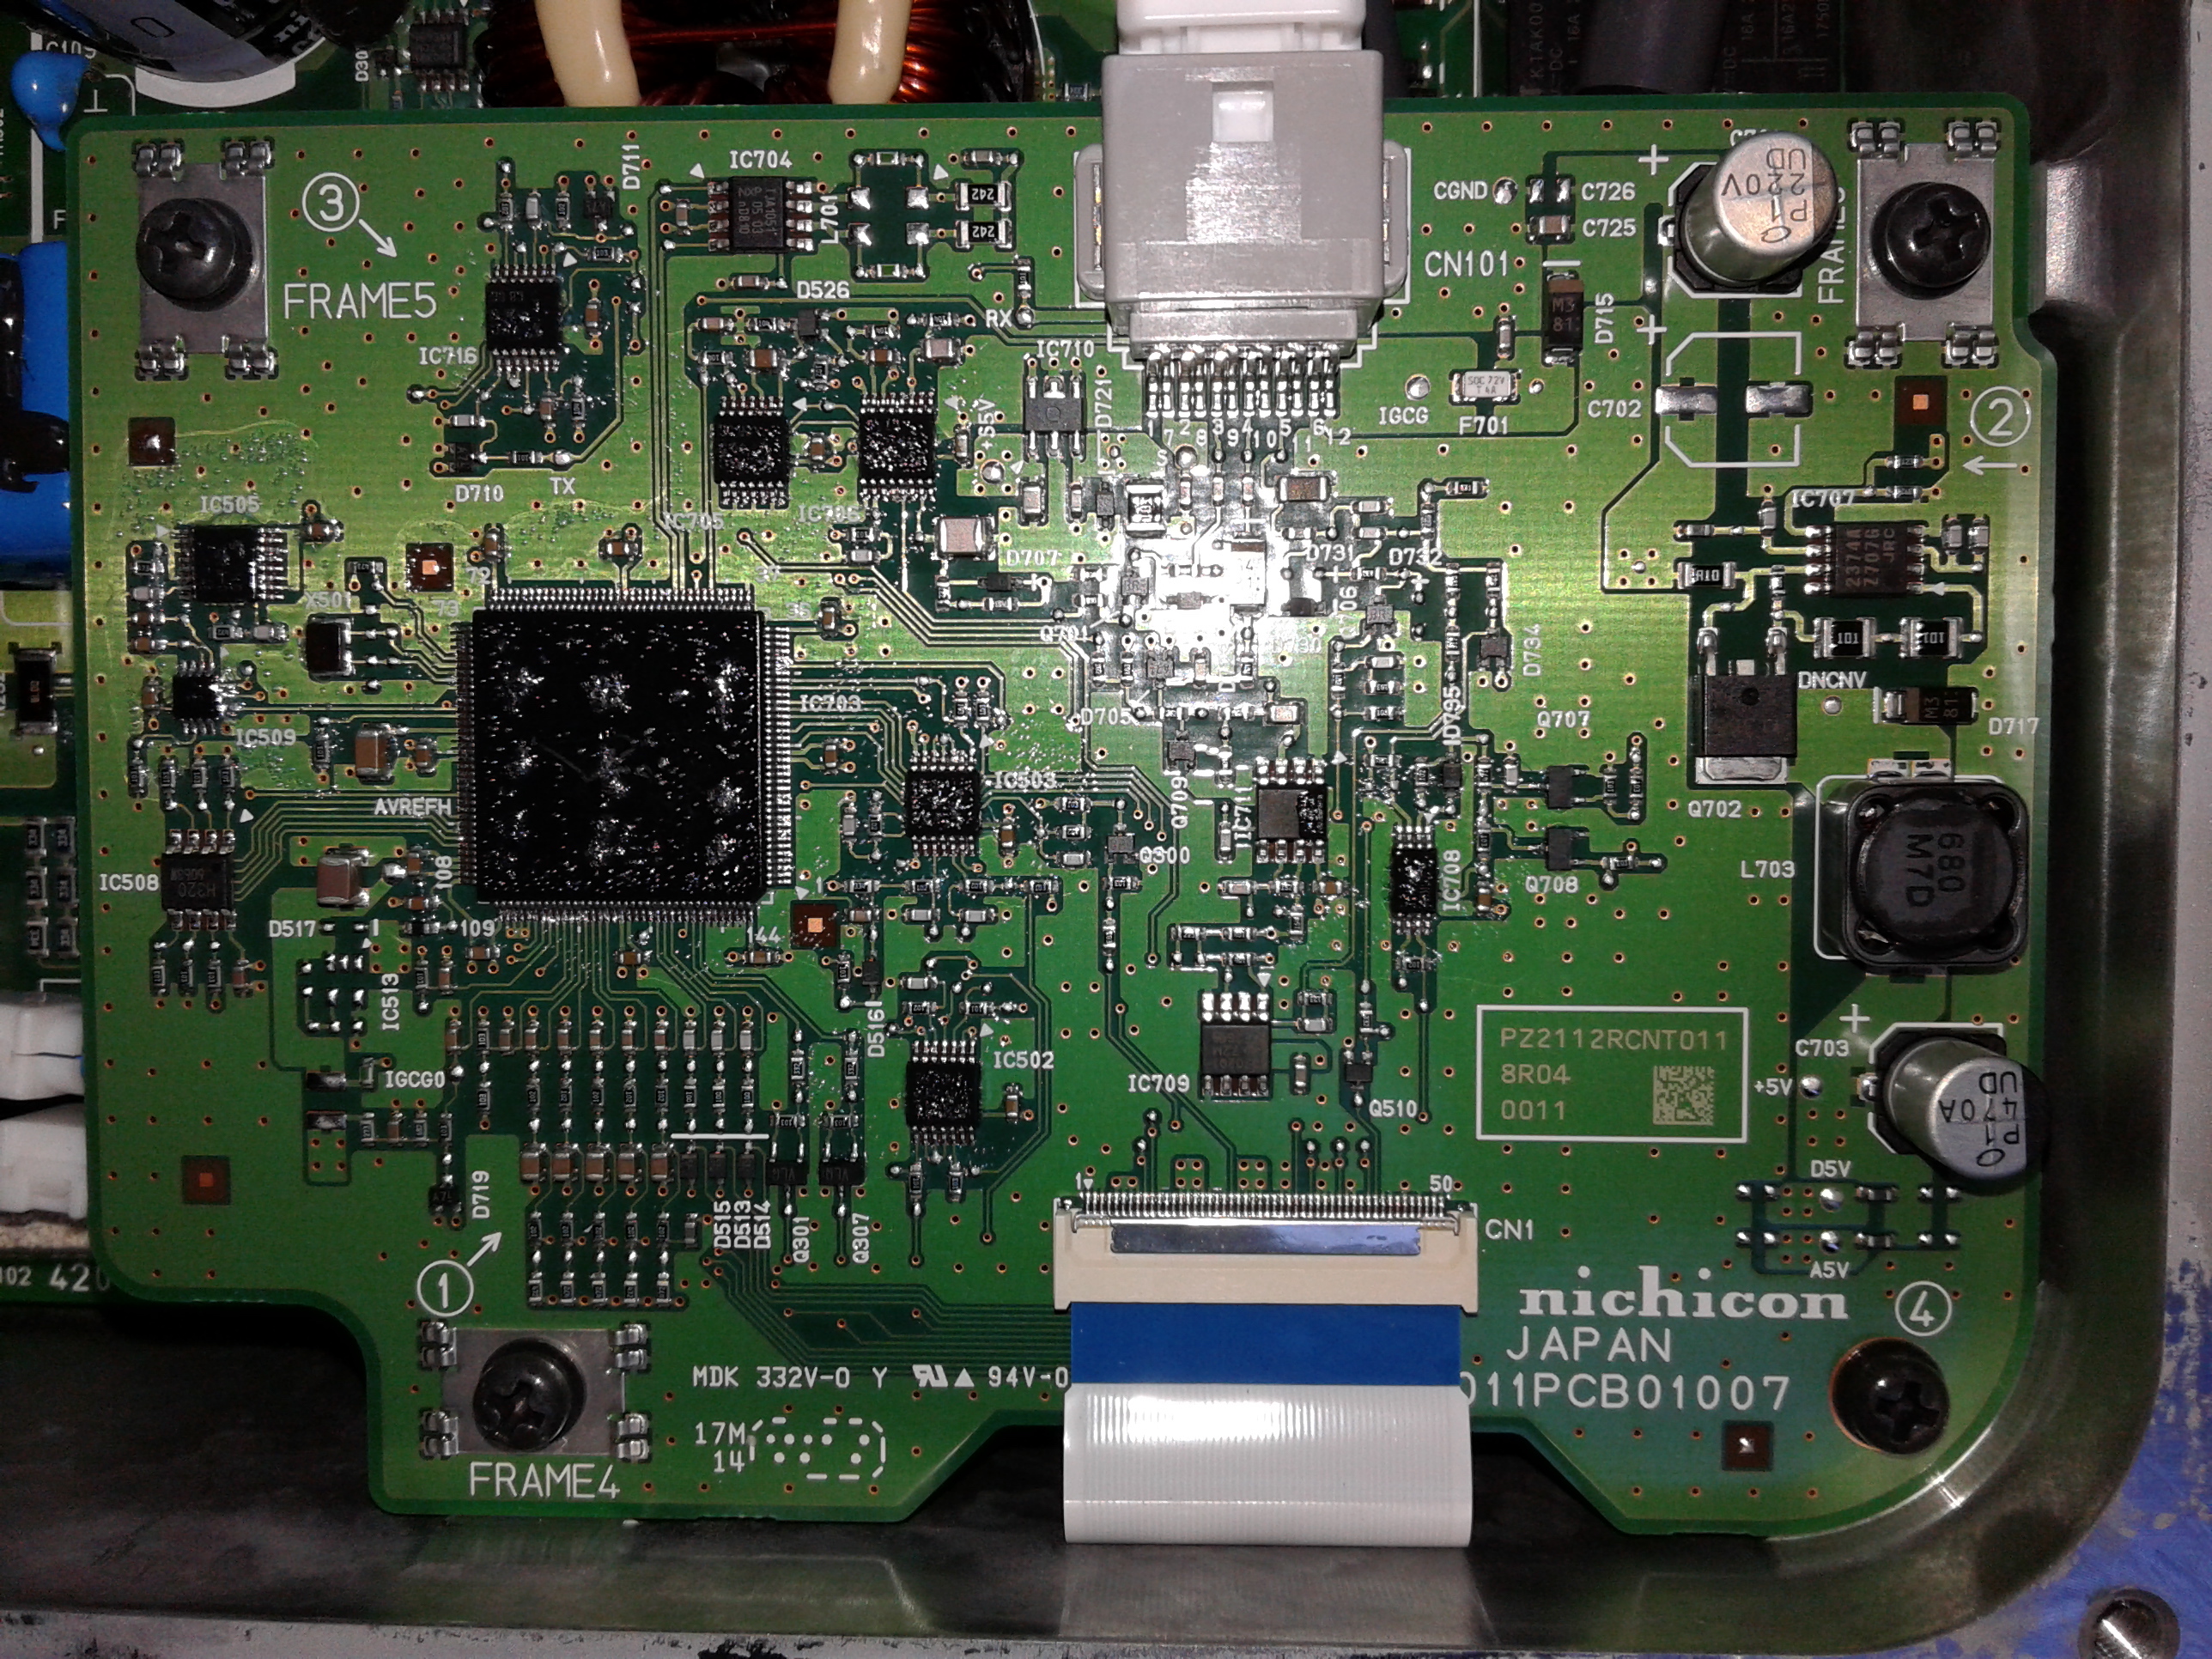
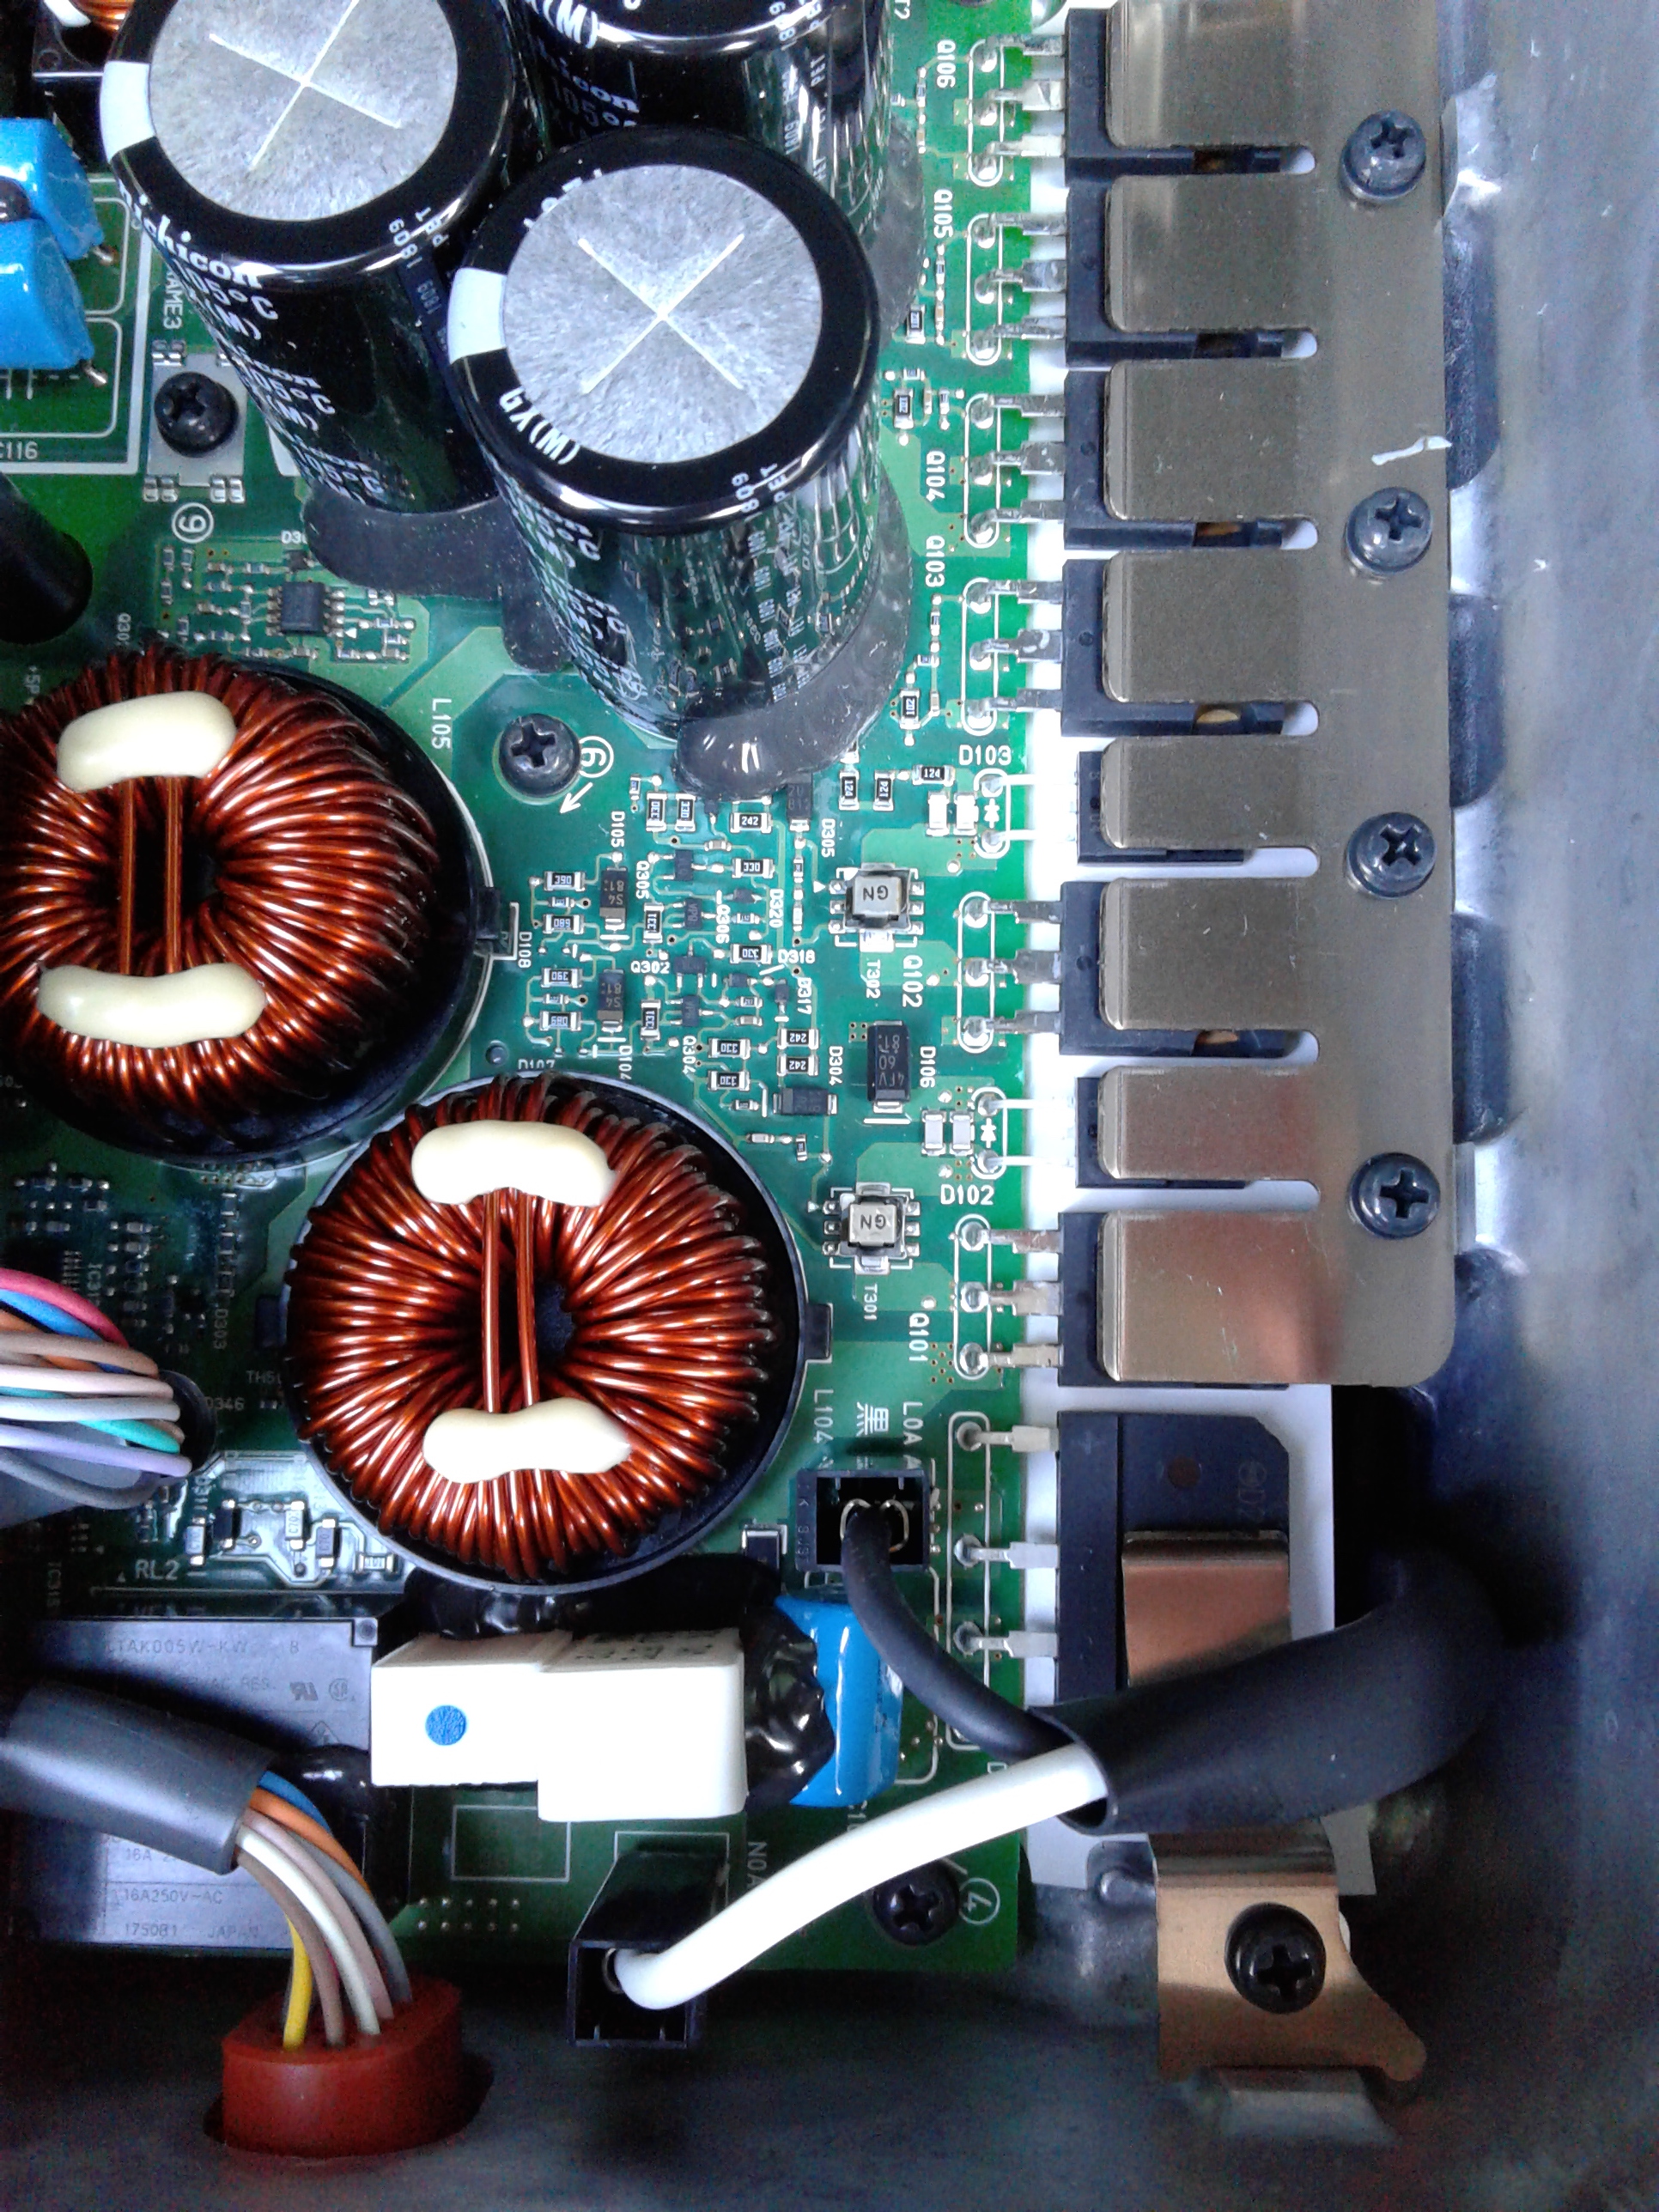
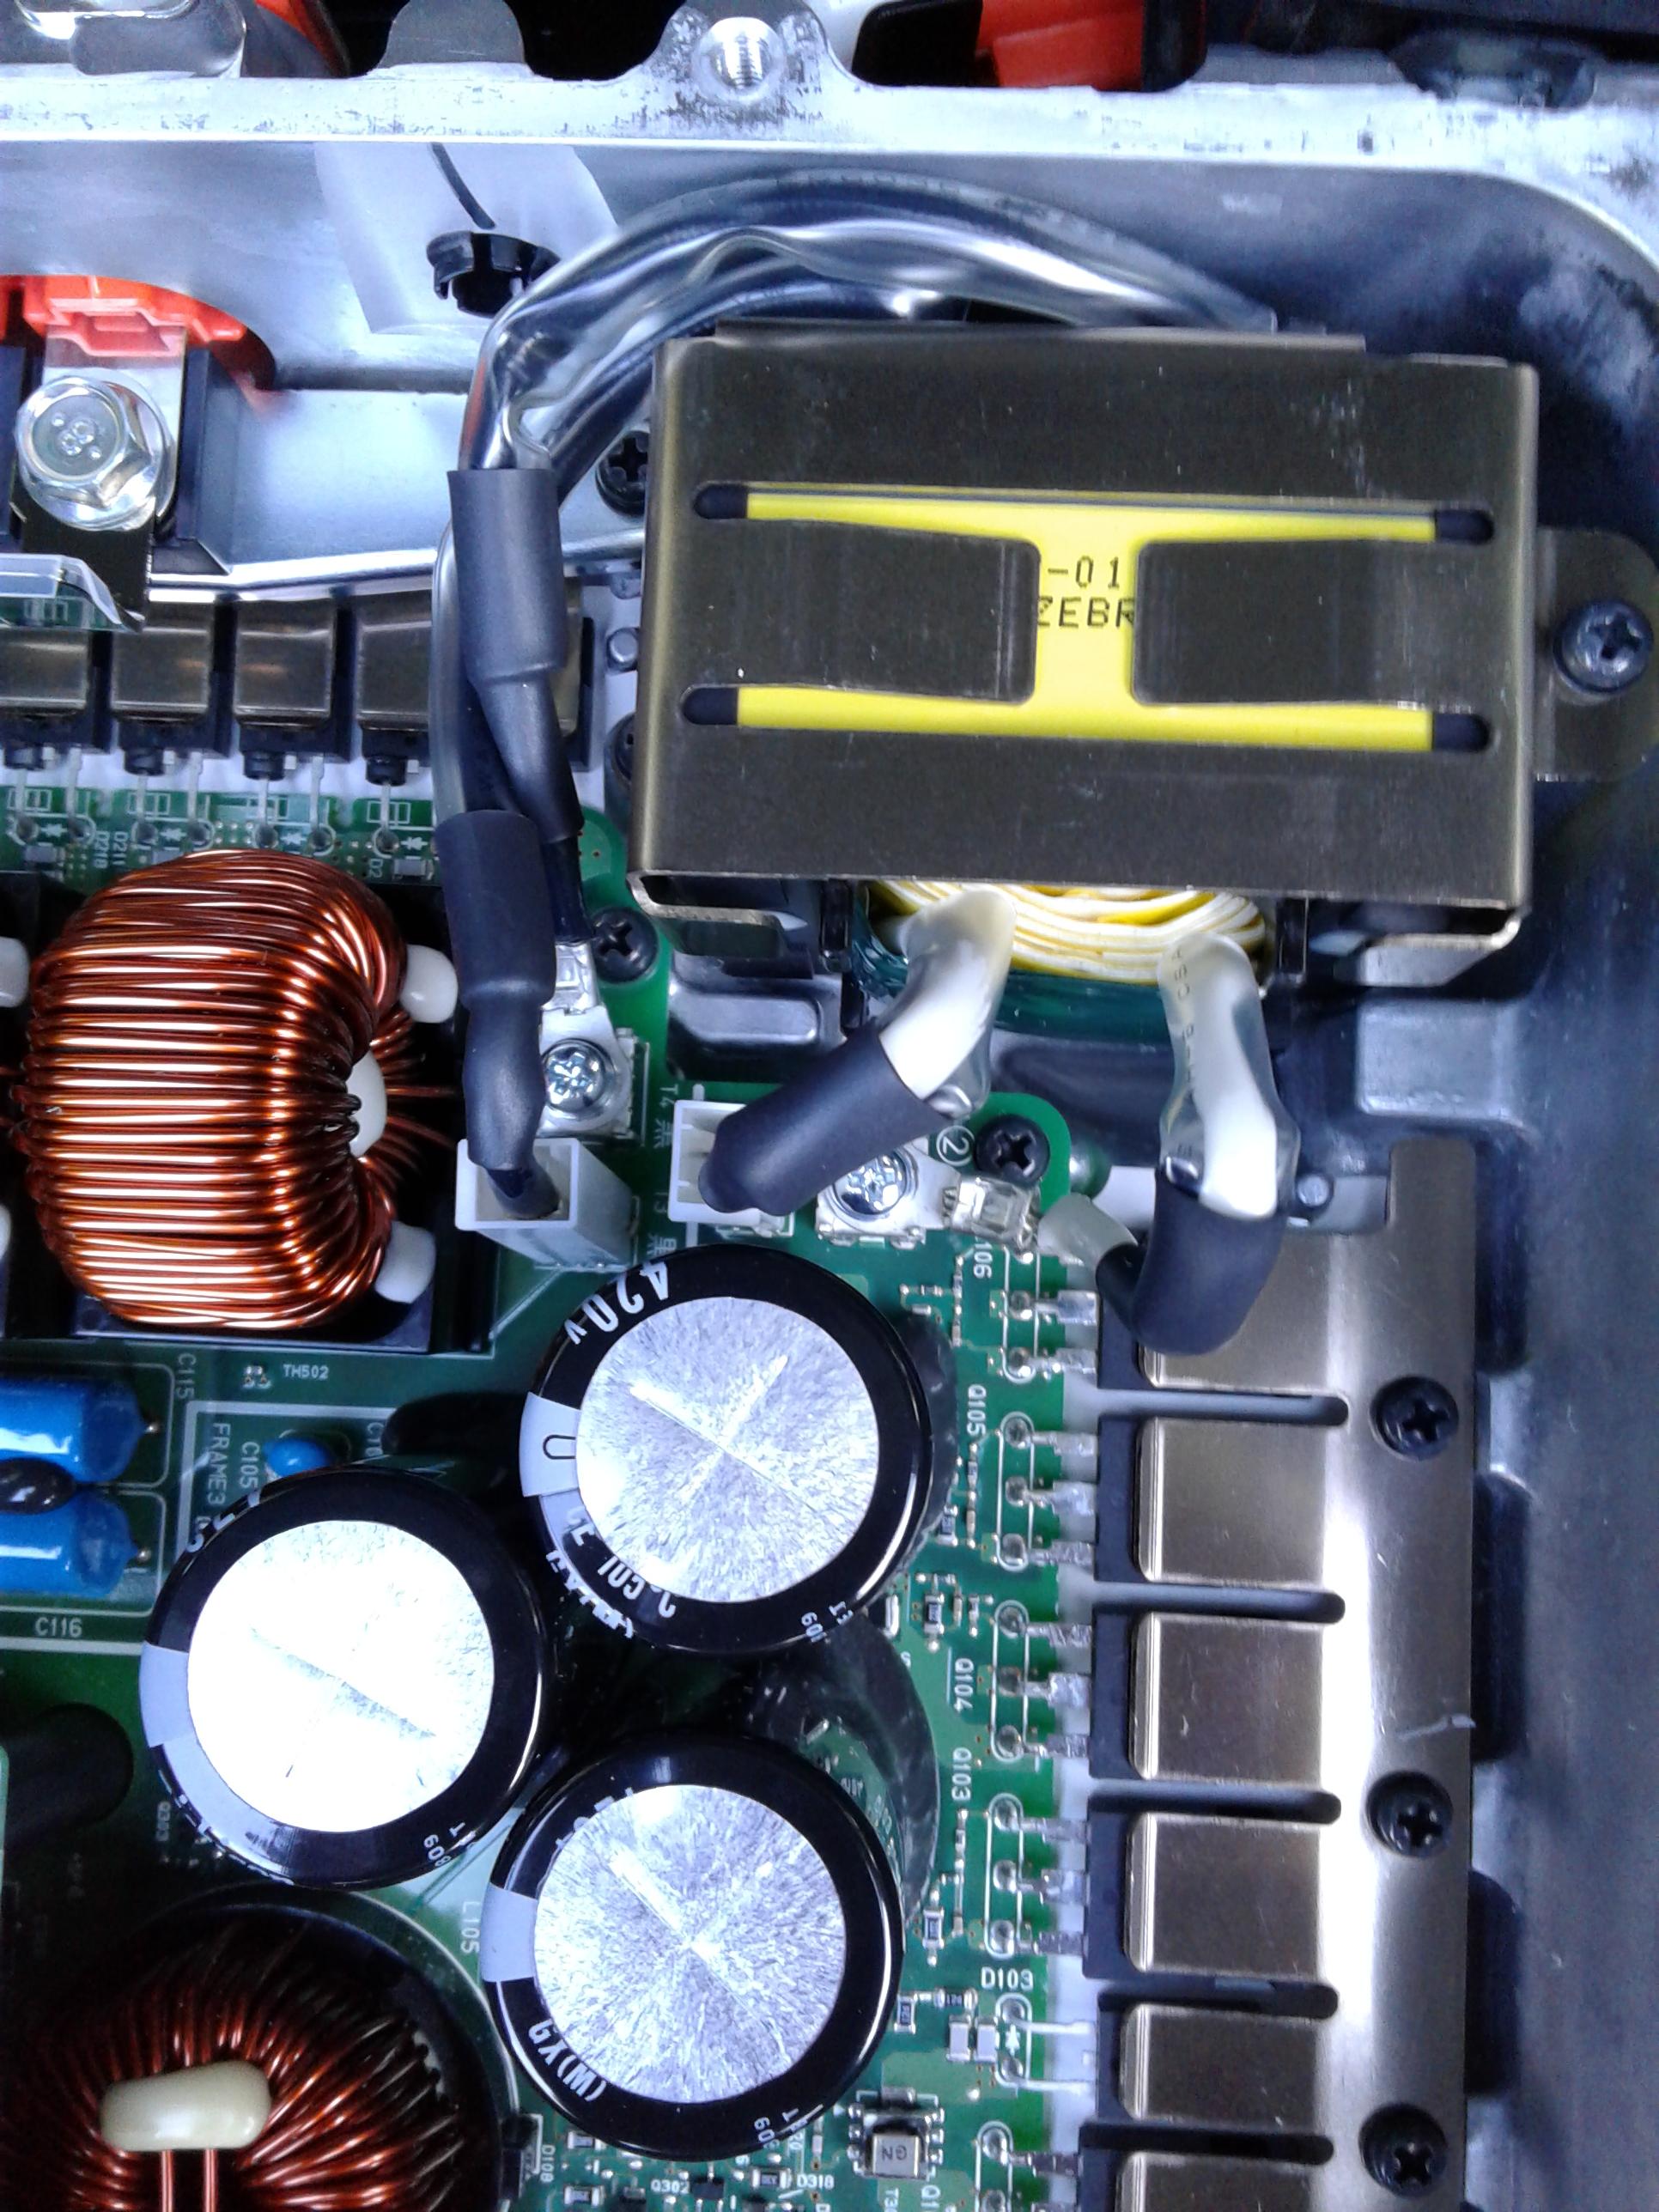
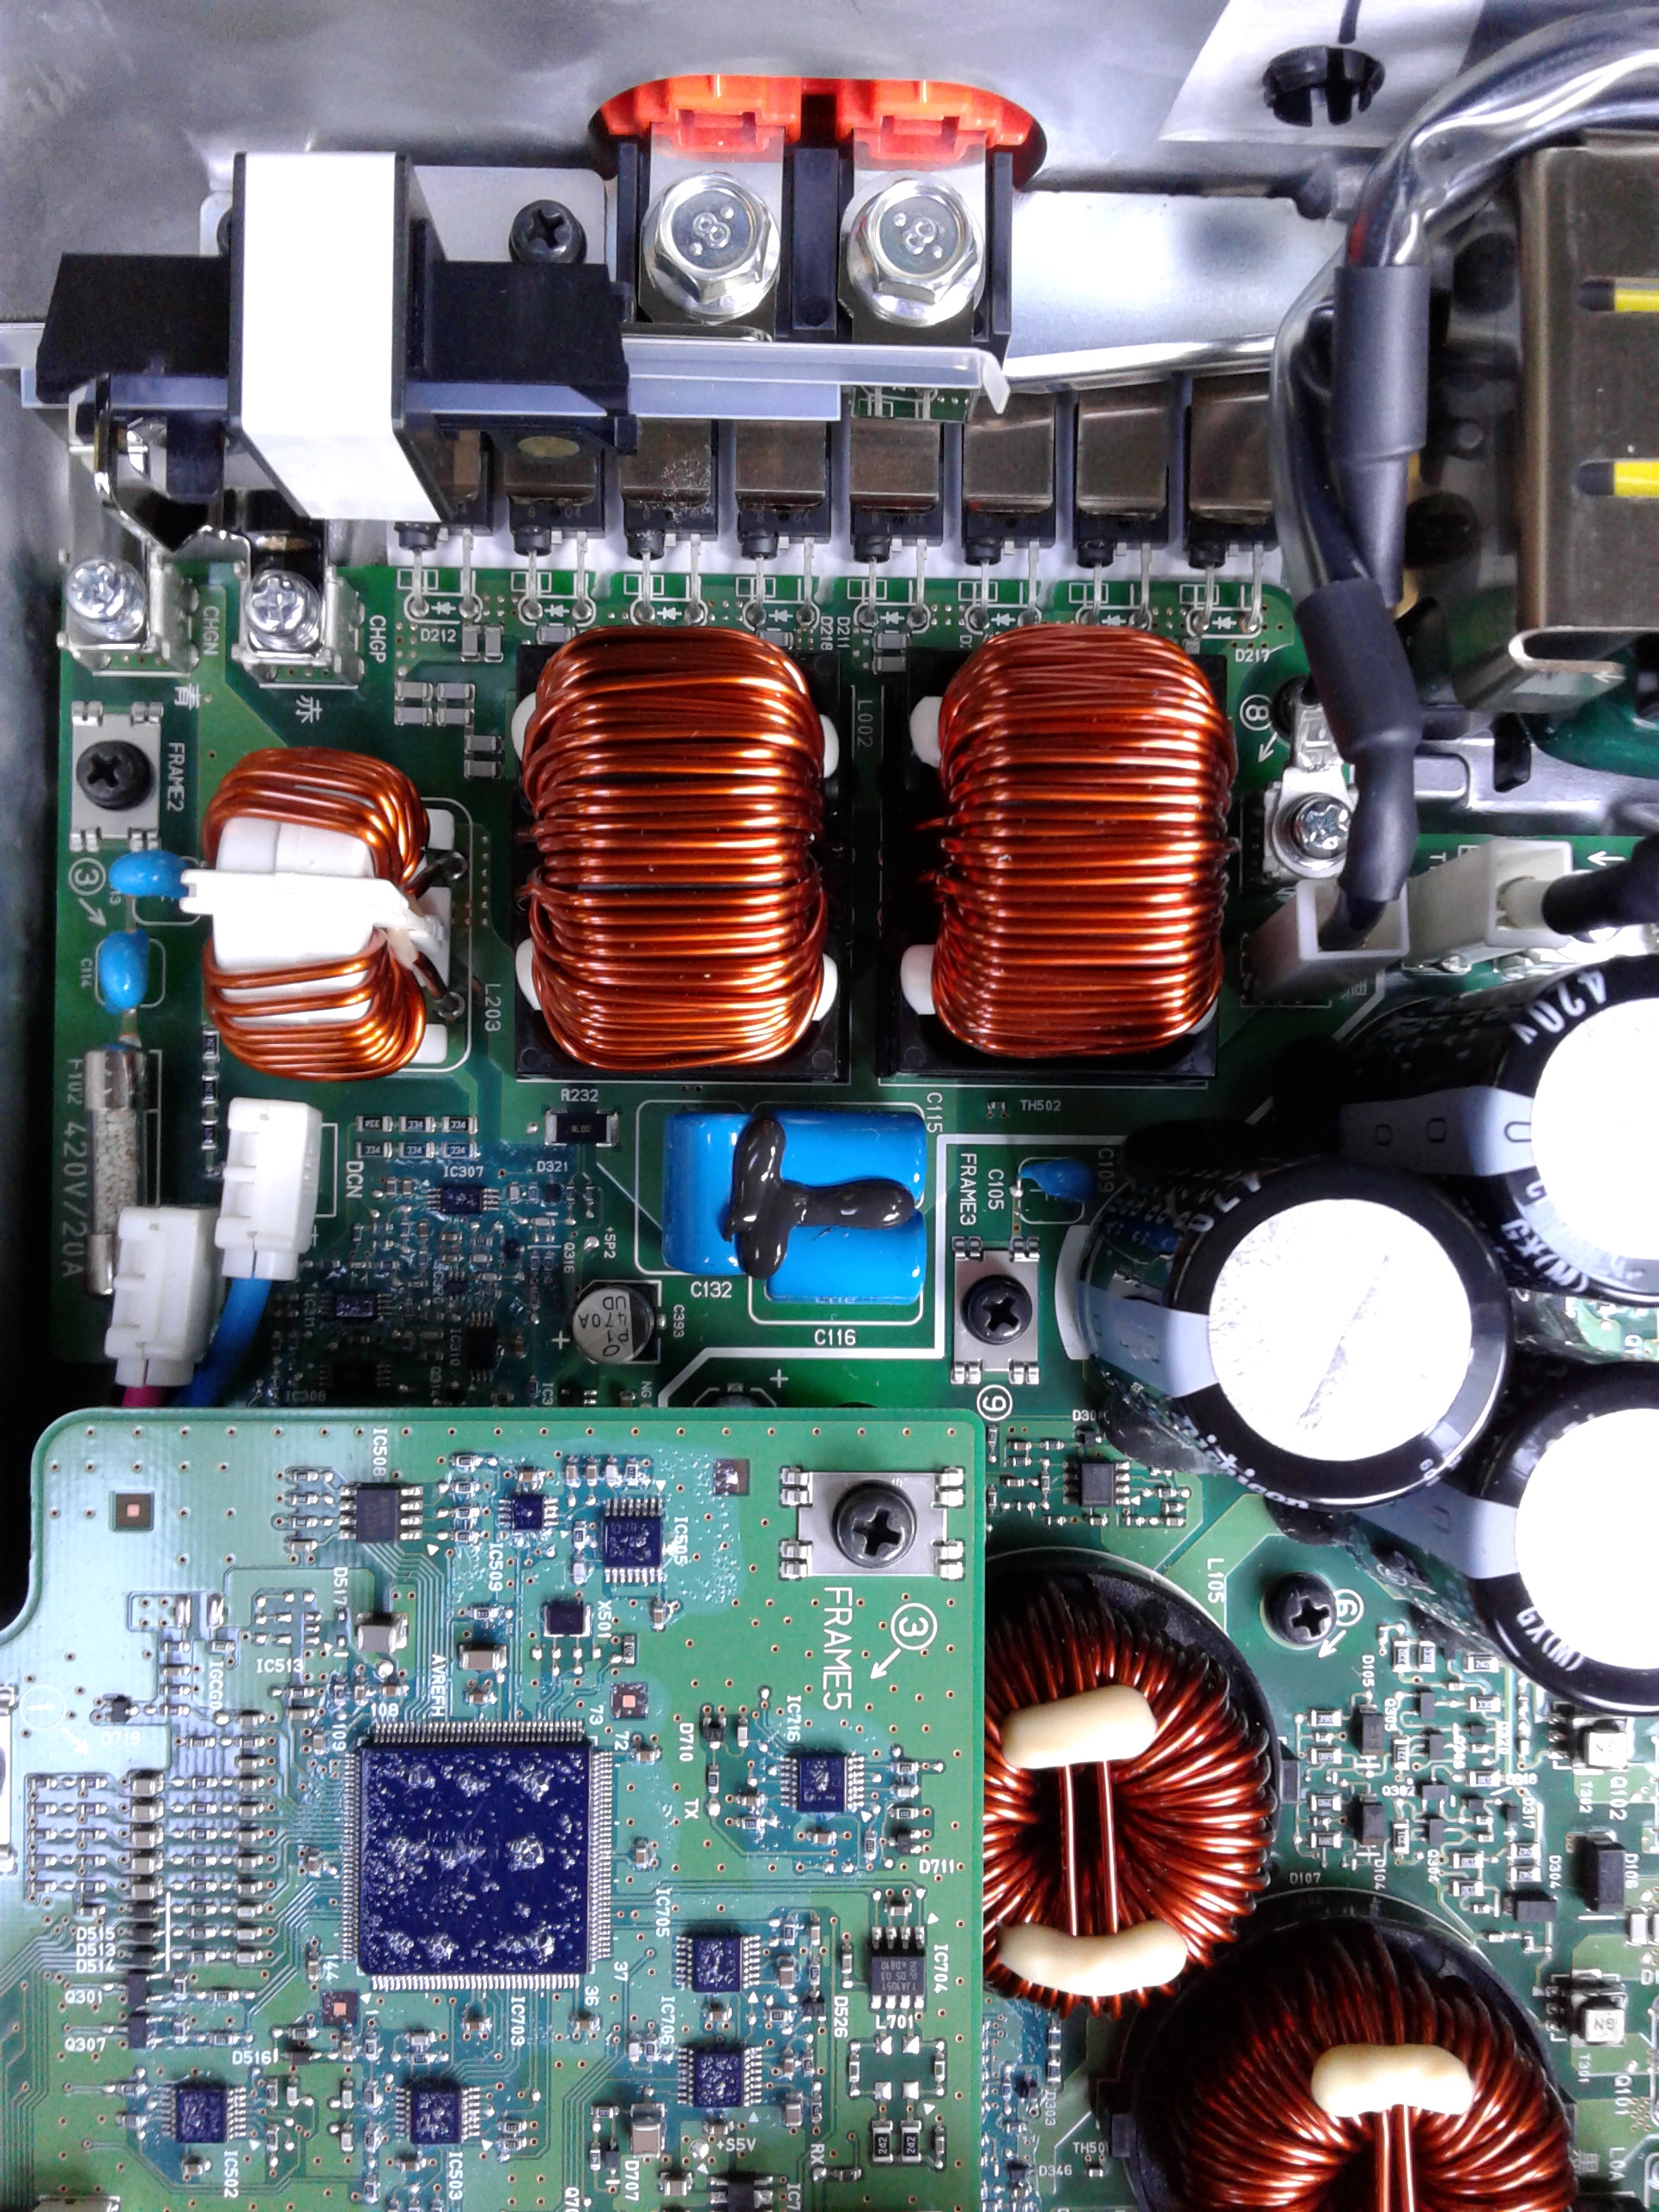
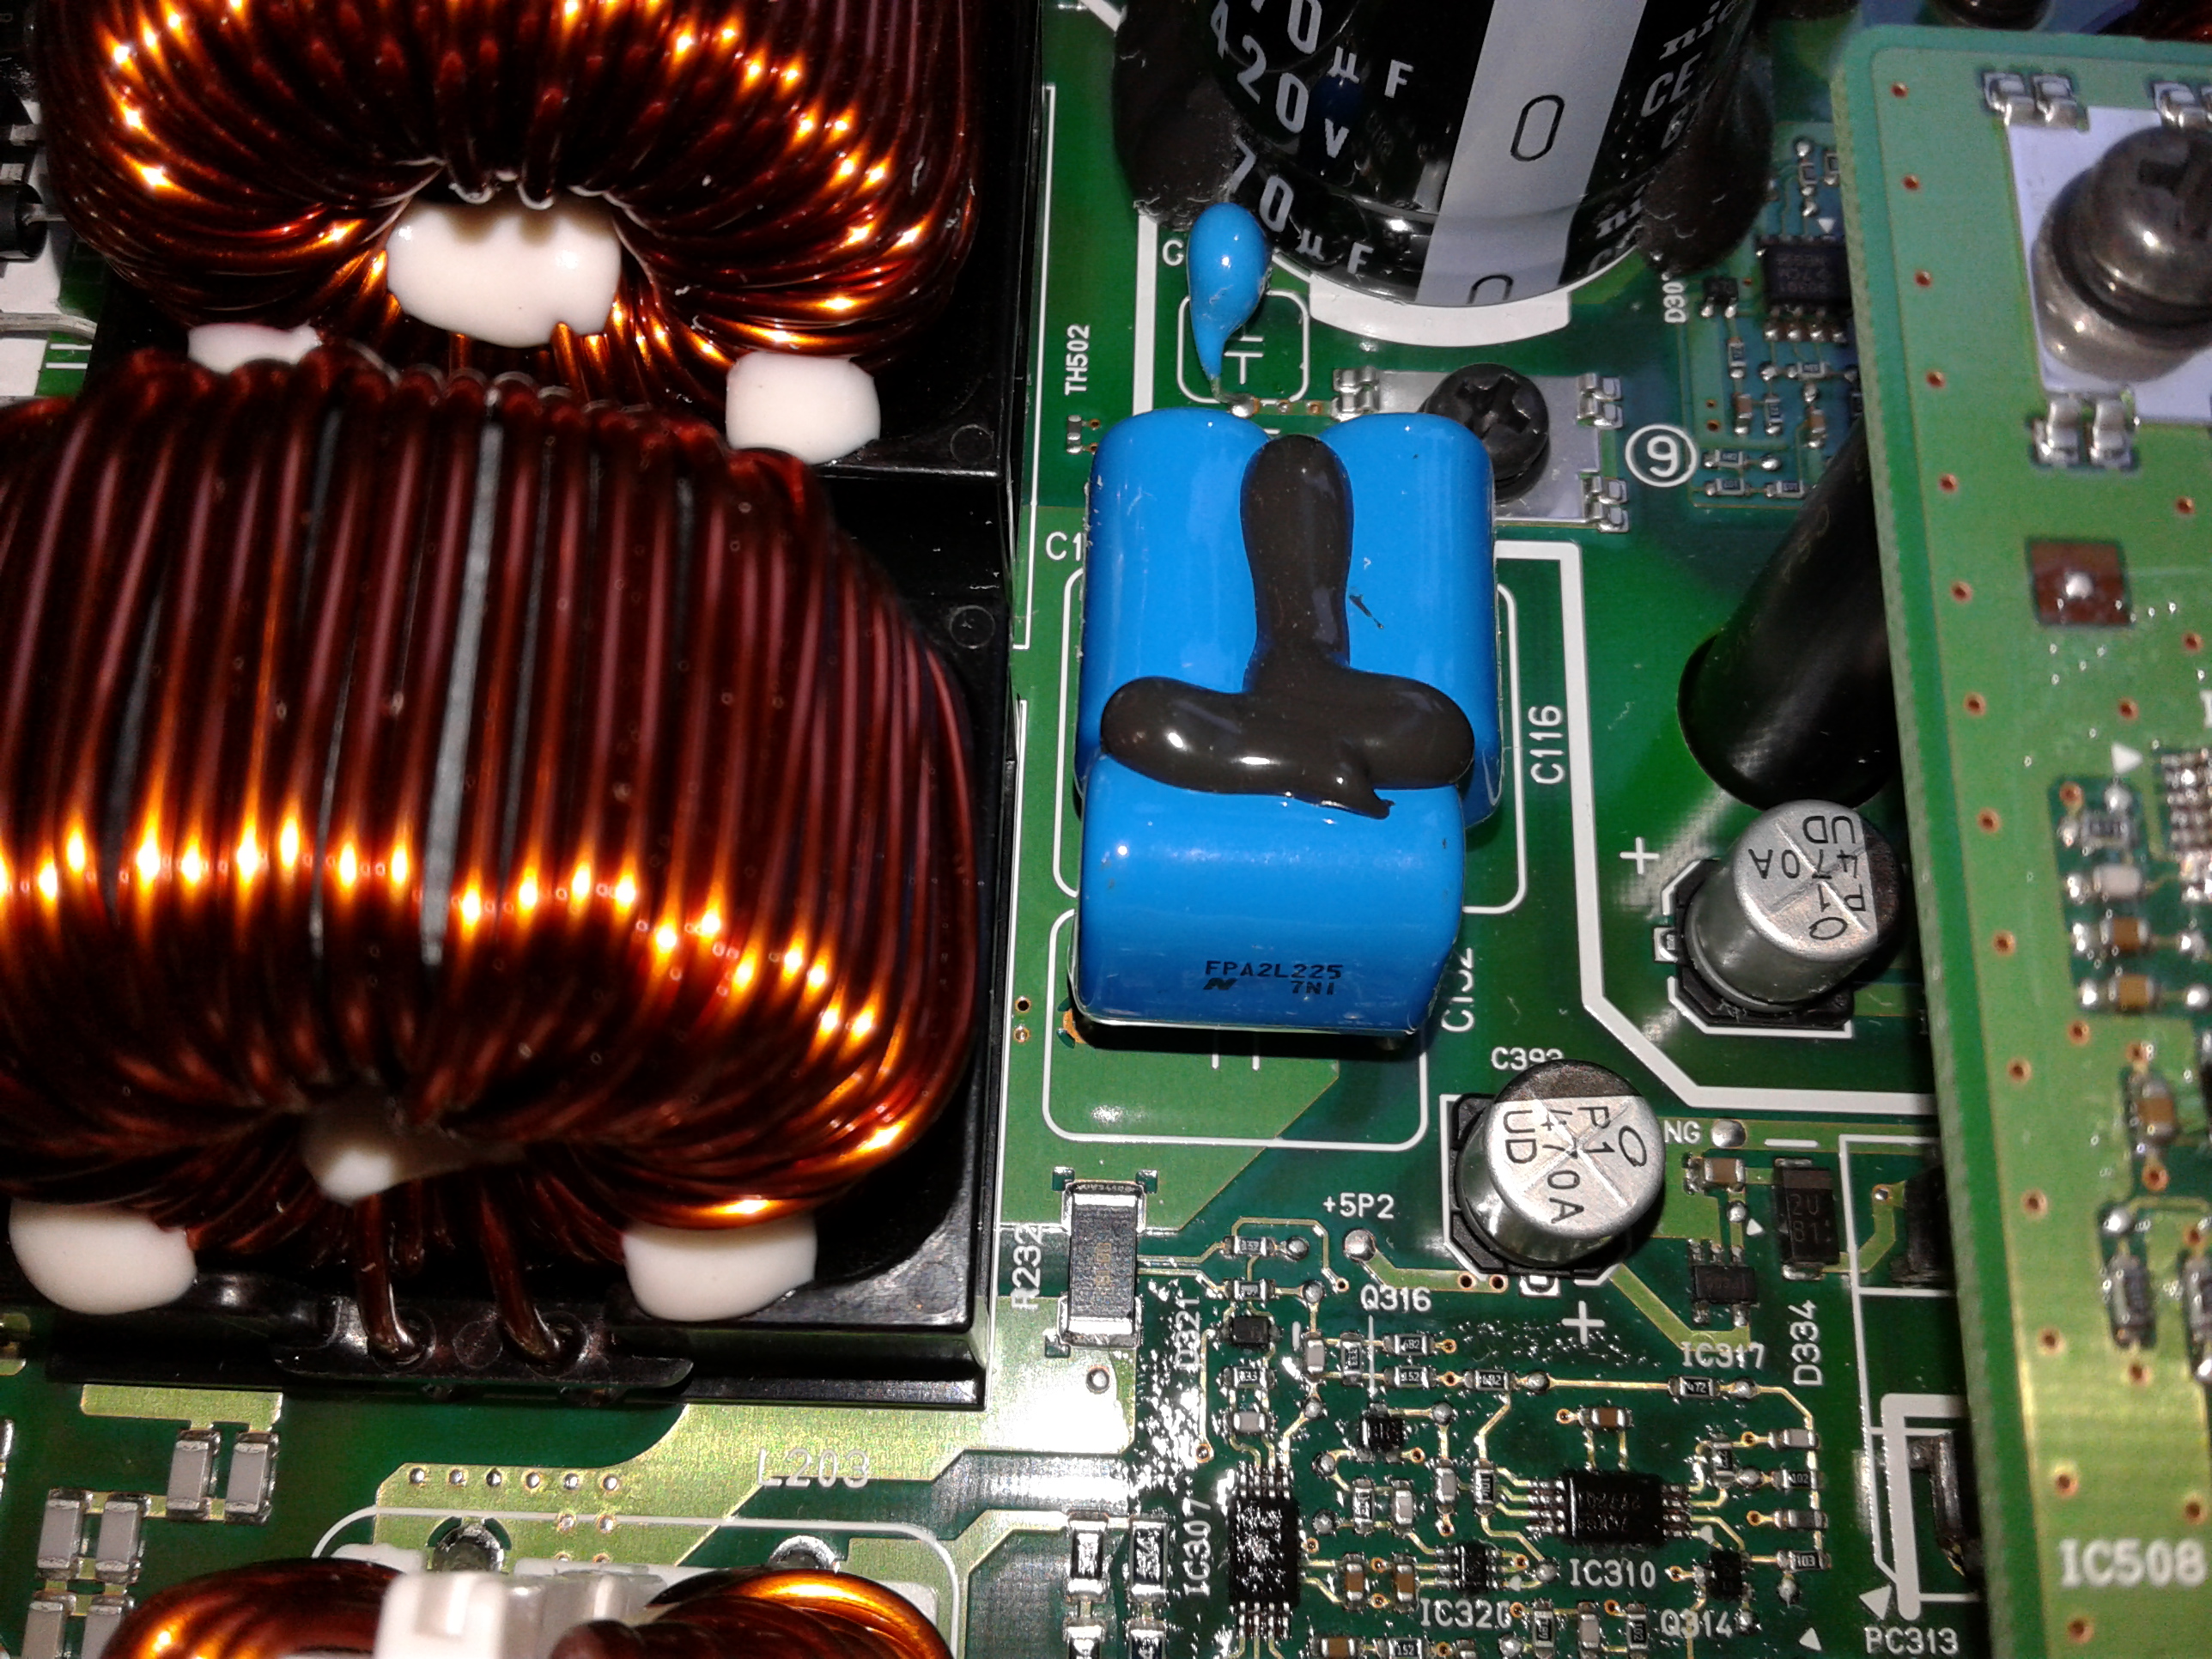
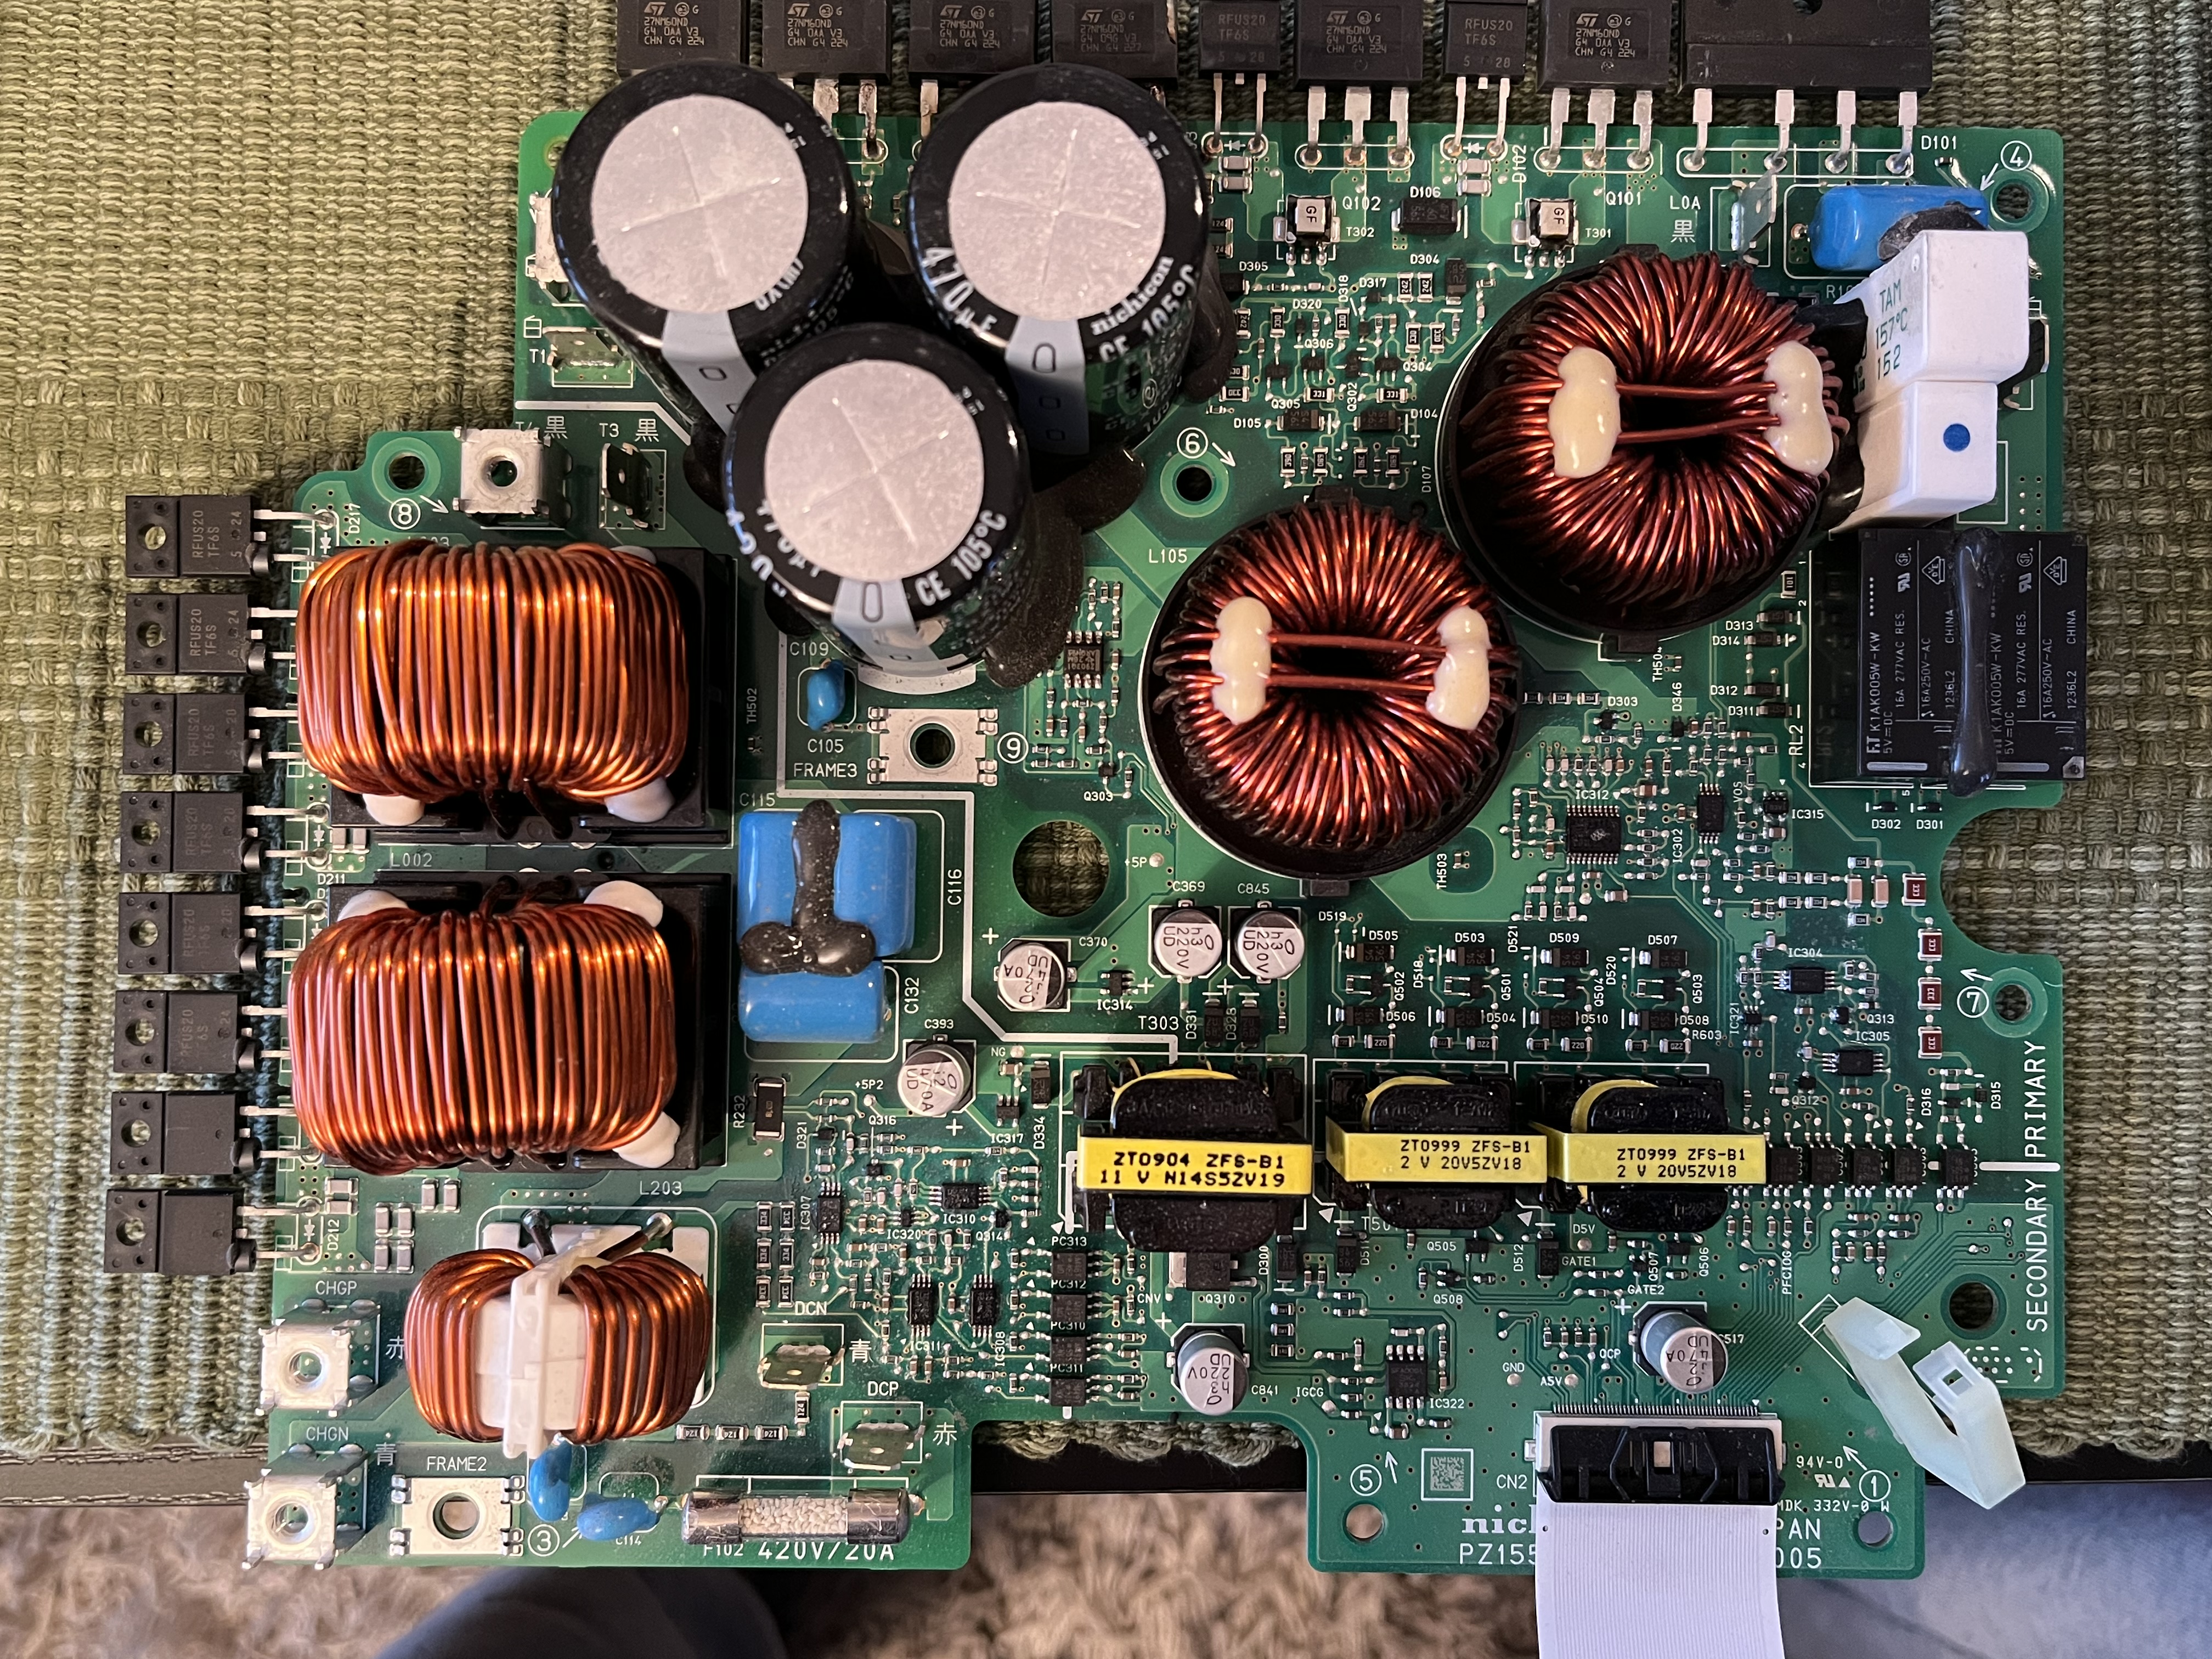
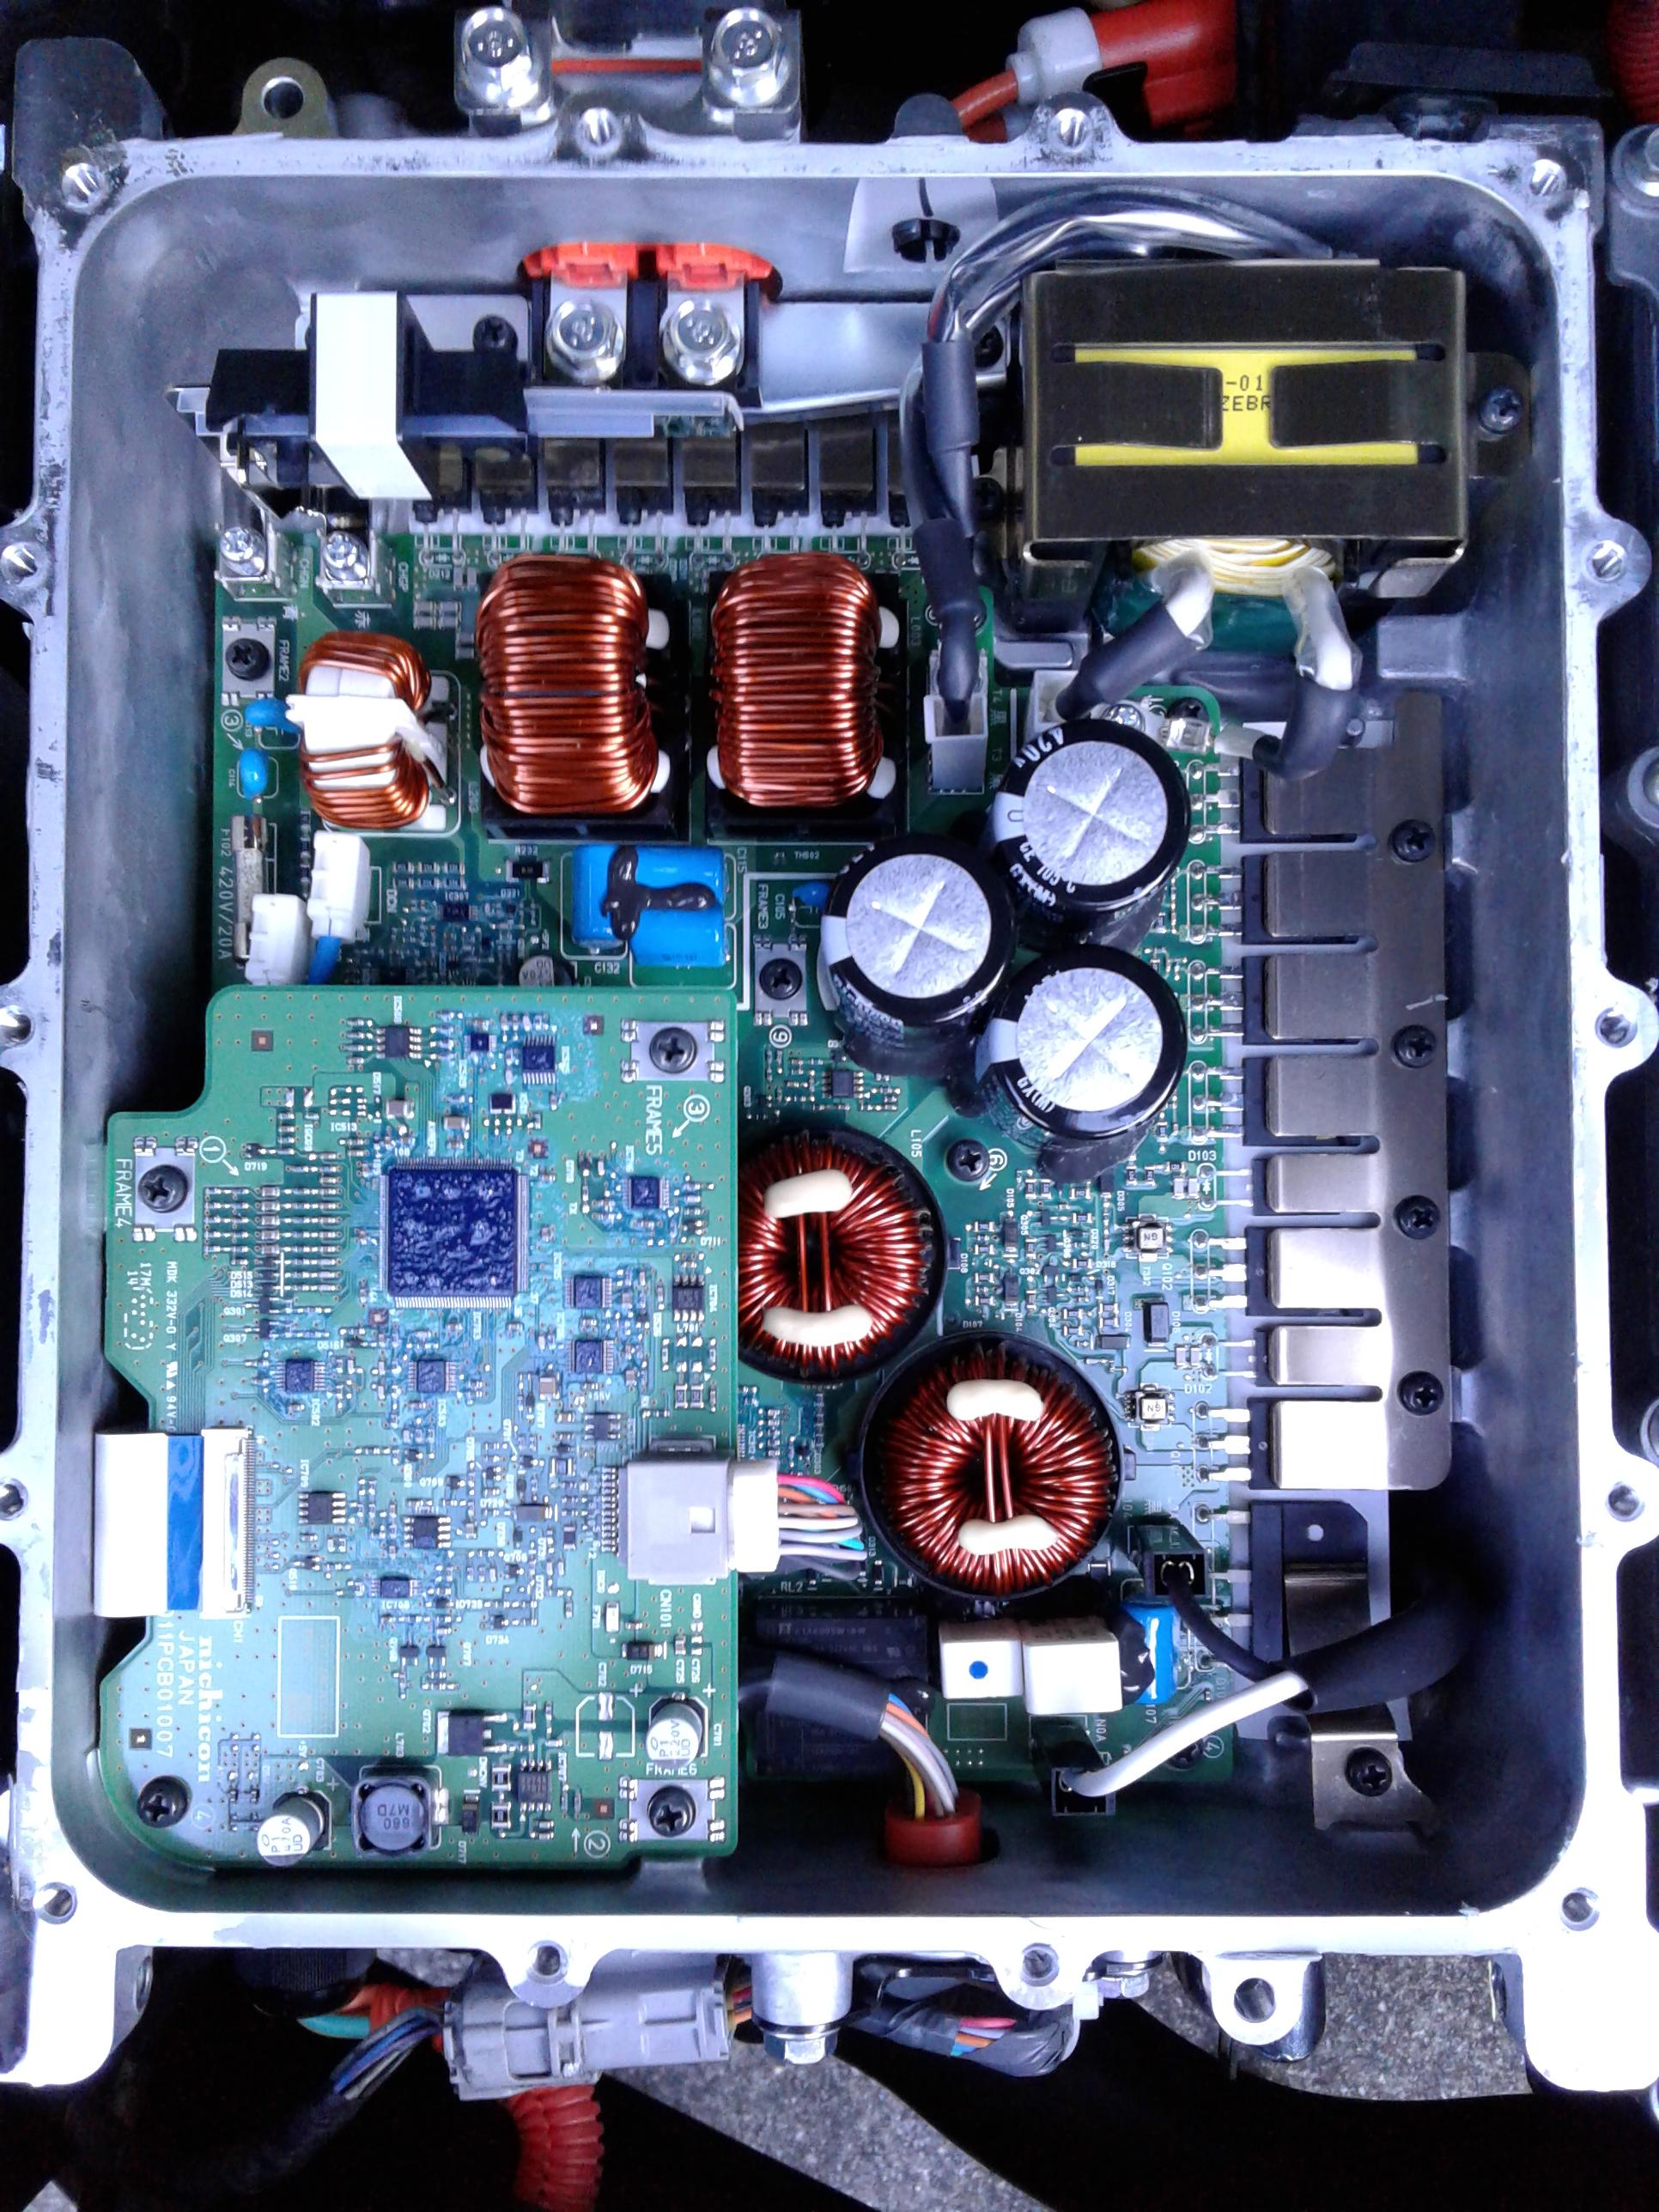
i just got kiev back today with the new style On-Board Chargger, calling it OBC2. It has a date code of 2018.05.17 and is quite different from the 2012 version.

Overview
l9jO0AQ.jpg


Top Board
tCRM5bf.jpg


AC Input (no more doghouse)
xalzQX0.jpg


Boost Transformer
PBOP4W5.jpg


HV Output
ZjMHy6P.jpg


Current Sense Resistor and Fat Blue Caps (snubbers?)
Y929Y0Z.jpg


These will be much easier to repair-- no Waffle Plate™, all the high power diodes and transistors can be seen along the bottom board edges.
 
kiev said:
i just got kiev back today with the new style On-Board Chargger
So naturally, the first thing you did was to rip the covers off :D

These will be much easier to repair-- no Waffle Plate™, all the high power diodes and transistors can be seen along the bottom board edges.
This is indeed great news. Still made by Nichicon; I wonder what prompted the change of design.

Thanks for the photos.
 
kiev, thank you very much for the photos of the new OBC/dc-dc innards. Any comments whether this new design has improved the component thermal management? I was always disturbed that the case of this module becomes hot despite the the liquid cooling system.
coulomb said:
This is indeed great news. Still made by Nichicon; I wonder what prompted the change of design.
What's interesting is that they went to all the trouble to make this new design fully interchangeable with our 'older' 2012 configuration. As evidenced by the number of failures on this forum, Nichicon/Mitsubishi must be experiencing an unusually-high failure rate, prompting them to redesign this unit rather than continue producing the original configuration - this is very good news, IMO. Nice of Mitsu to (rather belatedly) step up to the bar and extend the warranty.
 
My concern is . . . . if your original doesn't fail in the first 10 years, you're out of luck. If it fails later, I'll bet this new one is $4K if you have to BUY one from Mitsu . . . . and that would likely mean trashing your 11 or 12 year old car, regardless of the low miles you might have on it

Don
 
i think if you were to proactively replace the 20A MCU fuse as a maintenance item, then your old OBC would work just fine for a good long time.

i'm still doing research on the failure modes. i'm struggling to understand how the MCU fuse could experience an over-current condition and blow, without taking out the little 20A fuses on the input of the DCDC or the output of the OBC.

Also i don't understand how shorting by the snubbers caps would cause the MCU fuse to experience an over-current. If the snubber caps were to fail shorted, then the rectifier diodes in the waffle plate would likely fail and repairs would not be possible. Yet several have been repaired by replacing just the caps and fuse.

But i can see how an interruption of the OBC output current outside of the OBC, such as a mechanical break in the MCU fuse, could create an inductive over-voltage condition on the output side of the boost transformers that could cause the snubber caps to split.


Another weak link might be the AC input relay contacts; but i see that they have the same relay in the new box, so there will likely be a few failures on the AC side such as we have seen on the old box.
 
kiev said:
i think if you were to proactively replace the 20A MCU fuse as a maintenance item, then your old OBC would work just fine for a good long time.

i'm still doing research on the failure modes. i'm struggling to understand how the MCU fuse could experience an over-current condition and blow, without taking out the little 20A fuses on the input of the DCDC or the output of the OBC.

Also i don't understand how shorting by the snubbers caps would cause the MCU fuse to experience an over-current. If the snubber caps were to fail shorted, then the rectifier diodes in the waffle plate would likely fail and repairs would not be possible. Yet several have been repaired by replacing just the caps and fuse.
It makes perfect sense to me actually.

If you place a short across the 360v output of the on board charger (at the 1000pF caps) the charger electronics will have current limiting at or below around 10 amps and probably complete fold over protection so that it would shut down completely in the case of a short. This will protect the electronics of the charger proper, (including rectifiers) and also prevent the small fuse on the OBC PCB from blowing as the current will never exceed it's 20 amp rating unless the current limiting system failed. (And the fuse in the DC/DC converter is irrelevant as it isn't a fault current path in the shorted cap scenario)

However the only thing limiting the current drawn from the traction battery by the shorted cap is the 20 amp MCU fuse - nothing else is in the current path except the 250A fuse in the traction battery enclosure, and that's not going to blow first. :D
But i can see how an interruption of the OBC output current outside of the OBC, such as a mechanical break in the MCU fuse, could create an inductive over-voltage condition on the output side of the boost transformers that could cause the snubber caps to split.
While your theory of the fuse blowing first and causing an inductive spike is interesting and certainly feasible, occams razor doesn't require it IMHO.

I think it's as simple as a poor quality capacitor failing spontaneously well within its supposed limits, or perhaps being under-speced for it's role in the circuit or a bit of both.

Consider the following scenario - one of the caps goes shorted for whatever reason during charging. The OBC is already putting out ~10 amps in constant current mode. A short is not going to cause it to put out any more current because it is already electronically limiting to 10 amps. If it has fold over protection, and I can't see why it wouldn't, it will shut down if it continues to put out 10 amps but the output voltgage drops abnormally low. This protects the semiconductors from over dissipation and is easy to do - I've built linear regulators with fold over shutdown in constant current limit mode, and it makes them nearly indestructable done right.

Once the OBC shuts down the the risk of the OBC's own fuse blowing is gone, however the traction battery will continue to supply hundreds of amps until either the cap vaporises or the fuse or both.

If the cause of the failure is a defective capacitor spontaneously going short circuit and then blowing the fuse, I would expect to only ever see one capacitor of the parallel pair failed.

On the other hand if your theory about inductive spike due to a blowing fuse is right I'd expect to see both capacitors blown at least in some cases. Have there been any reported cases yet where both caps fail ? Certainly in mine one split completely into three pieces (blew the bonding legs off both sides of the ceramic chip) but the second capacitor was unharmed.

That to me suggests the capacitor failing was the root cause of the failure, and that replacing them with better rated (higher voltage, high current rating) types like I did is prudent.
 
Somehow i missed Simon's excellent post with analysis of the snubber cap failure--i'm gonna blame it on distraction from the pandemic.

@kriiise, Welcome and thanks for sharing your pictures. Are you planning to make the repairs? If possible could you post the part numbers of any transistors or diodes that you uncover?

While i haven't traced out the schematic for the newer version power board, i can see and guess at some common elements with the previous version.

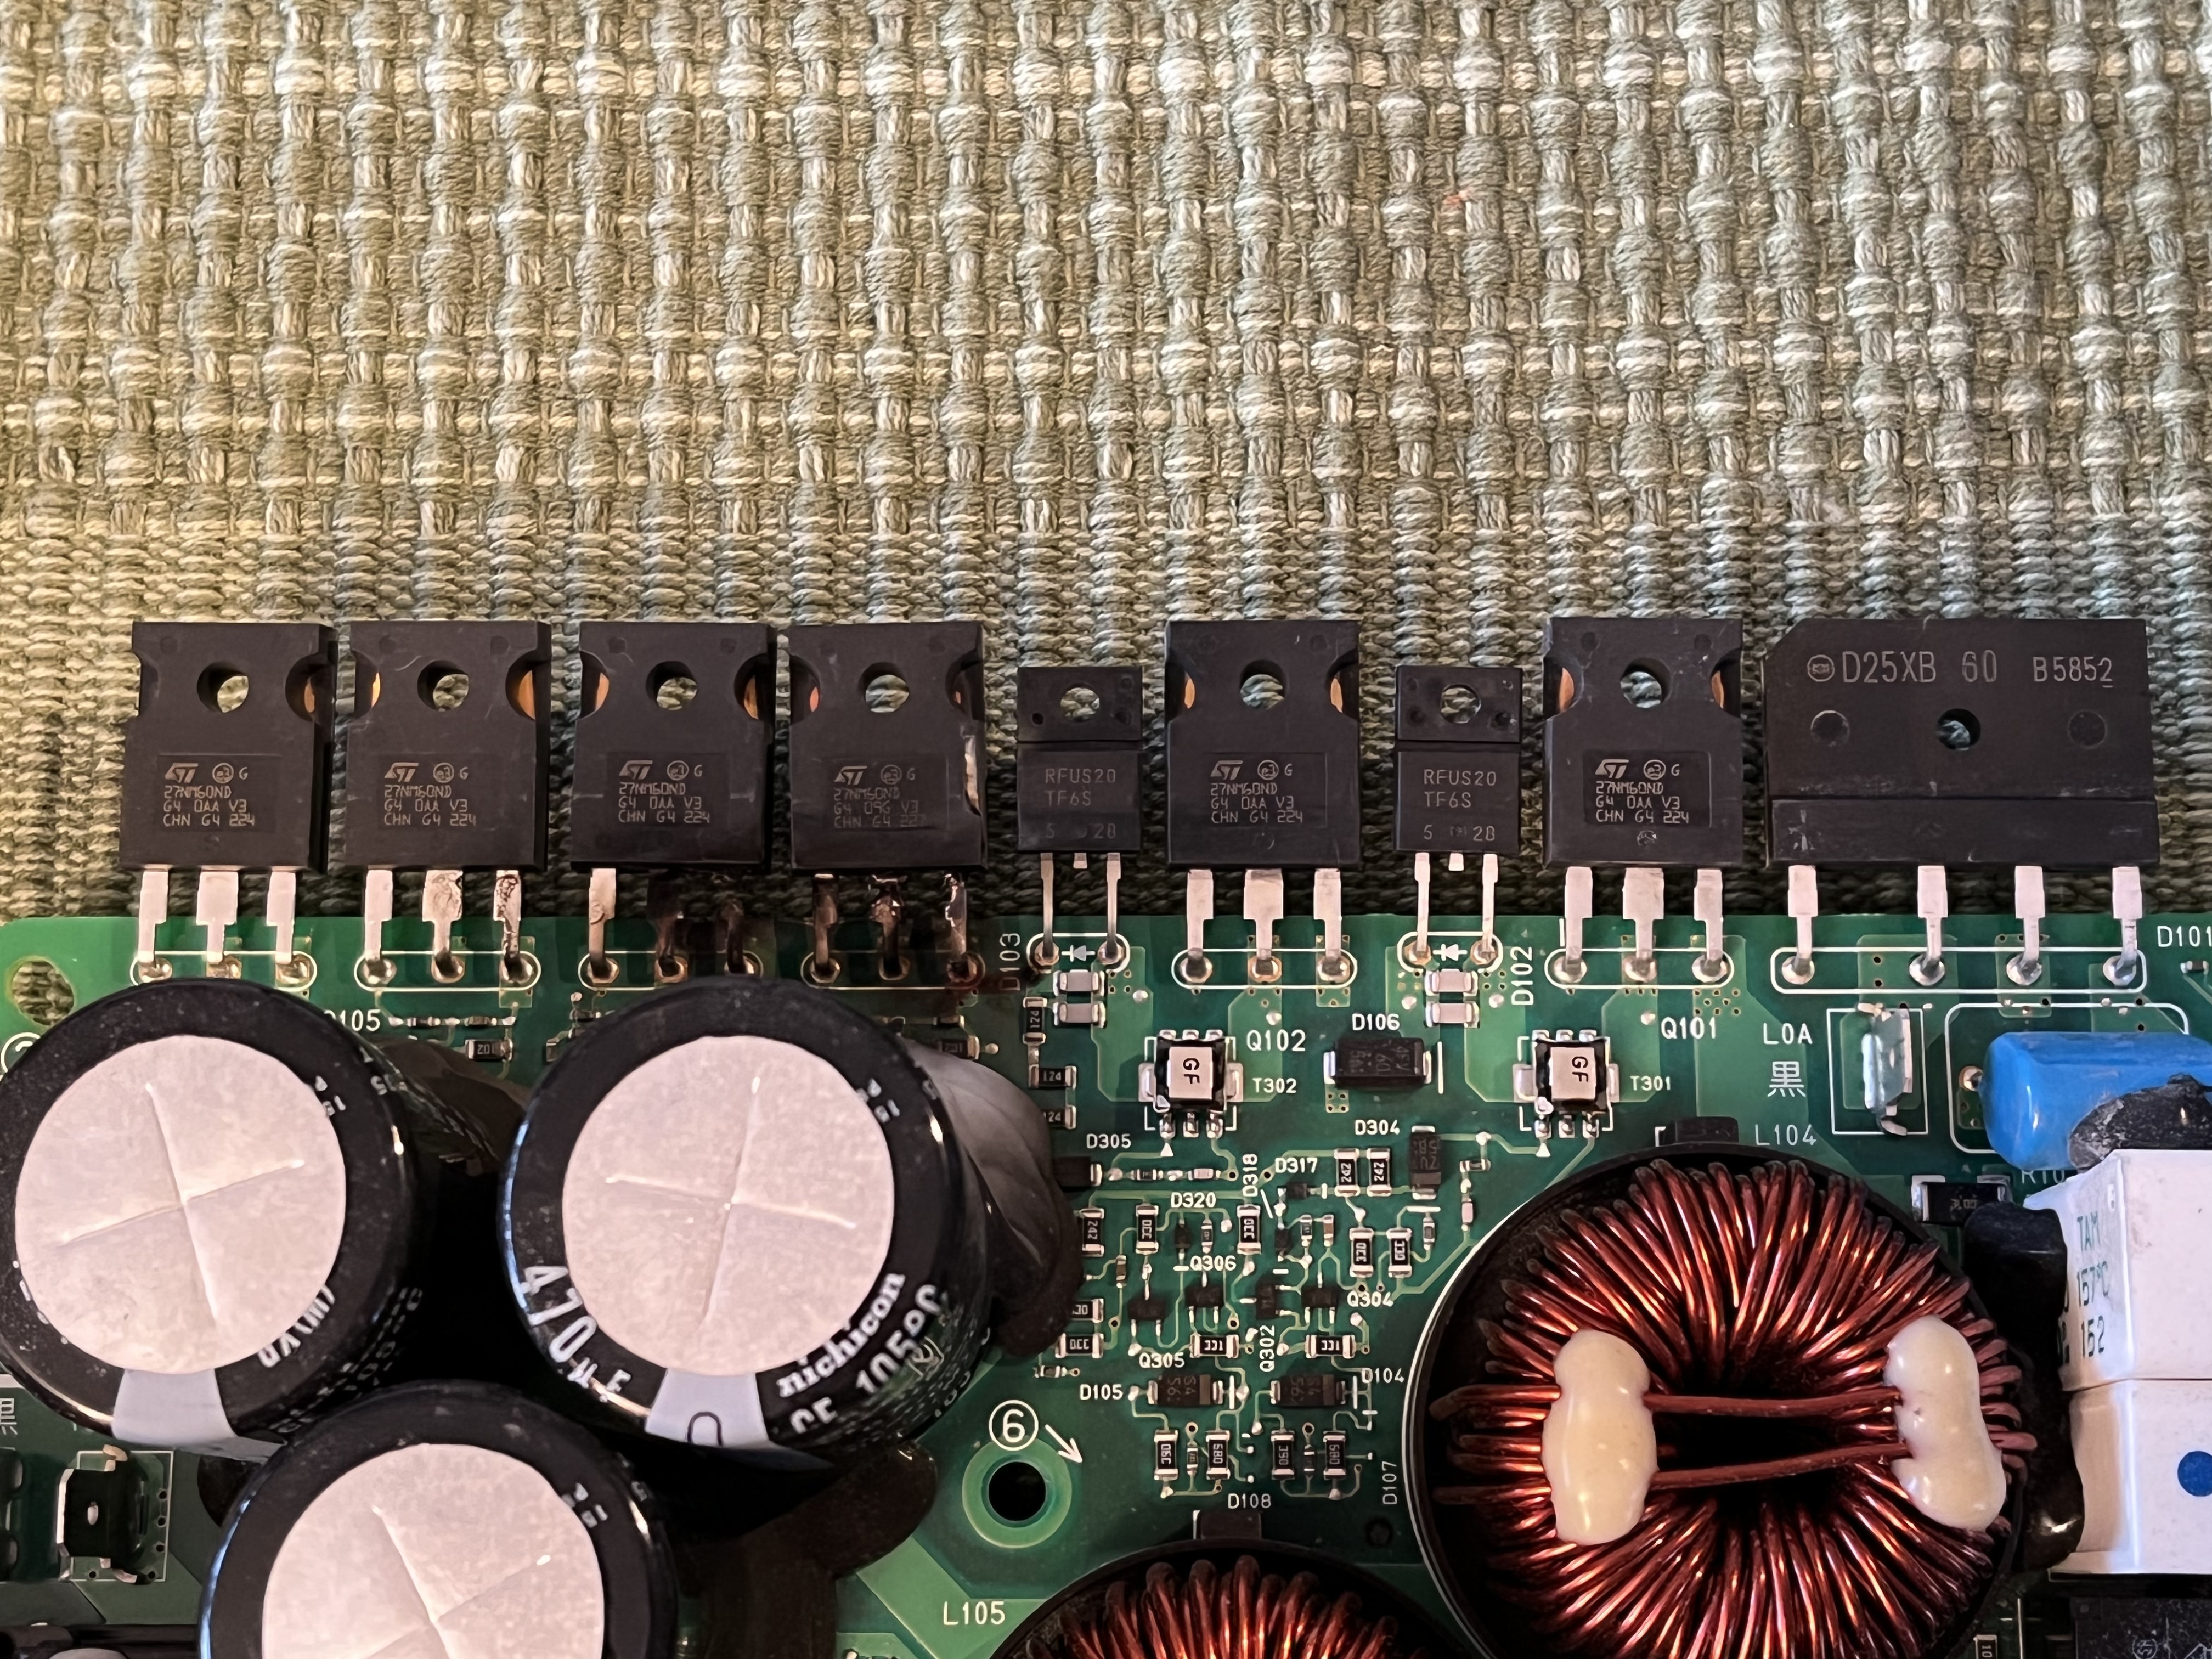
At the bottom edge in your photo can be seen the AC input relay along with the 2 ceramic resistors feeding in to a diode bridge rectifier D101 over to the right edge. Above that are the PFC/ Boost pair of transistors and diodes Q101-102 and D102-103, with current sense transformers.

The 2 failed transistors pointed to by the arrow are one leg of the switching H-bridge of the four transistors Q103-106. The final output is made at the top edge of the board with the 8 rectifier diodes attached to the heatsink.

So some common design elements to the waffle plate version, but now the parts are accessible and can be replaced.
 
Not sure what the diodes look like, but I’ll try to get a picture of any text I think might be important. The images are clear enough to read the text/numbers on my phone, but not sure if they keep their resolution when i upload them. Let me know if you need closer pictures.
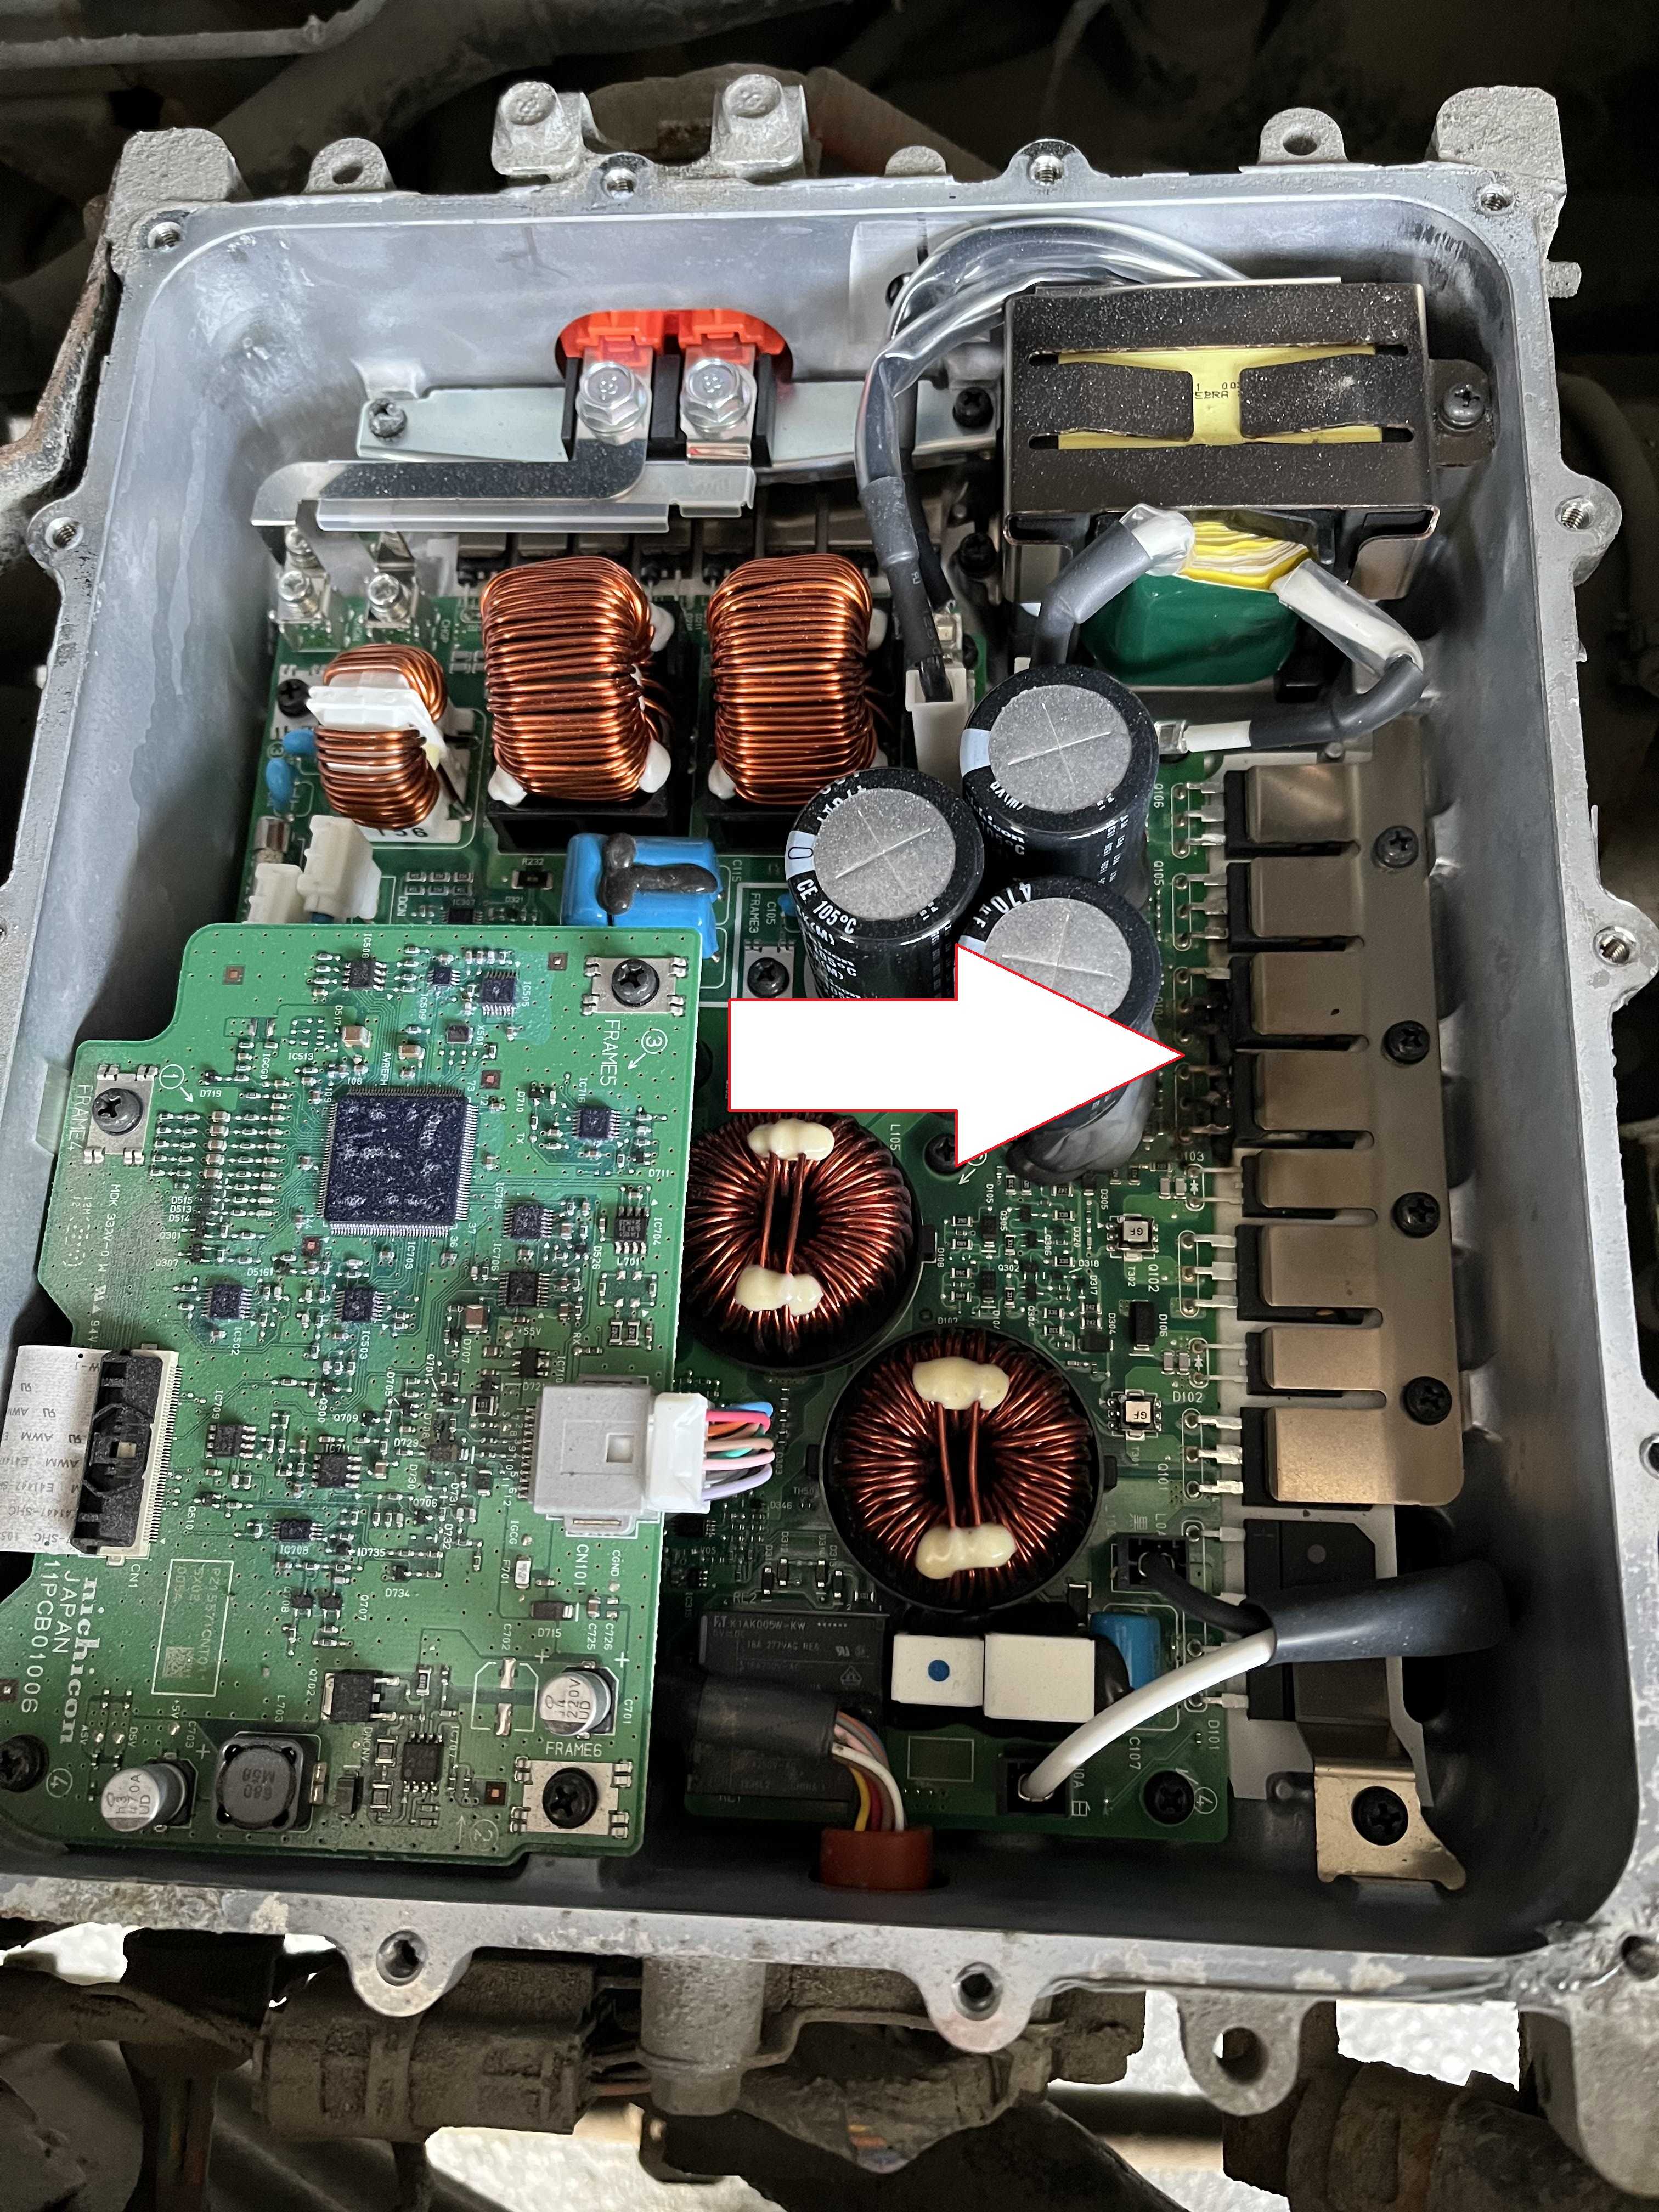

BB7C4356-FC13-421D-BA2F-1299B2E2607F.jpeg


F110C25A-59B0-4FE0-8AD8-0E0704480570.jpeg


8B8AE83A-8C8C-4424-9D81-49D02ACF04B8.jpeg
 
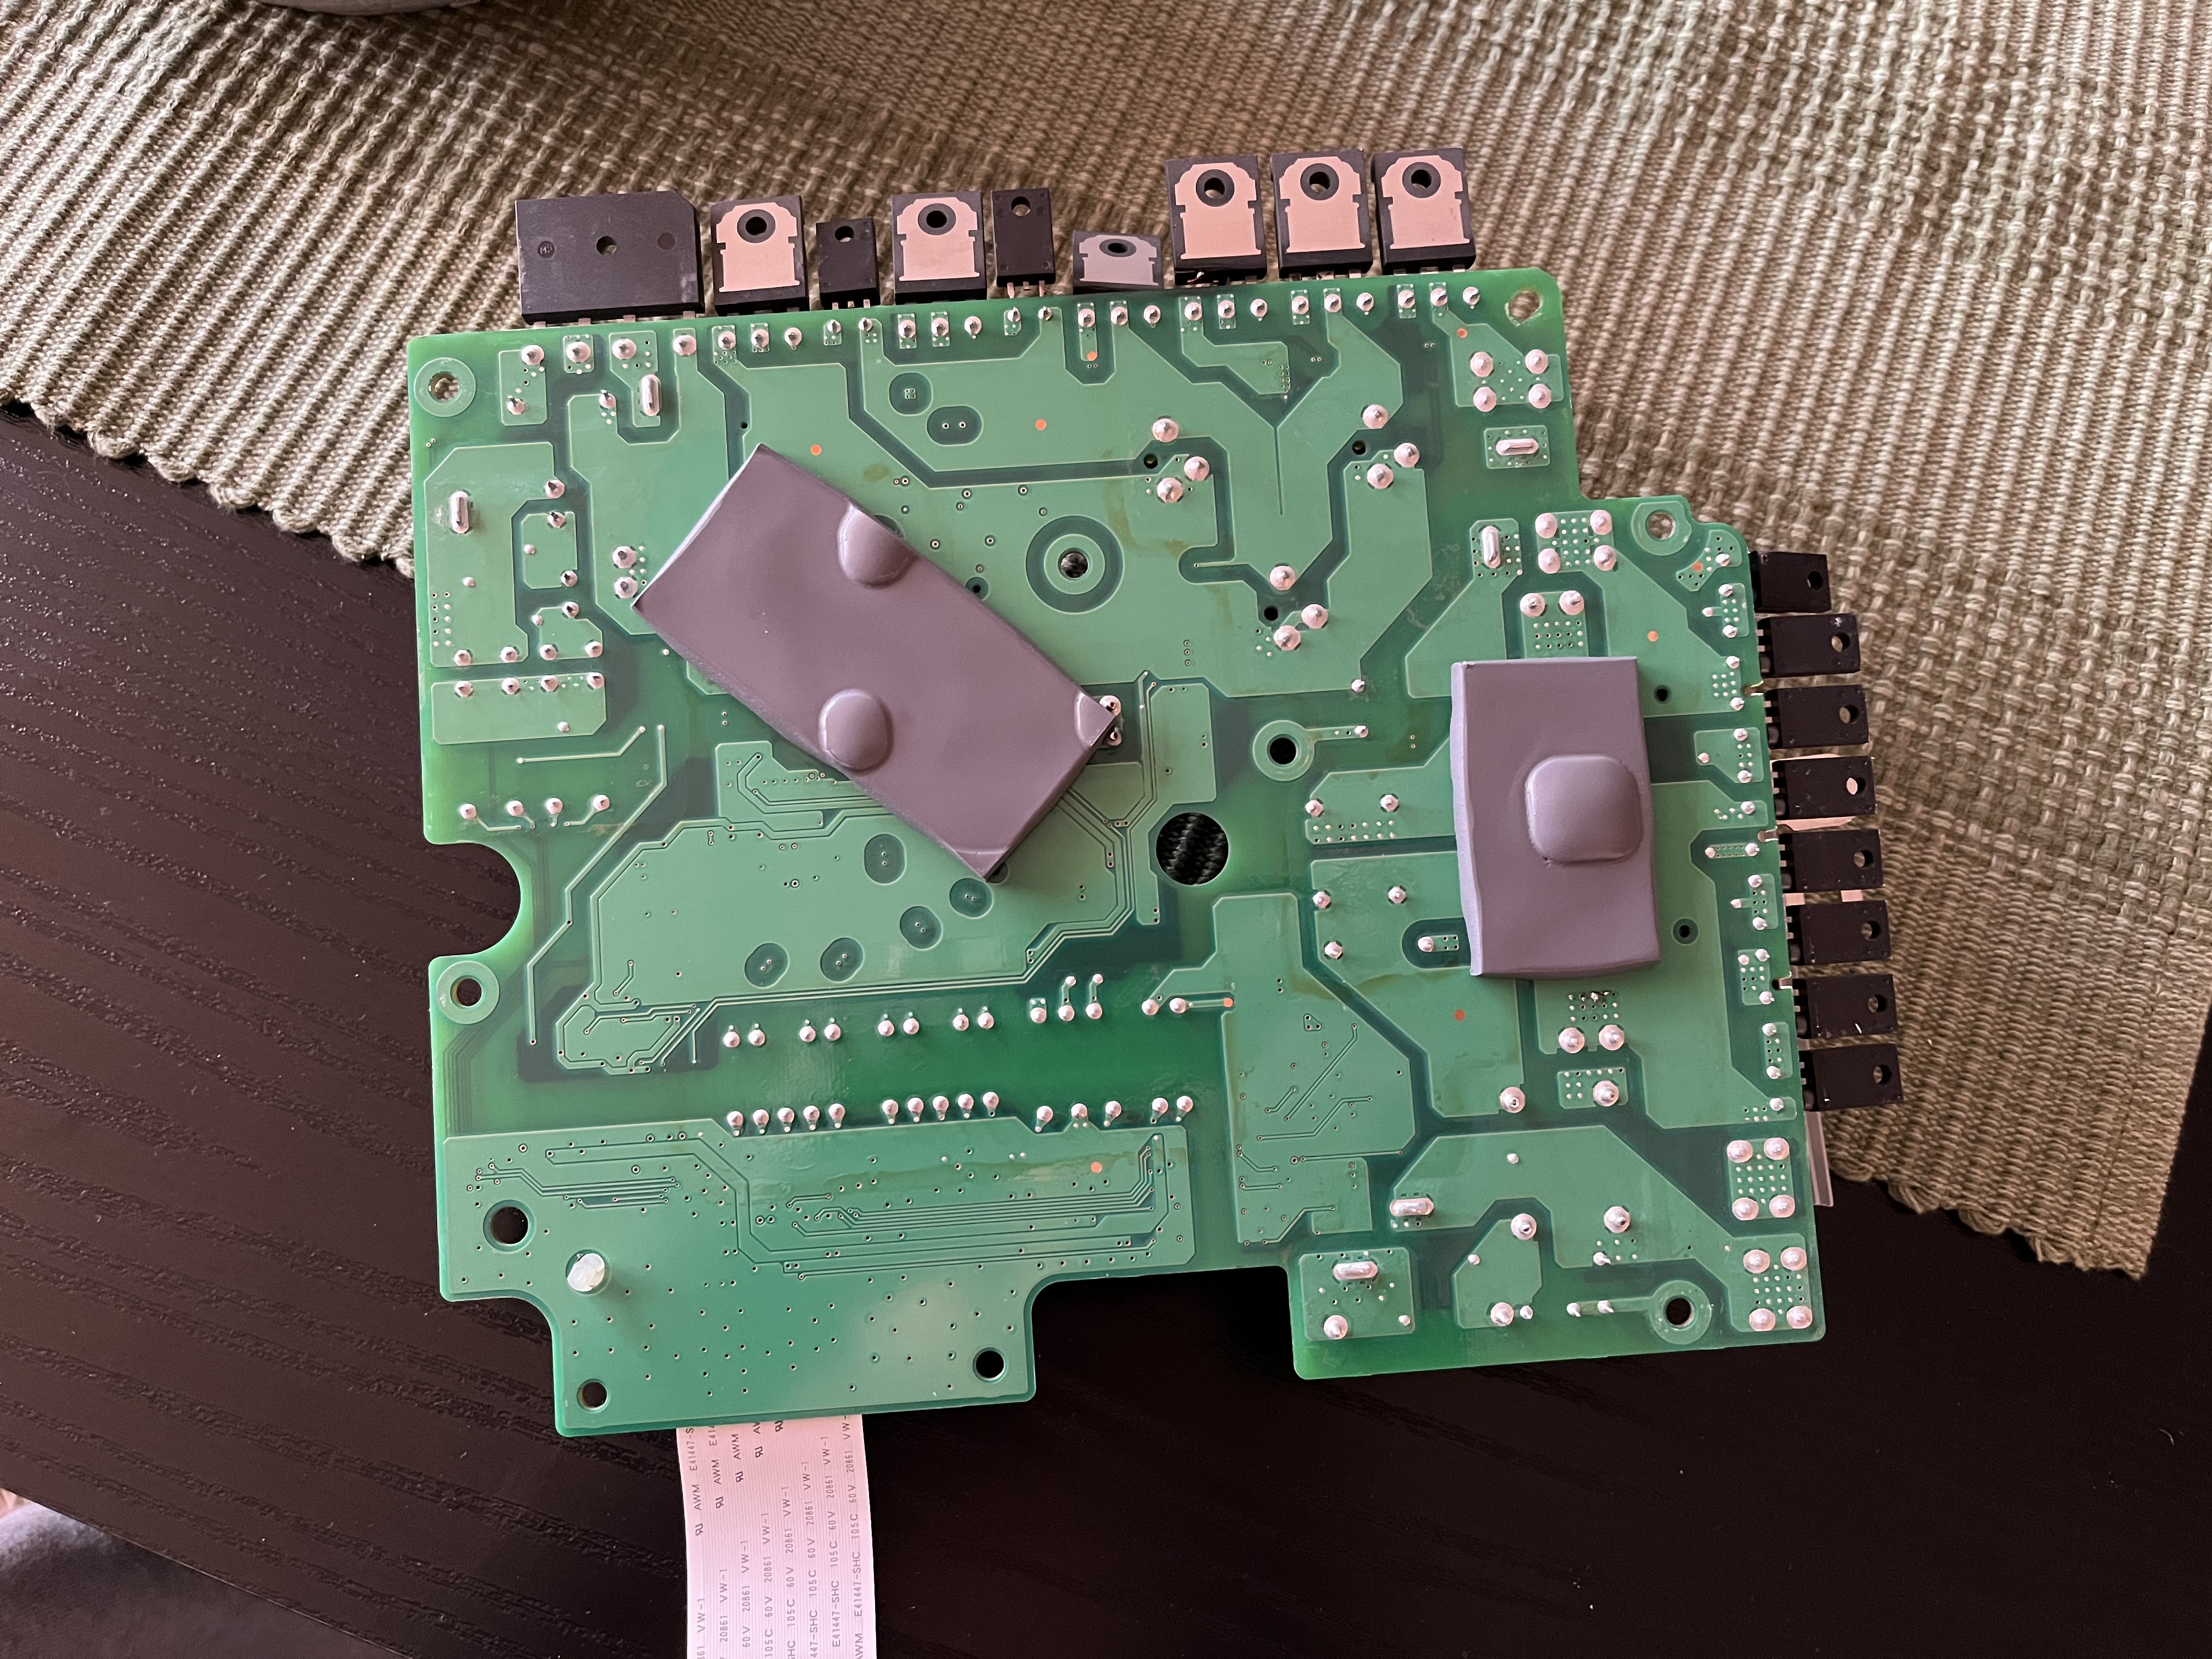
Would you be able to post a photo of the backside of that board? Might be able to do some tracing from the top and bottom views. Thanks
 
Looks like the transistor was discontinued in 2018, and under nearest replacement Mouser only states ”contact division”
 
kriiise said:
Looks like the transistor was discontinued in 2018, and under nearest replacement Mouser only states ”contact division”
https://www.infineon.com/cms/en/product/search/cross-reference/#!view=crossReference&term=STW27NM60ND

The manufacturer usually likes to be helpful in cases like this.
 
I got a hold of 6 of these: STW25NM60ND. As far as i could see, pretty much the only difference was that these ones were not certified for automotive use.

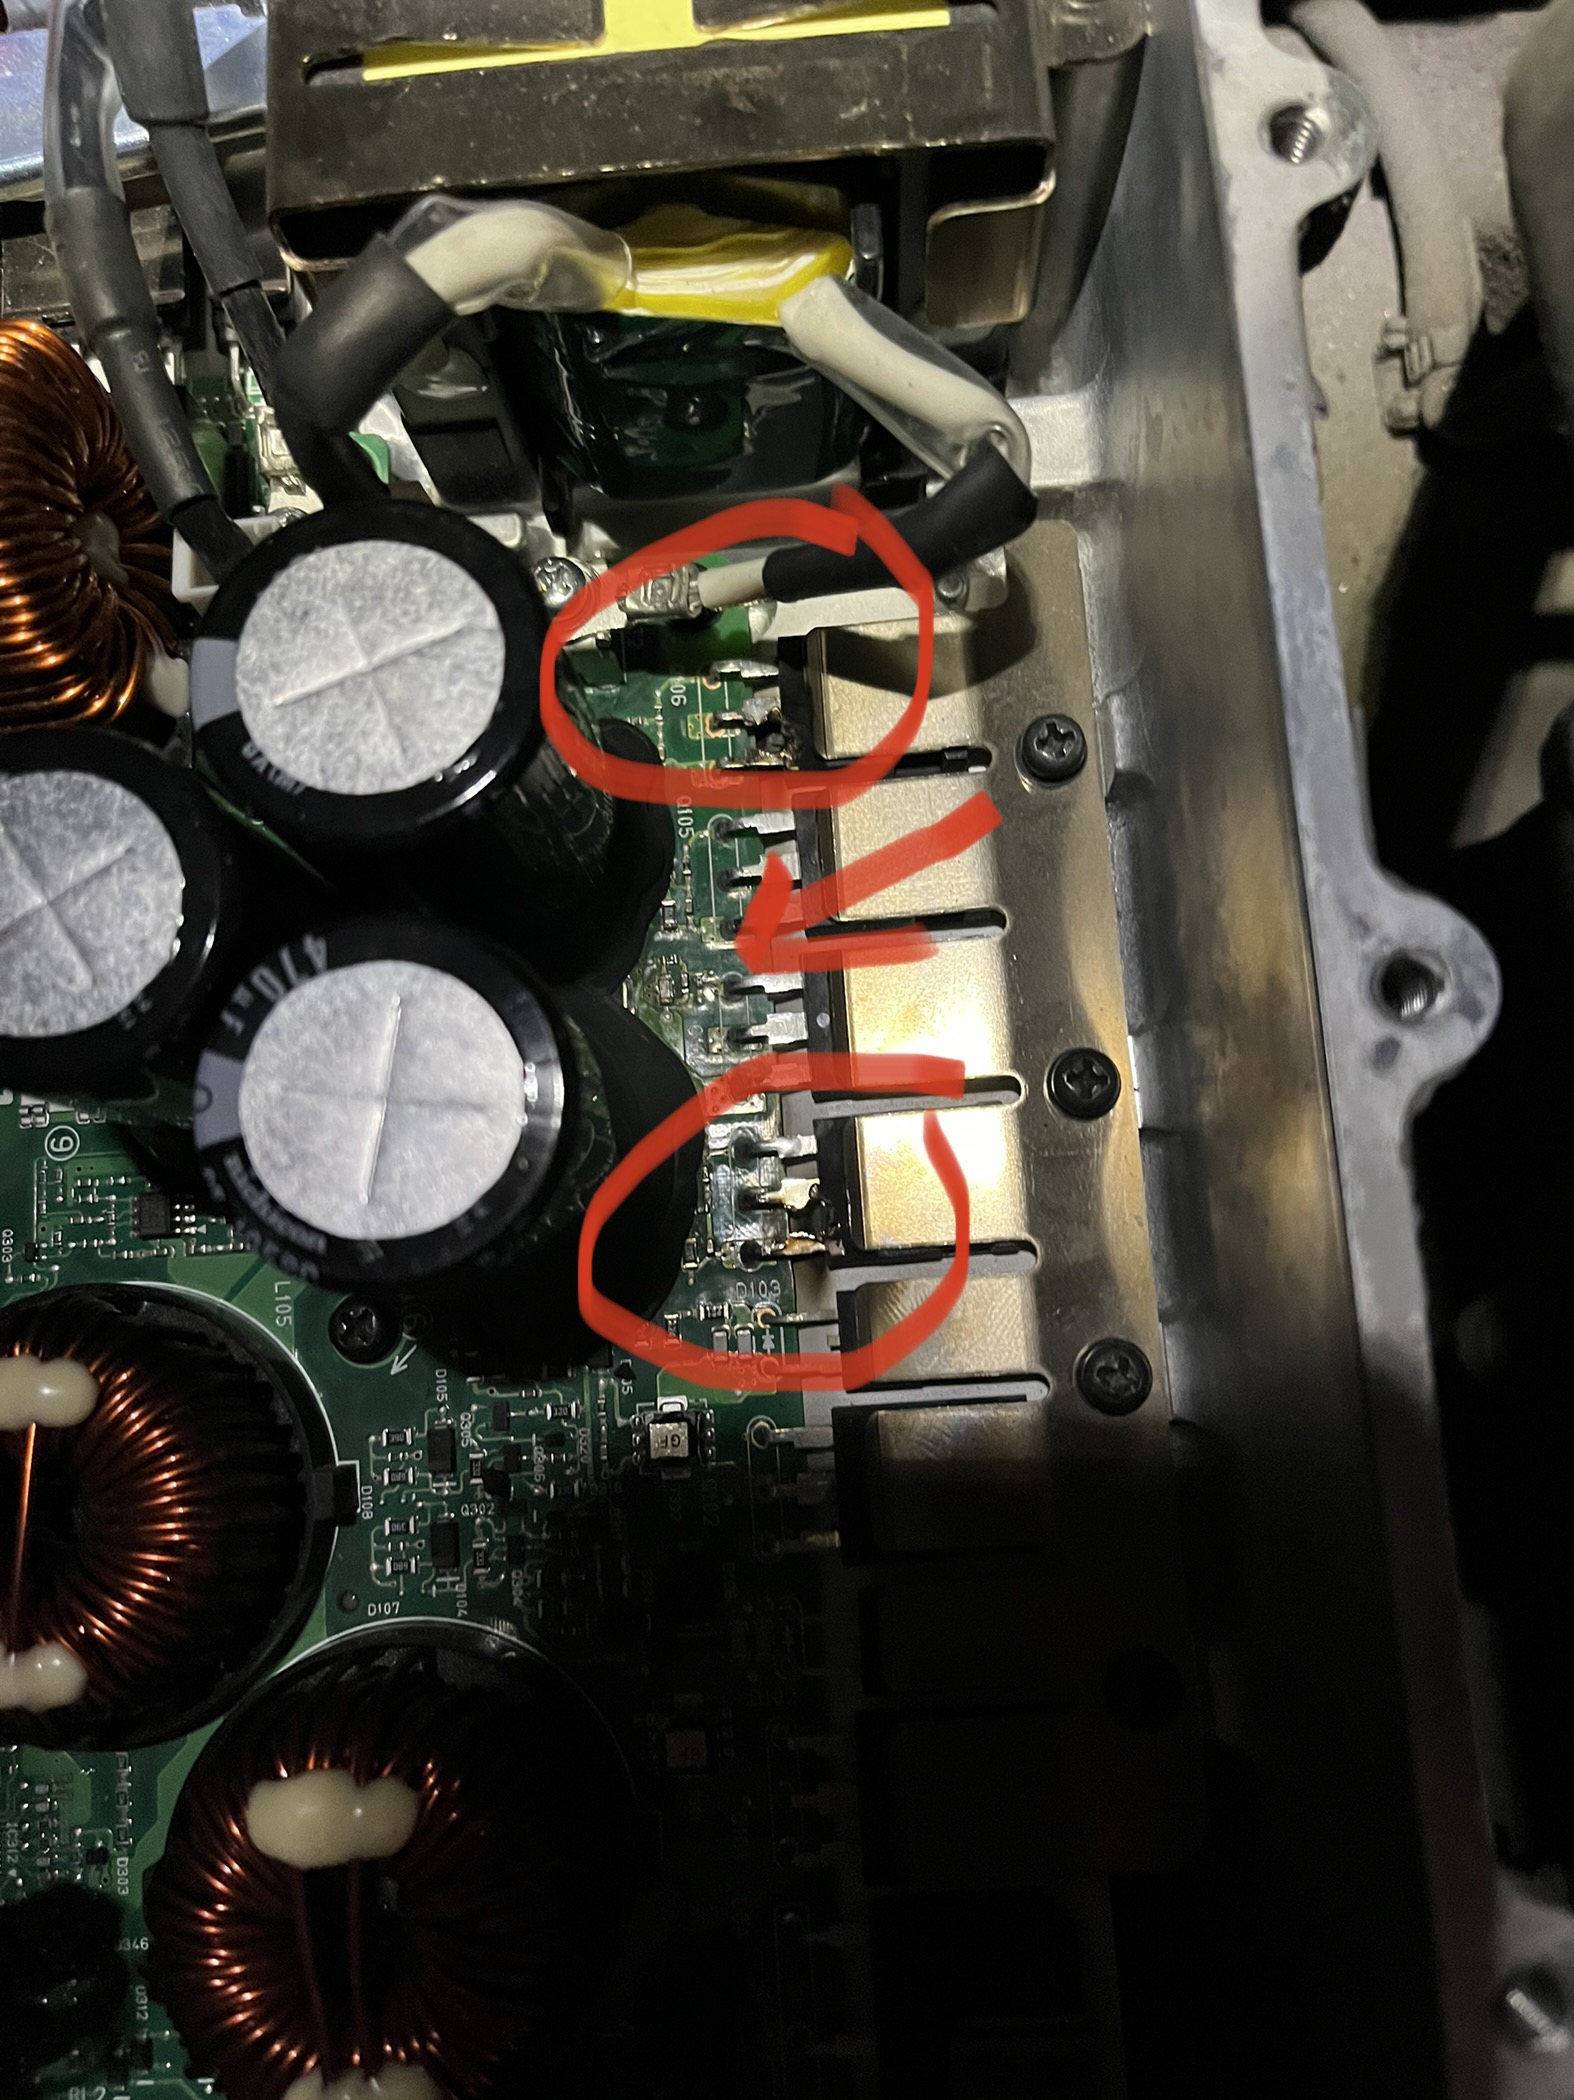
So i swapped them out. Enabled charging. Heard a pop from the obc and the charger stopped, but the fuse in my house did not trigger (it did before). Opened the obc and could not see any damage. Then i decided to try starting the charger again, with the obc open. Now i saw some tiny sparking from the area where the arrow is pointing, and just as i was leaning in to look closer - two of the transistors popped. One of the new ones, and one i didn’t change (circles)
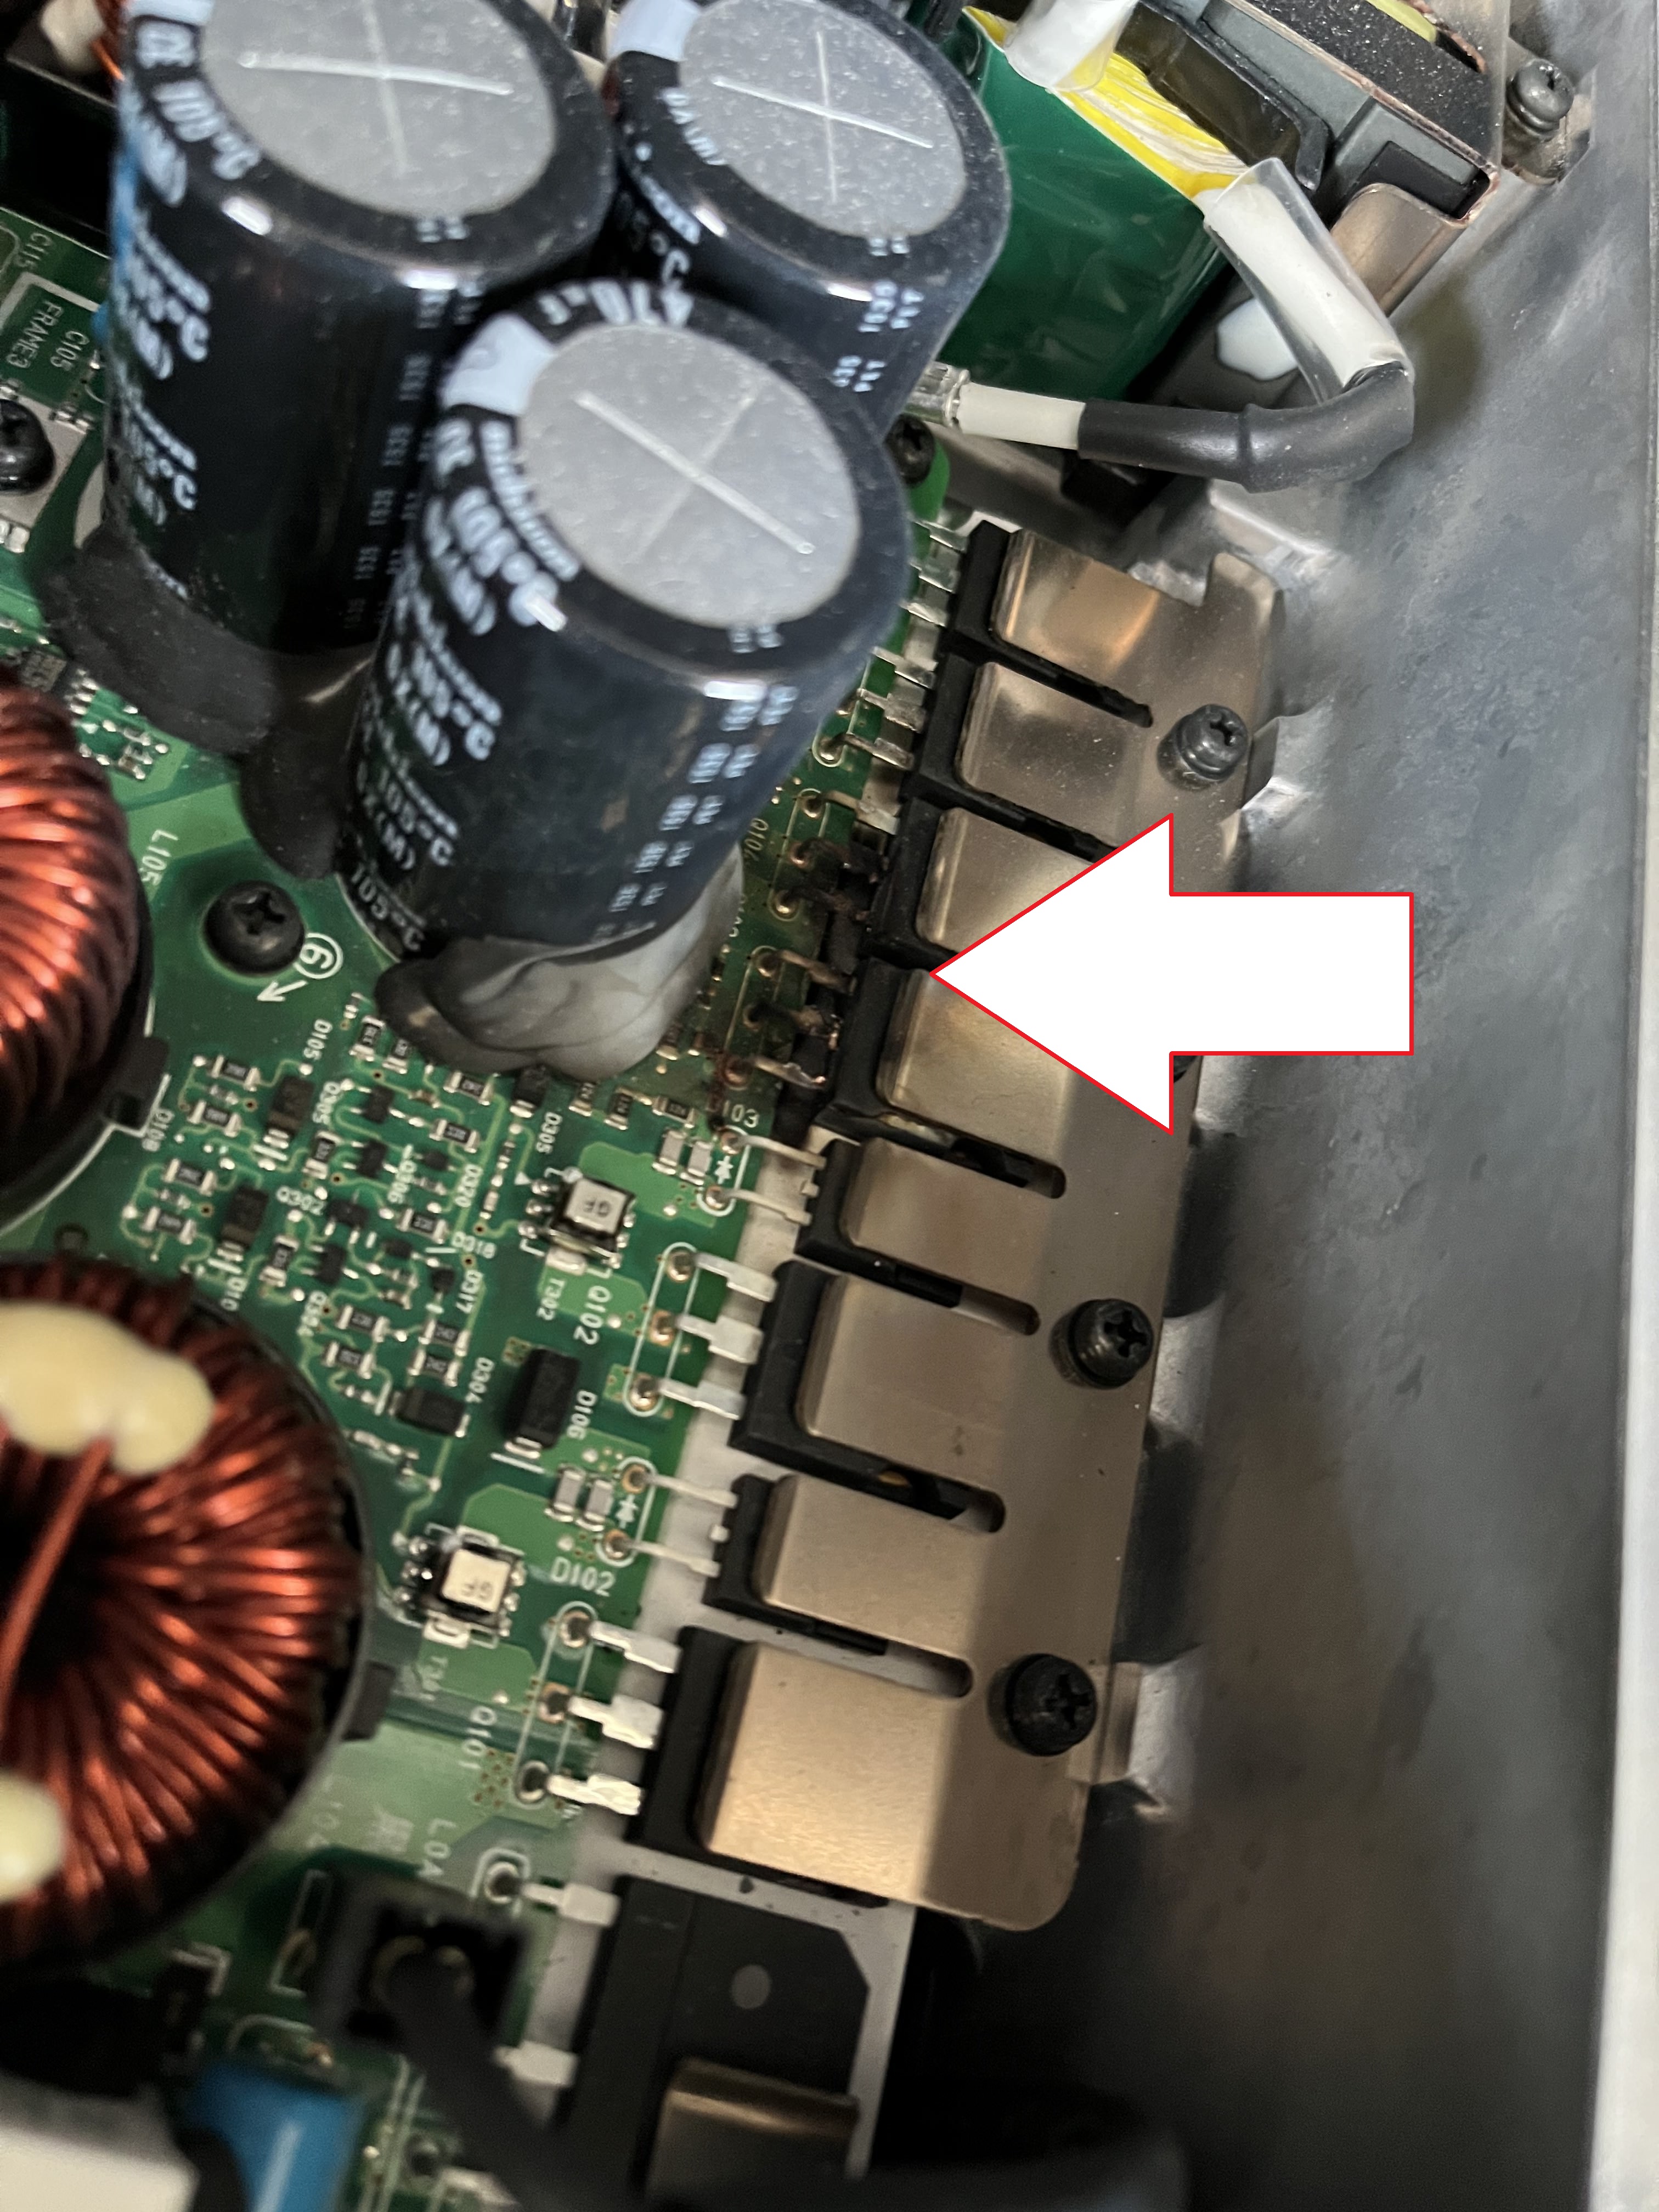
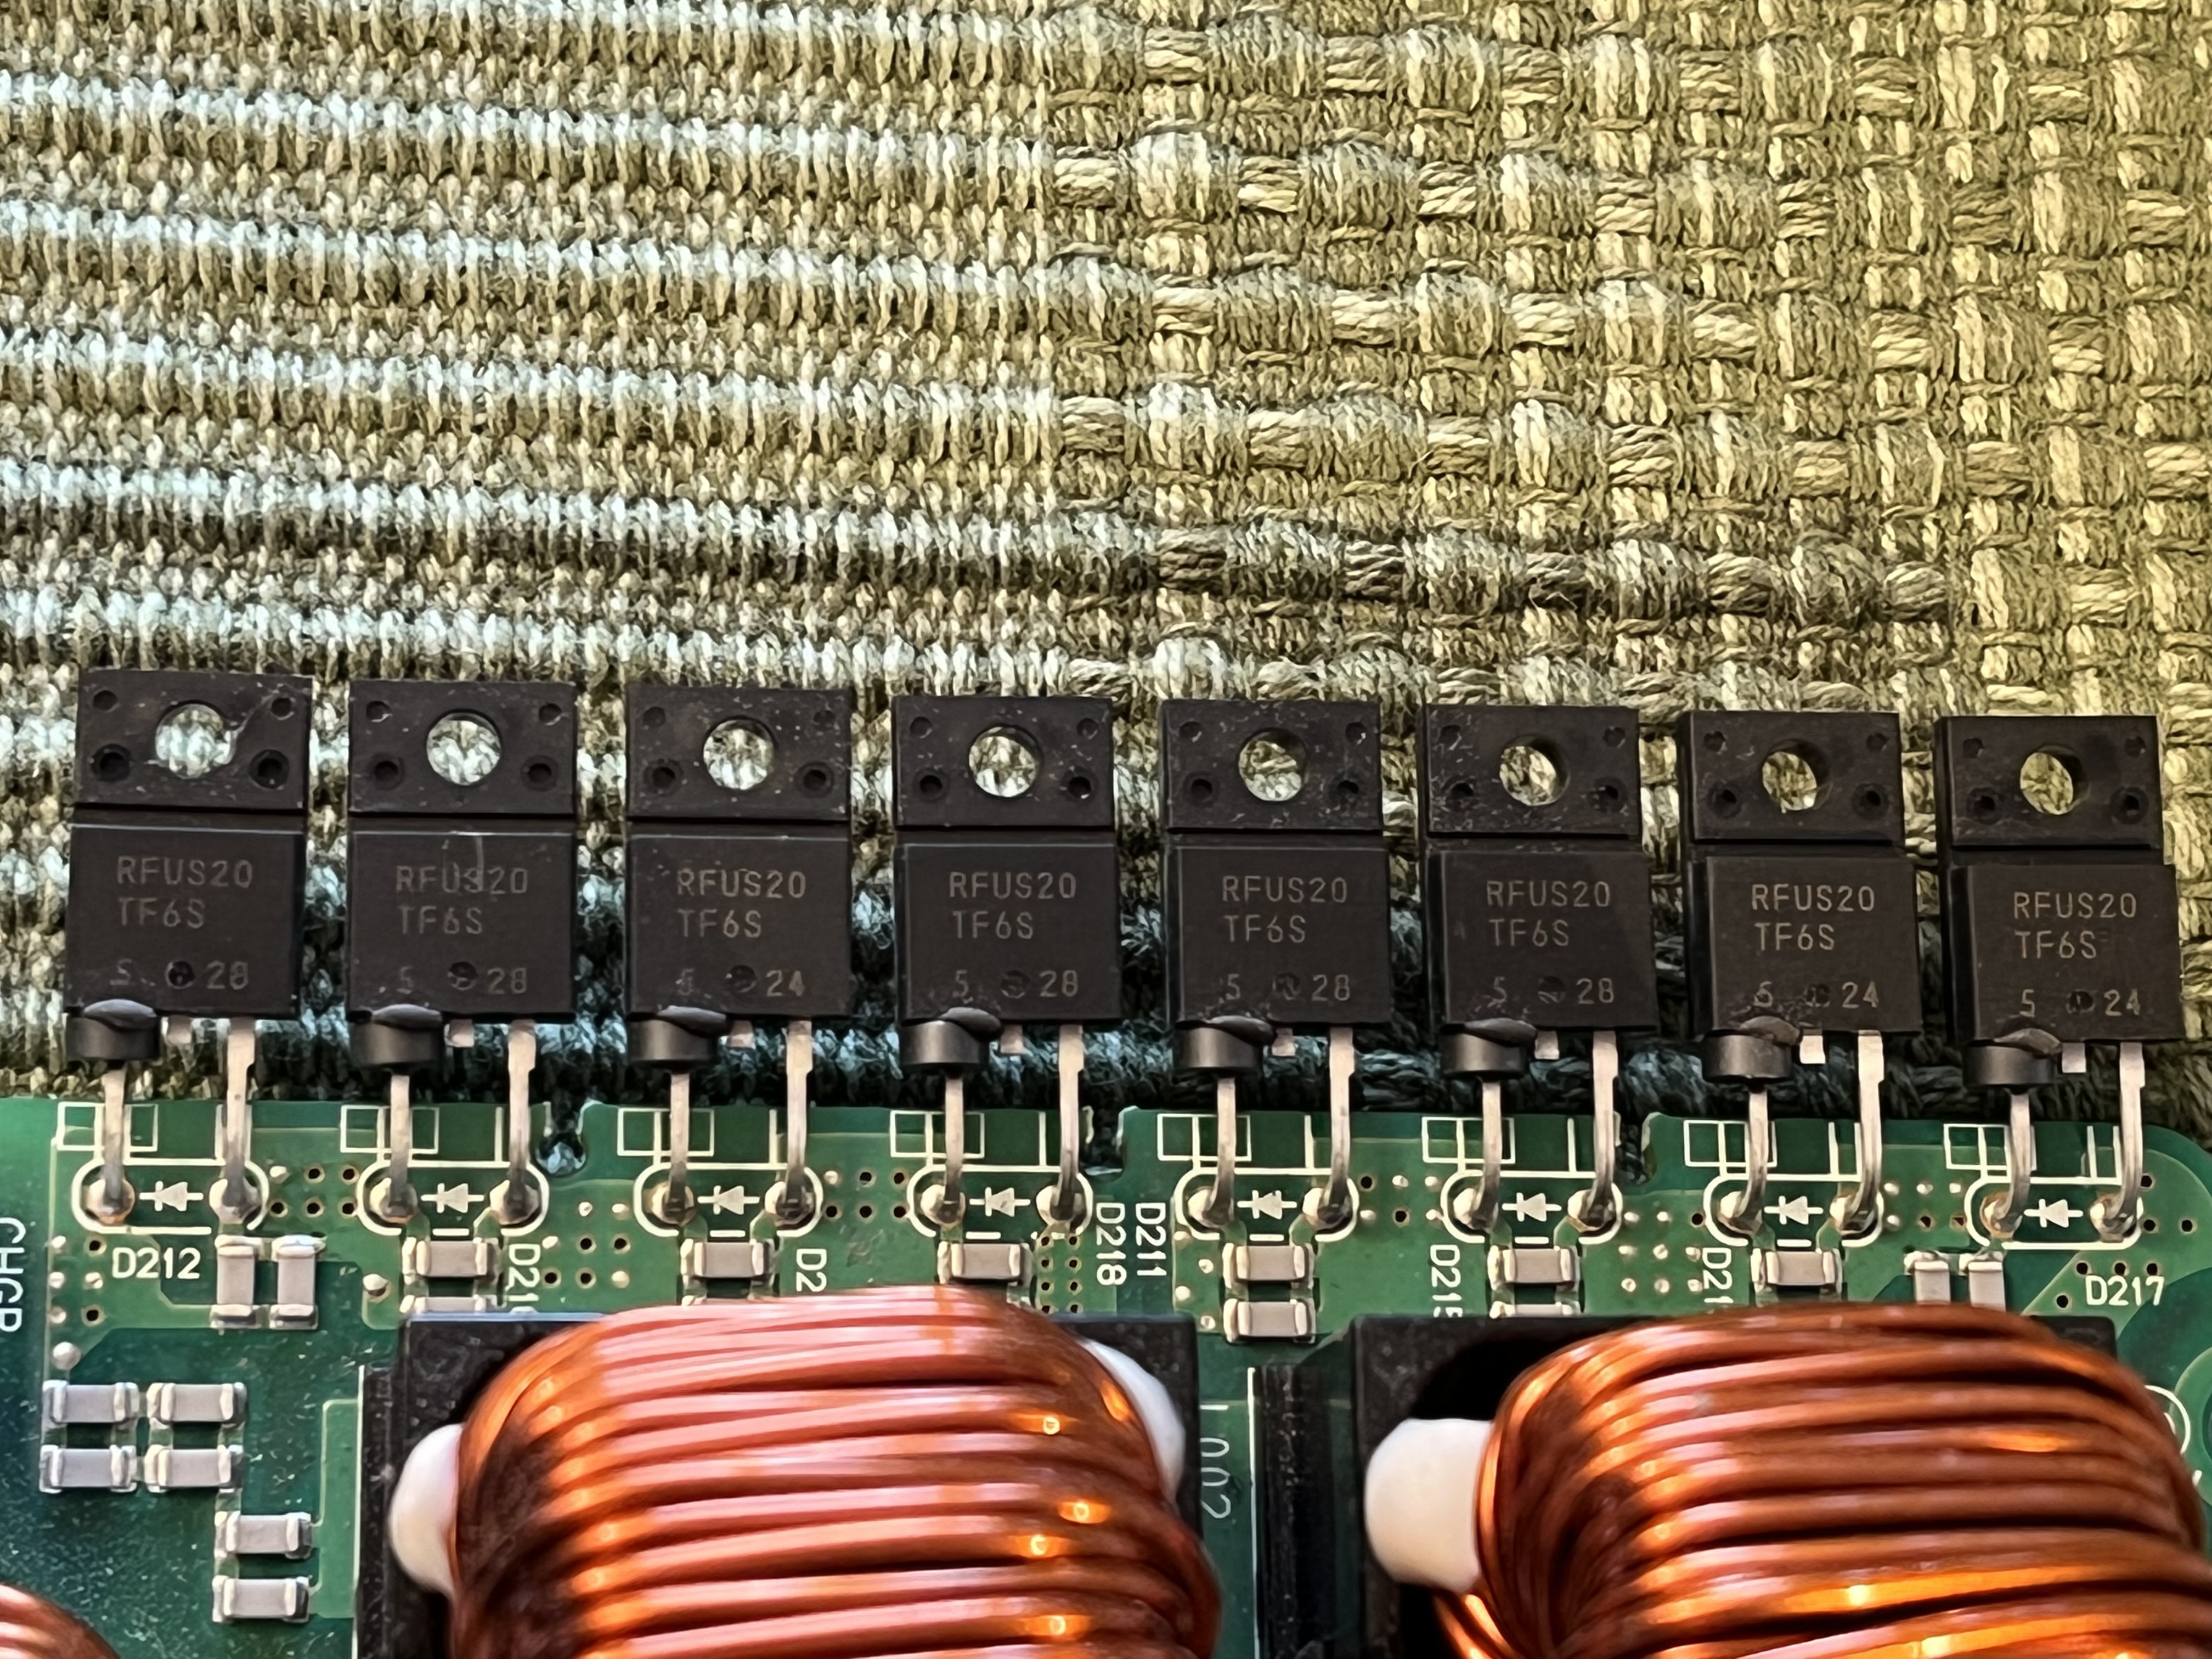
B6BB2D25-E789-4B6A-A2C0-CCC8D0526C8D.jpeg
 
kriiise said:
Heard a pop from the obc and the charrger stopped...
My guess is that when the original transistors blew, they took out some of the gate driver components. It's not clear to me exactly where this tiny spark was, but it's near a gate (left) lead. Perhaps it was a gate component arcing internally.

It can be frustrating repairing this sort of fault; I get it also with solar inverter repairs. Assuming that the PCB hasn't been damaged (that can be really hard to repair), you'll have to replace the damaged transistors again, then test and as necessary repair every gate component before re-applying power. Gate drivers have a hard life even when working, pushing amperes of current into or out of the gate in fractions of a microsecond. When MOSFETs or IGBTs fail, they often fail shorted, often shorted gate to collector/drain, in which case the gate drivers see massive overloads and fail also. The chain of destruction could go back quite far.

If the heat of the fault current caused part of the PCB to carbonize, then it's a nightmare. You have to get rid of every part of the carbonization (since it's conductive), and any vaporized high current tracks need to be replaced with suitable conductors, while maintaining suitable clearances for high voltages.
 
Back
Top