The Troubleshooting and Repair for On-board Charger (OBC) Thread

Mitsubishi i-MiEV Forum

Help Support Mitsubishi i-MiEV Forum:

This site may earn a commission from merchant affiliate links, including eBay, Amazon, and others.
Hello coulomb,

Thank you for the prompt answer! I was away for a few days, but will resume testing and eventually pull both charger boards out and inspect them very closely.

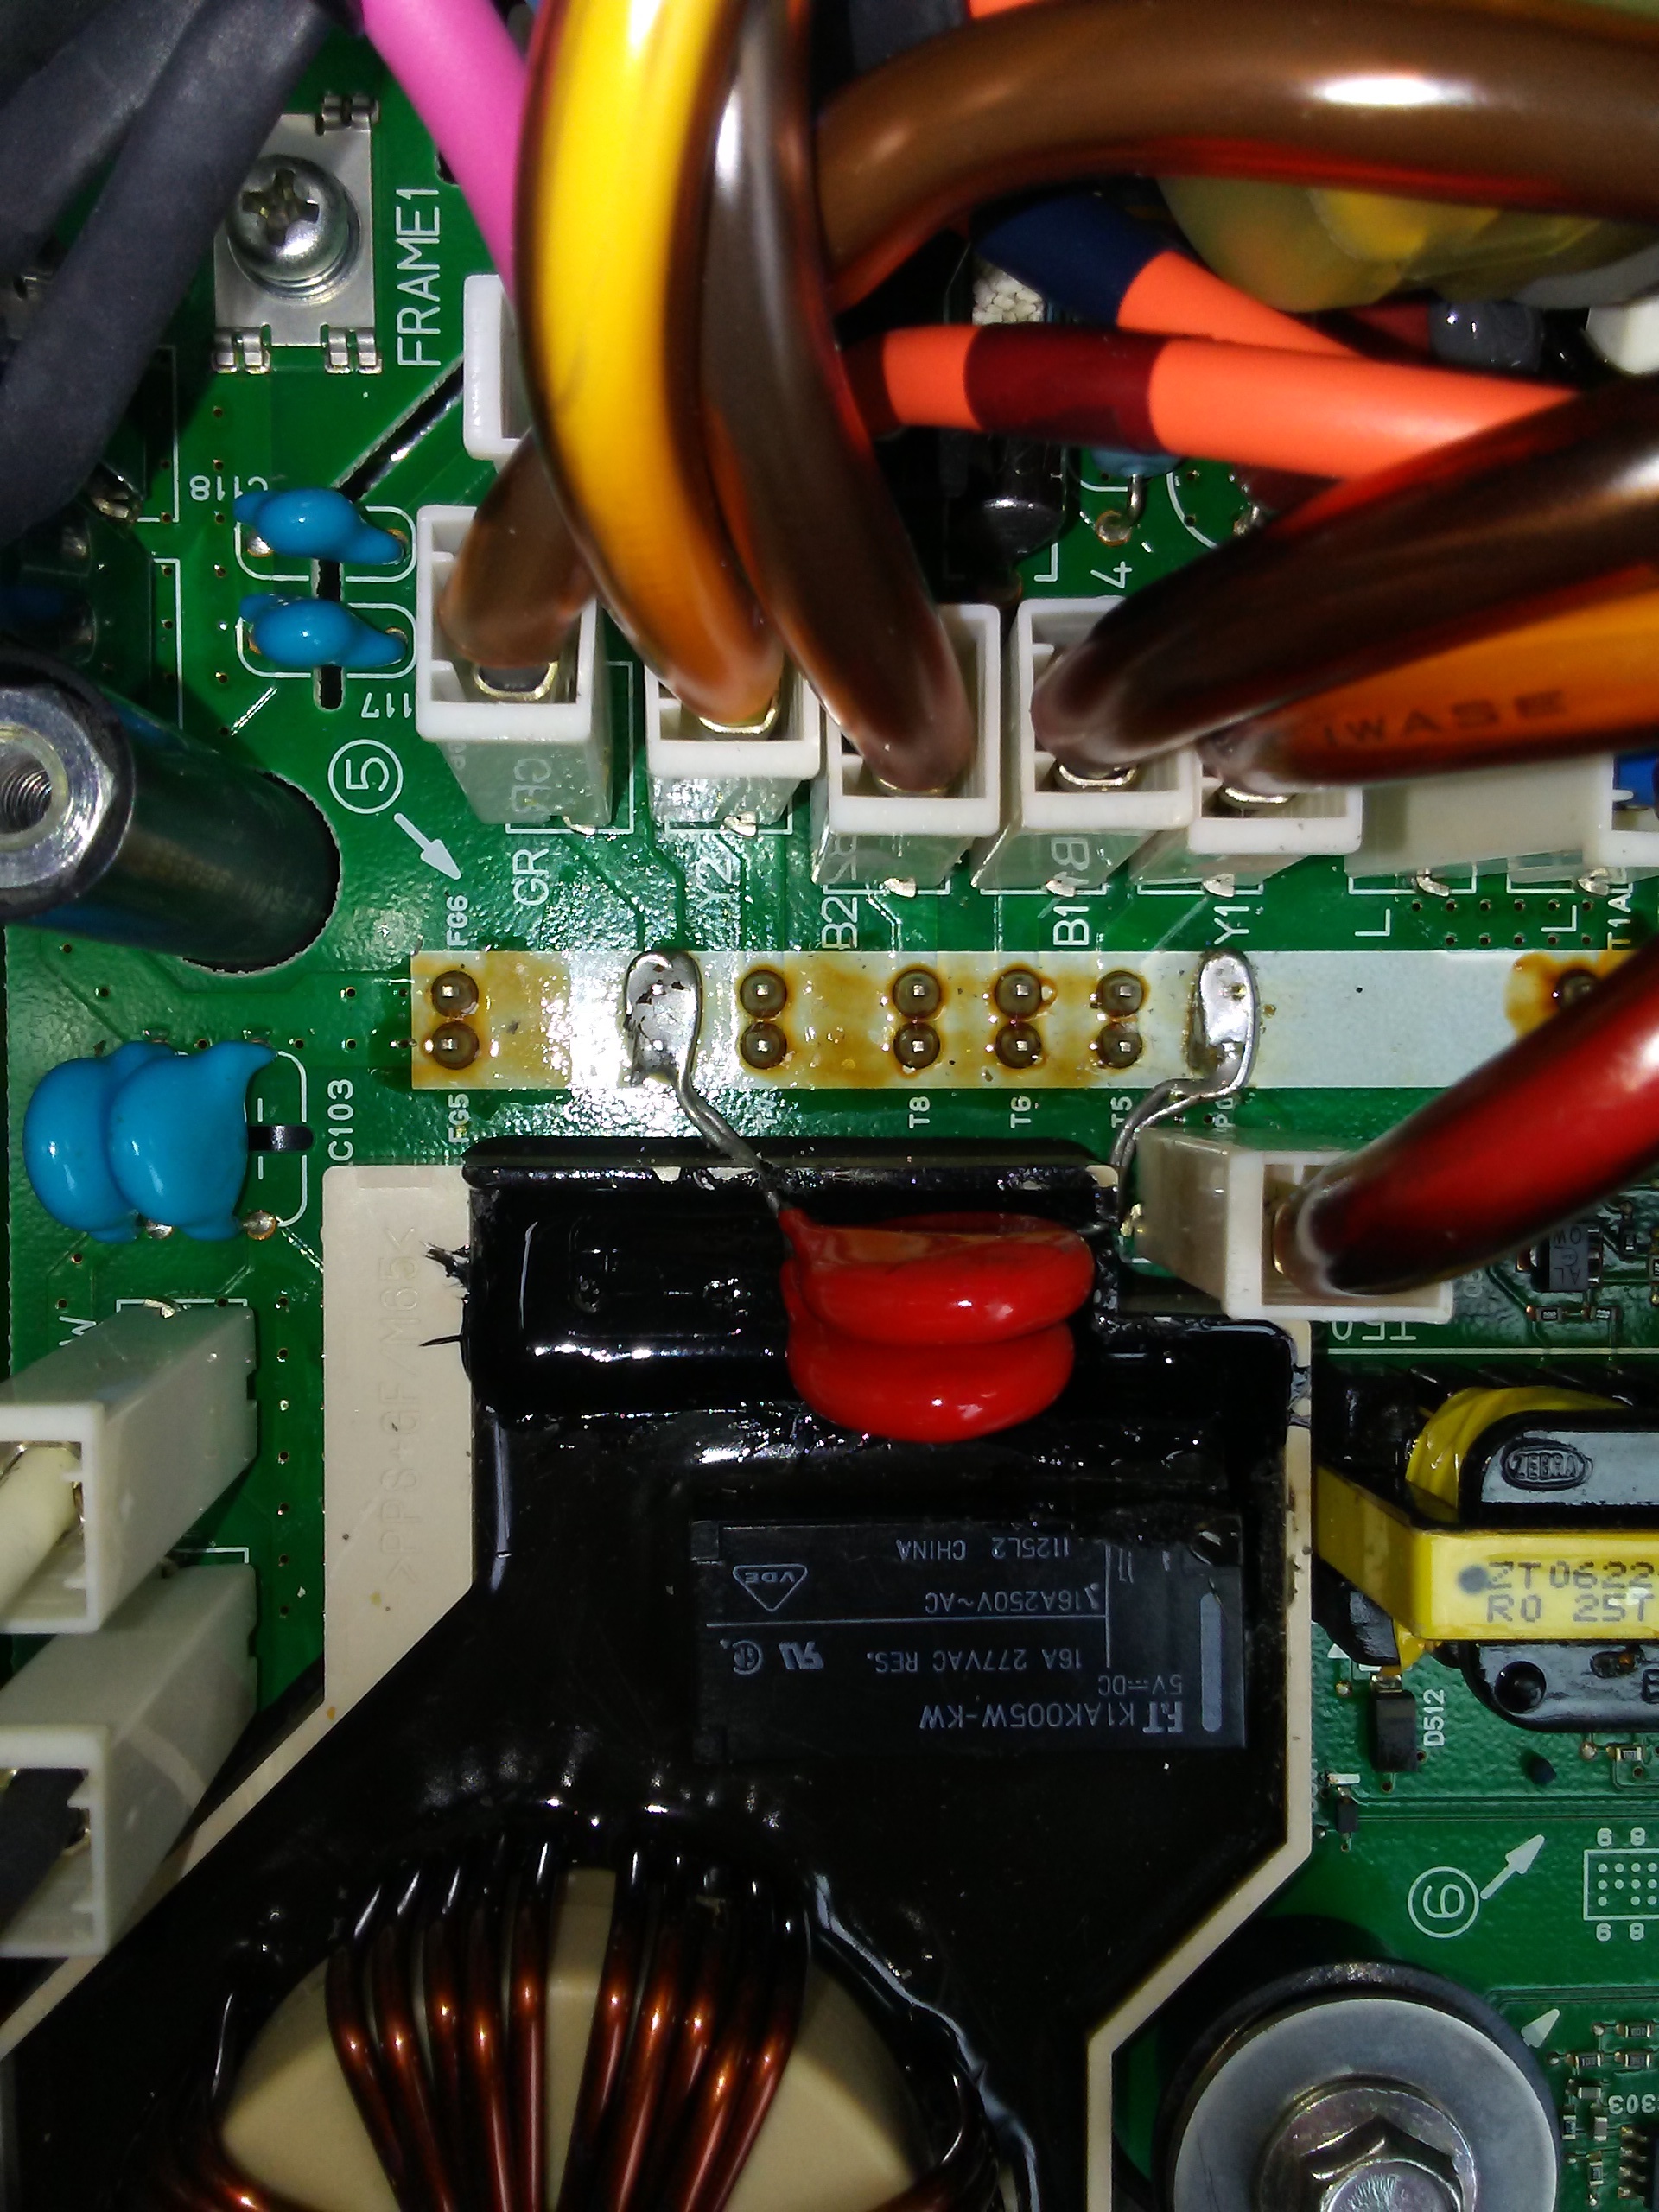
  1. Yes, as I said - I will test the ceramic caps and that thermal fuse. Thank you kindly for coming across this photo, very handy!
  2. DTCs... can`t seem to read those with either ELM327, two ELM327 mini, an OBDClick, AutoDia K409, VAG KKL and VCDS... I can`t connect at all to the car (but the devices are fed 12v). Obviously, these are not mine, but the car owner was able to source them from all his acquaintances. I only have an old Delphi (purchased with heavy money for my father`s Citroen), but I can`t find its software anymore :)))... Is there any sequence of commands I need to perform before I can successfully connect with any DTC reader? Or does the 2012 Citroen only work with MUT?
  3. We always pull the driver`s seat plug, it`s not fun being charred from 330v.. and yes, we always disconnected the 12v battery whenever we touched the BCM or ECM.
  4. Cool thing that it can be removed from the car without draining the coolant, thanks for the tip. Will take pictures with what wires goes where, to not do fireworks afterwards. Very odd that some wires change colors from one place to the other, I have never seen wires crimped in the middle from the factory...
  5. I have no idea whether the DC-DC charger works (drive battery -> 12v battery), as I have only seen the car with the drive battery depleted. But yes, the motor controller 20A fuse is healthy. Although a terribly bad idea, I might even try and somehow charge the 330v battery myself.. but at this point I have no such charger.. I could feed some HV mosfets (that I obviously need to procure) from an ATX PSU active PFC circuit.. that should be close to 400v, so it`s above 330v. but it`s still very dangerous, I agree.
  6. OBD-II.. isn`t that supported by the VCDS cable tester? Or by any ELM or OBDClick? Odd that we can`t connect to the car at all... The testers do get voltage, bluetooth connection works, tester light lights up without cable plugged into the car, hand-held devices do power on...
PS: I love this forum.. I accidentally closed this page.. right before clicking POST REPLY.. and it`s saved :love:
 
Transfer some PM posts from @floridamiev here for everyone to benefit.

Hello, my name is Kent i am a mechanic working for the person that owns this account.

I think I have found the problem I hope you remember. car wont charge 12v battery.

on top of the on board charger there is a little black box with two harnesses going in and it is smoked. also what looks to me like a relay is also blown out. let me try and send some photos.
IMG_1512.jpeg


I need to know what direction to go into next. should I ship it out to someone specific?
IMG_1516.jpeg

IMG_1510.jpeg

Thank you very much
Kent Lackemacher
 
Reply:
Wow that is quite some damage in the little black EMI filter box on top. That is a melted capacitor with scorching residue. Possibly a lightning surge in the AC input lines or some other over-voltage event.

Plus i see a melted/blown capacitor inside the OBC on the bottom power board (inside the fenced area).
 
More PM:

Hi Kiev, we spoke a while back about my car not charging and not wanting the dealer to fix it, so a local mechanic agreed to get the card out for me. He found two small boxes that had melted but we are not sure what these are, he posted them on my page. Wanted to find out what they are called, and where to look for new ones please.

Attachments​

  • IMG_1518.jpg
    IMG_1518.jpg
    89.6 KB
 
Those are "X2" safety capacitors on the AC Input section. One in the EMI filter box on top, the other inside the OBC on the power board. Should be able to de-solder and replace.

The OBC would function without the EMI filter box. It seems to be an additional filtering added externally as there is a similar circuit inside the OBC.

Also check the AC input portion located on the top board in the OBC. There is some lightning surge arrestors and transient suppressors on that board from where the AC enters, across to where it drops down to the bottom board.
 
Hi Everyone, First of all i would like to introduce myself, i am a Nissan Leaf owner with a blown onboard charger. Second of all, i would like to thank all the members of the forum for the incredible amount of information regarding the on board charger, the waffle plate, schematics and so on.. THANK YOU SO MUCH... (Maybe this is premature, as i still havent managed to repair my onboard charger, but i am on the way :p)

i would like to share with you what i am doing. basicaly i started removing the epoxy to replace the broken transistor and i kind of gave up, i realize that it was going to take me less time to make a new pcb than to clear out this one with all the possible defective components. so here i am, just finishing the DRC (design rules check) on the new waffle plate...


when i finish and i manage to produce i would like to share the project with all of you that are in need of such component. of course, if you want the sources before i produce and test mine, i am solo willing to share with you..

regarding cost, i have choosen the most economical and available components from mouser, right now the bill of materials is arround 60 euros including shipping.


https://eu.mouser.com/ProductDetail/241-GBU3008_T0_00601
https://eu.mouser.com/ProductDetail/726-IGD08N120S7ATMA1
https://eu.mouser.com/ProductDetail/637-BCX53-16
https://eu.mouser.com/ProductDetail/637-BCX56-16

I may be able to reduce the cost by 10 euro replacing the diodes by bridges, however i wanted to start by the basic design following the schematic of the Ukranian who did the first commercial replacement plate that seems to be for sale in... ~300 euro

https://eu.mouser.com/ProductDetail/241-GBU3008_T0_00601

In any way, if anyone is interested in collaborating, verifying the eschematic, design, etc.. please let me know. The contact details can be found on the share folder where soon there will be the files of the project.

Project folder
https://drive.google.com/drive/folders/1mfxHlWD3nZR7SCulJhmhCoxP8X81Wa3n?usp=sharing

about the design:
Software: Altium Designer
PCB two layers, 1.55mm thickness
components on the botom of the pcb (to interface with an aluminium plate to then be in contact with the wall of the charger.
connector on the top (missing reference to the connector, so for the moment I think i will need to do it myself with a rigid coper cable 1.55mm thick pcb which will cost arround ... 70-100 euro for 5 pcs depending of the chinese provider you choose (pcb way ~70usd)
 
Back
Top