GregFordyce
Well-known member
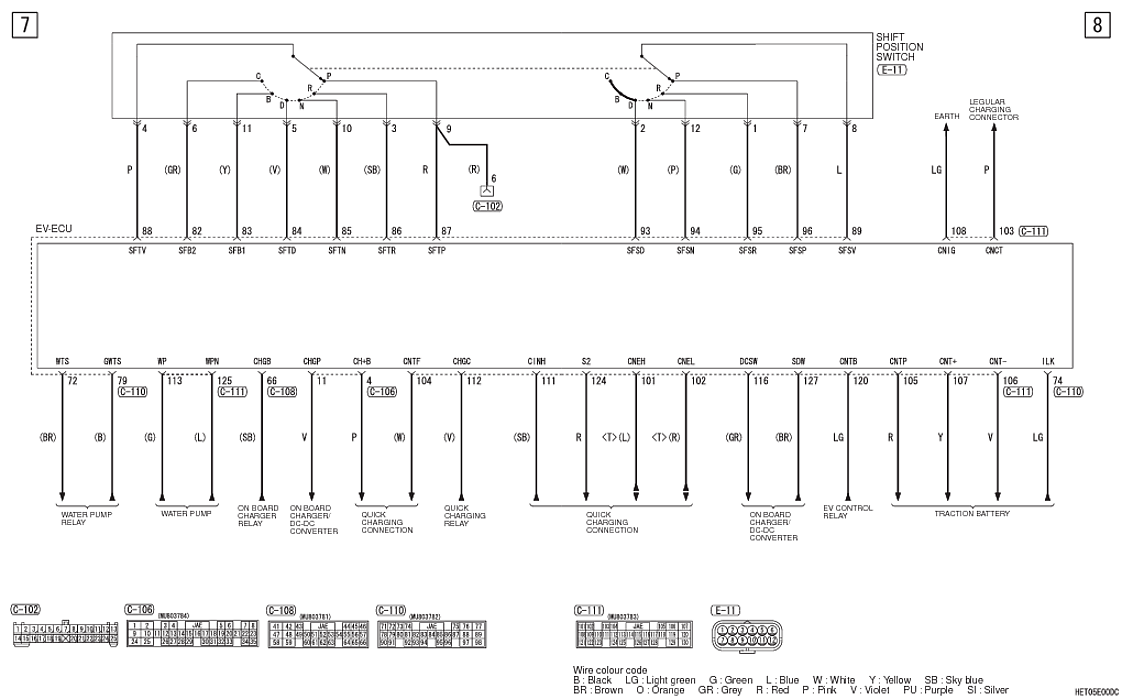
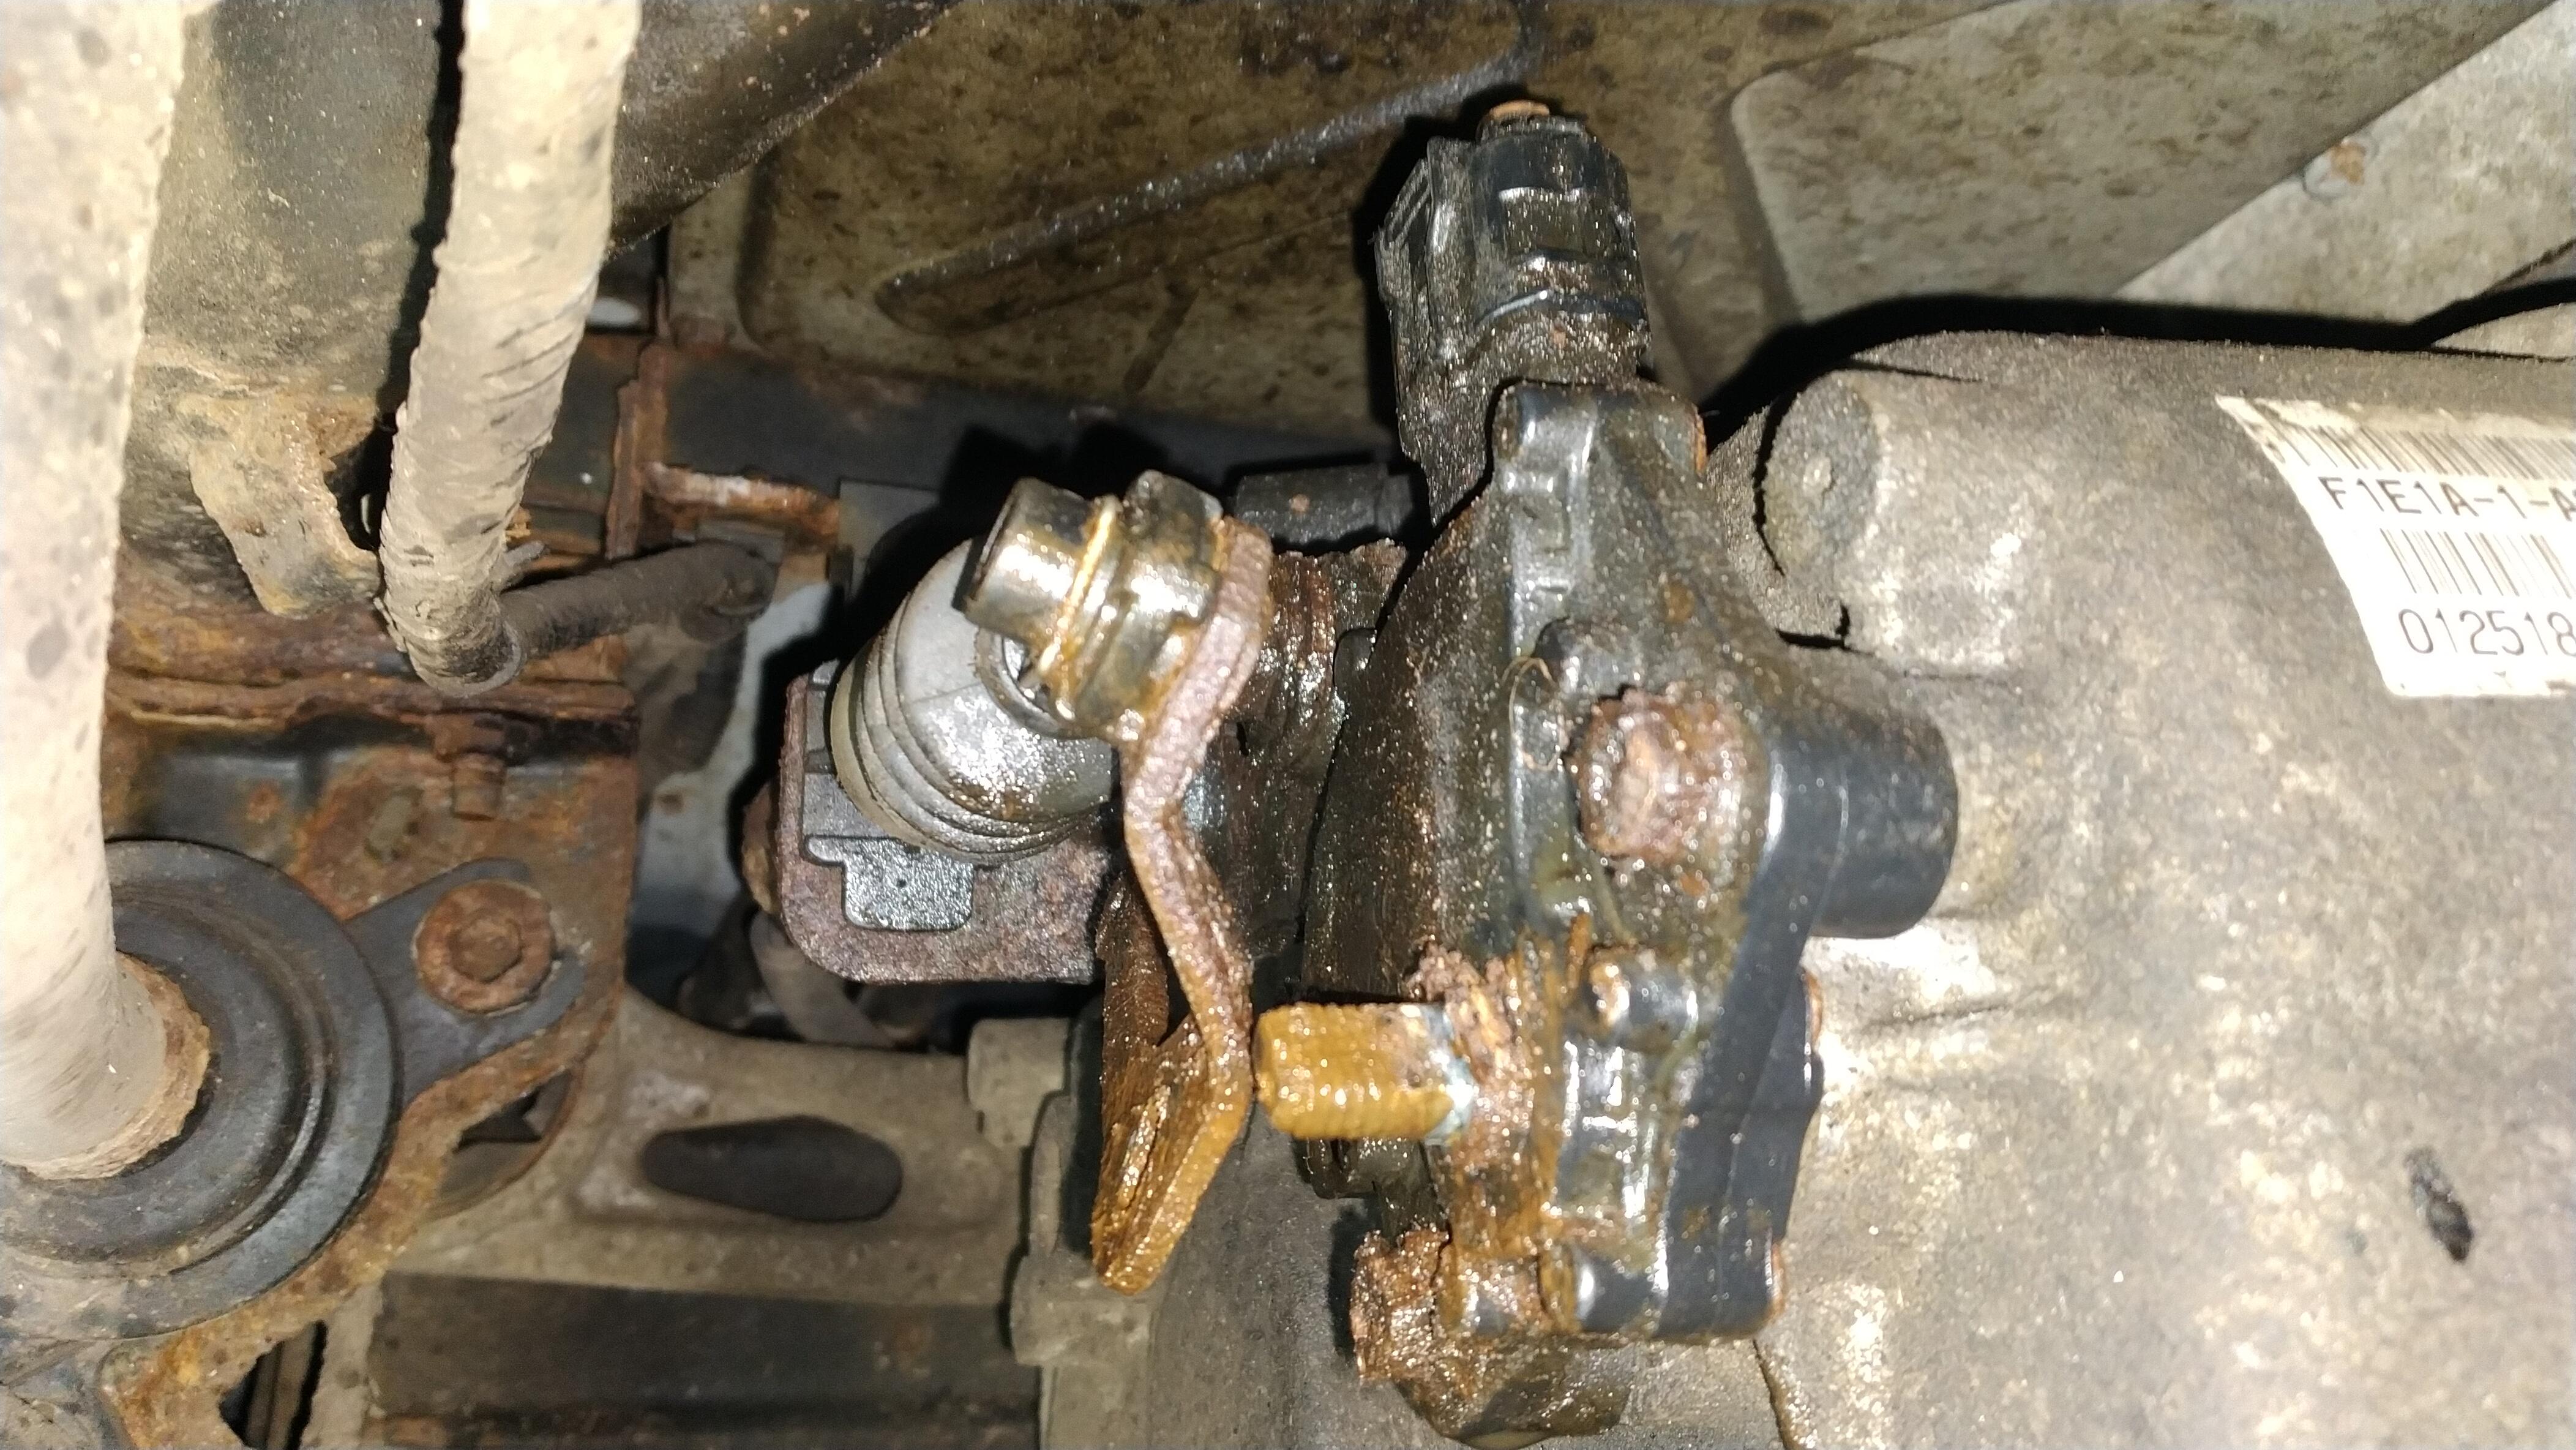
Back in November I had to get my iOn recovered after losing drive. It would go into reverse but when trying to go into drive the gear display would go blank. Looking at the diagnostics one of the 2 position sensors was always showing reverse (the shift position switch is actual 2 switches in one for redundancy, the earlier cars actually had 2 separate switches). So in reverse it was fine but going forward was a no go as the car was getting conflicting signals. So with a lot of penetrating oil I got the nut off.

The shift lever off.
And the switch off. It is screwed together and came apart with only one of the screws breaking.
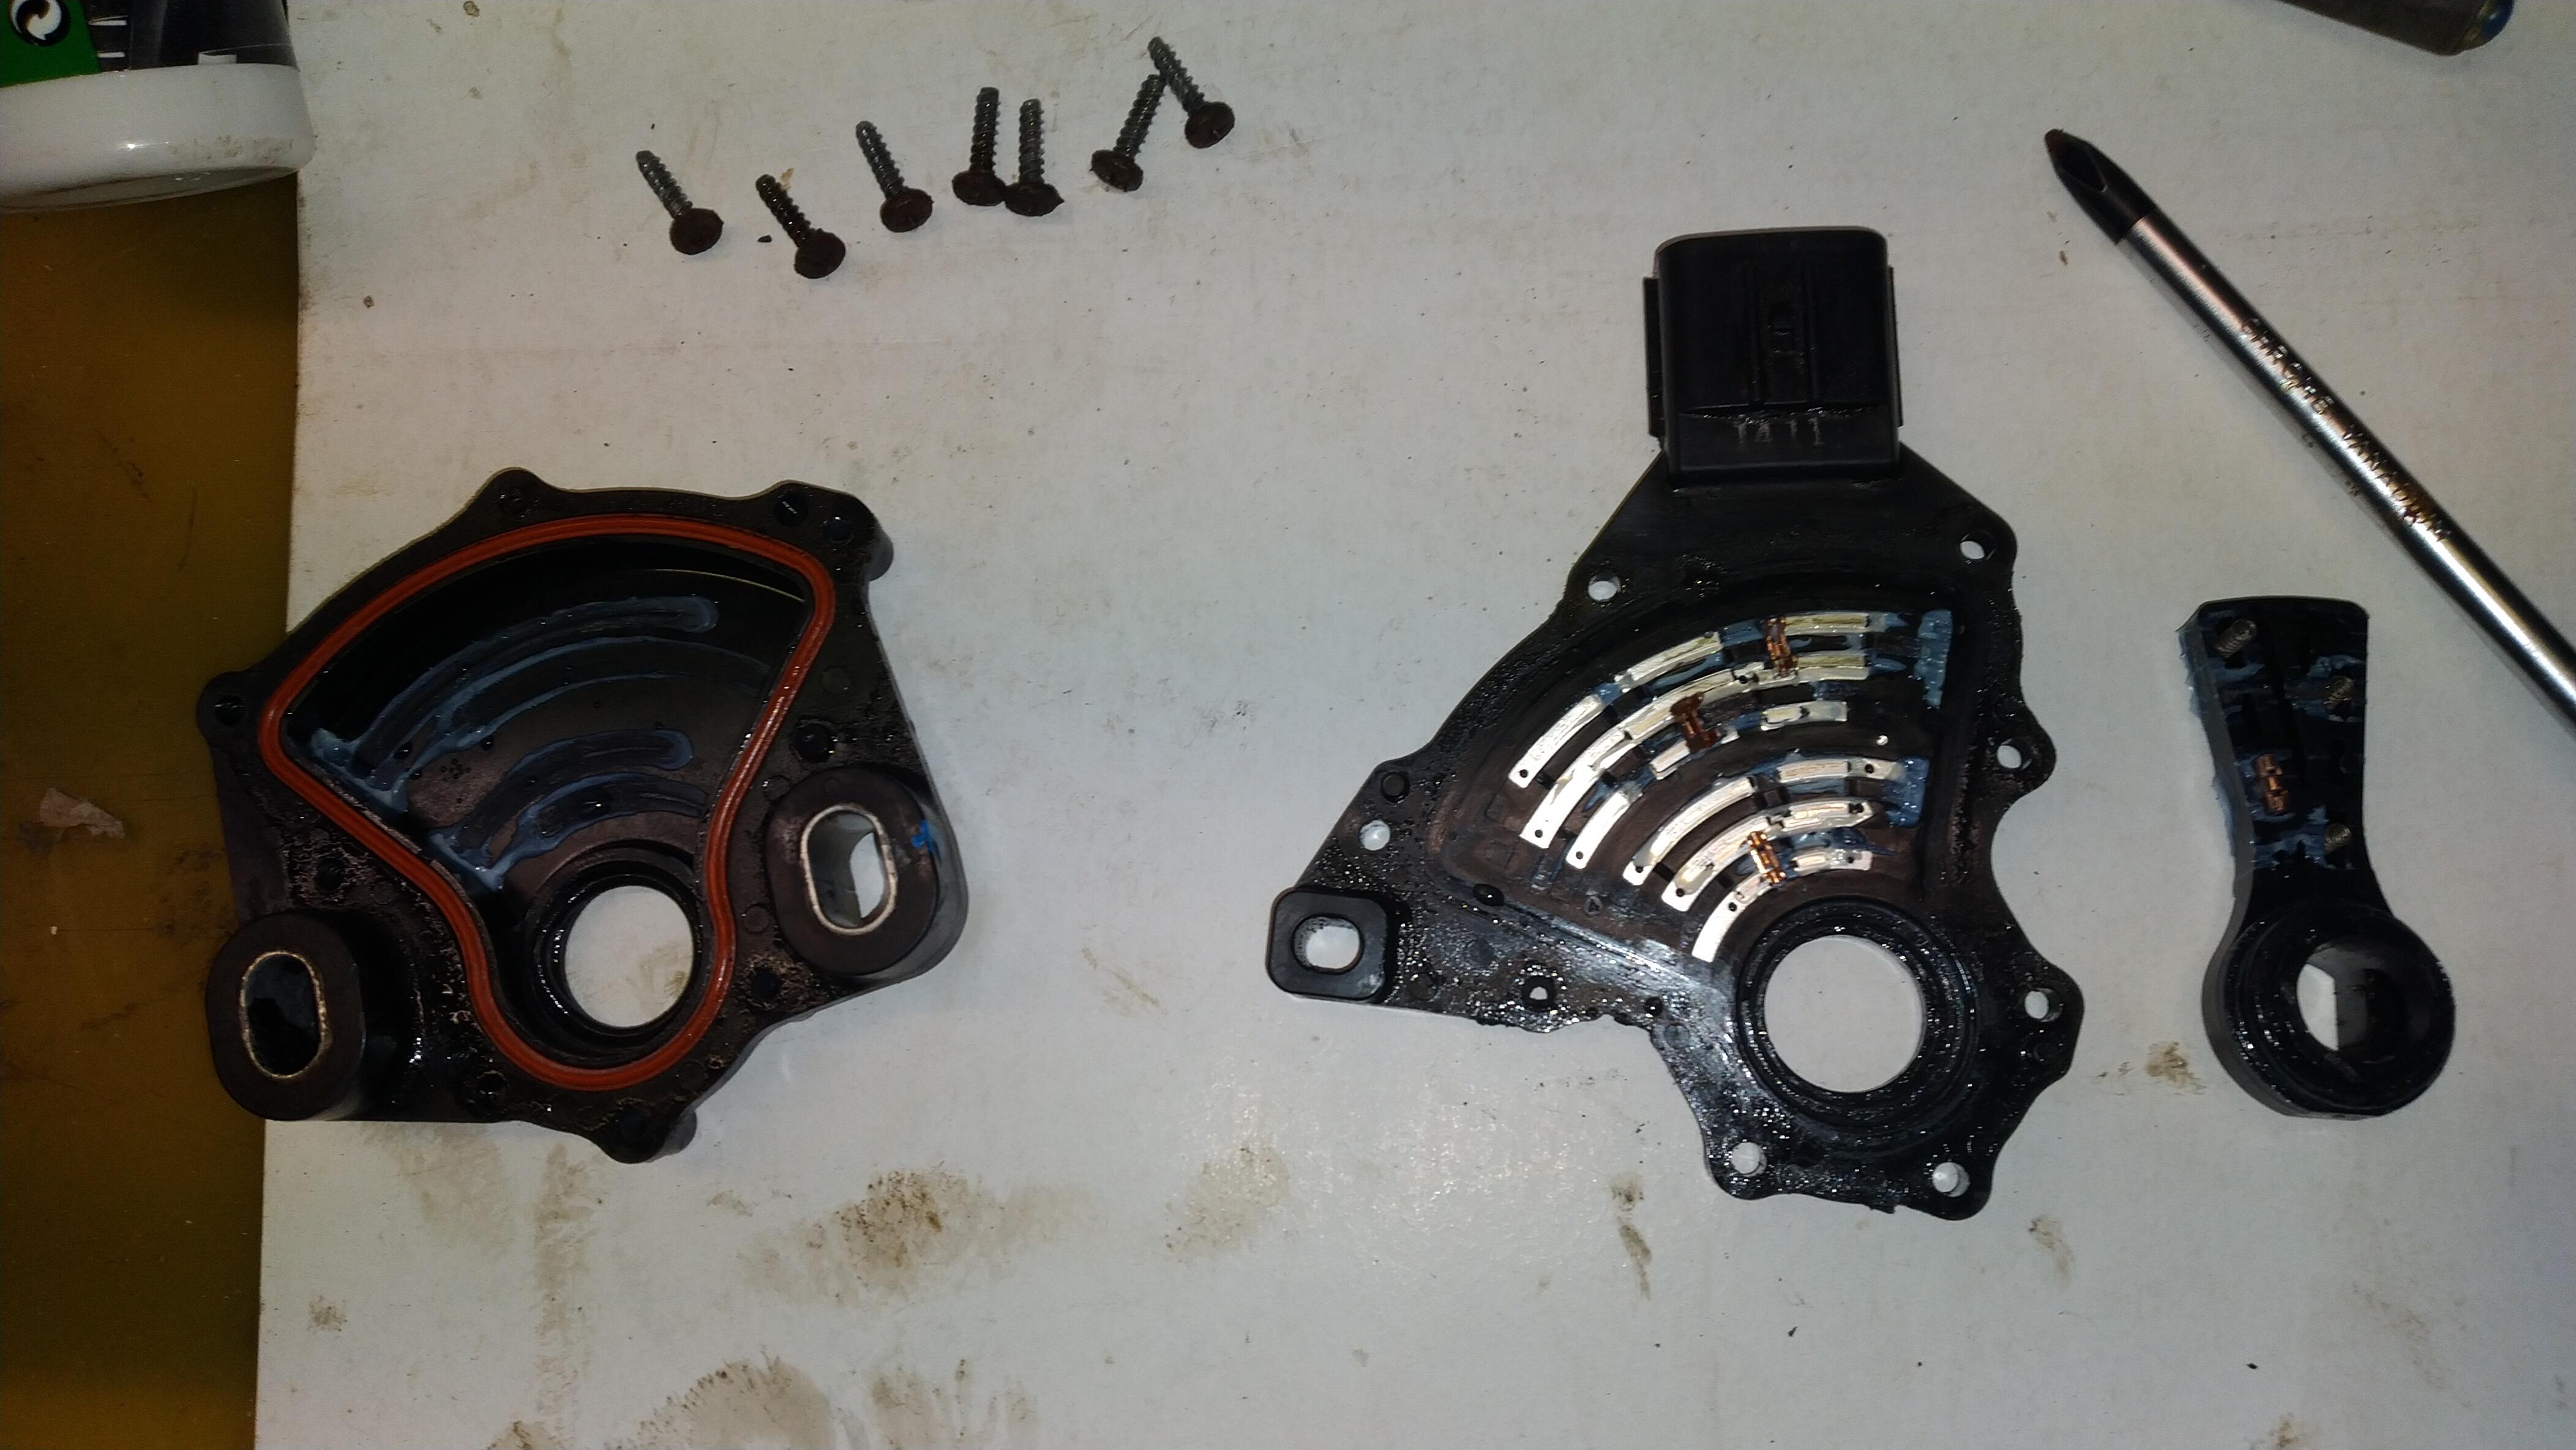
You can't see it in the picture but mixed in with the grease was some fine copper shavings worn off from the contacts. I cleaned out all the old grease and put a little new grease in the switch and screwed it back together. Then I cleaned all the rust off of the shaft going into the gearbox and also unclipped the lever from the cable and cleaned the rust off of the pin that the cable attaches to. Some new grease on the cable and refitted the switch.

Final adjustment is done with the gear stick in neutral. Loosen the 2 bolts that hold the switch and rotate until a 5mm drill bit can be inserted through the lever into the guide hole on the switch. Tighten the 2 bolts (11Nm), remove drill bit and your done. Two months on and the switch is still working fine and has never shifted easier.
The shift lever off.
And the switch off. It is screwed together and came apart with only one of the screws breaking.
You can't see it in the picture but mixed in with the grease was some fine copper shavings worn off from the contacts. I cleaned out all the old grease and put a little new grease in the switch and screwed it back together. Then I cleaned all the rust off of the shaft going into the gearbox and also unclipped the lever from the cable and cleaned the rust off of the pin that the cable attaches to. Some new grease on the cable and refitted the switch.
Final adjustment is done with the gear stick in neutral. Loosen the 2 bolts that hold the switch and rotate until a 5mm drill bit can be inserted through the lever into the guide hole on the switch. Tighten the 2 bolts (11Nm), remove drill bit and your done. Two months on and the switch is still working fine and has never shifted easier.


")