Custom 11 lb hitch receiver adapter

Mitsubishi i-MiEV Forum

Help Support Mitsubishi i-MiEV Forum:

This site may earn a commission from merchant affiliate links, including eBay, Amazon, and others.

GdB

Well-known member
Joined
Aug 12, 2014
Messages
154
I did not want to buy a $250 44lb hitch adapter just to carry bikes. Too heavy, so I made my own 11 lb adapter. It's definitely strong enough to tow a light trailer less than 500lbs, maybe more, but I don't plan to do that.

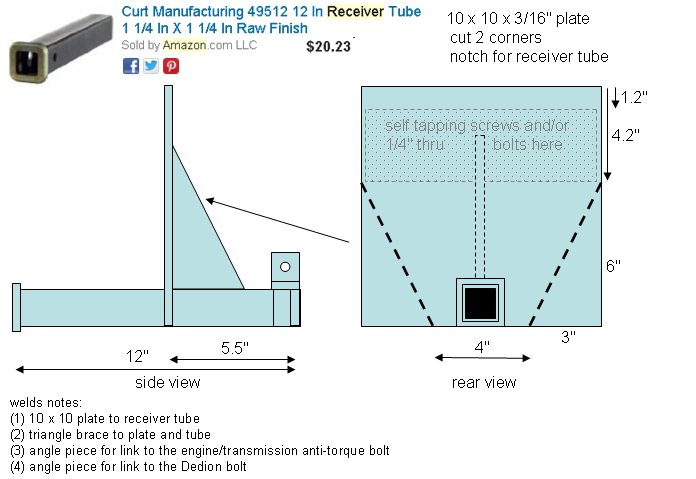
It's a 10x10x3/16 plate cut a bit and welded to an unfinished 1-1/4 hitch receiver from amazon. Total cost was less than $100 not including my time and a few scrounged nuts and self taping screws.

It transmits longitudinal, lateral, vertical and left right roll torque loads through the bumper. Longitudinal is limited by the two small 1/4" bolts and 18 self taping screws through the bumper.

The vertical pitch torque load is greatly assisted by a short link to the engine/transmission anti-torque bolt that has a 10mm thread, and 14mm nut and bolt head.

Side to side torque is greatly assisted by a link to the Dedion bolt on the left side, 12mm thread, 17mm nut and bolt head.

Installation is much trickier and requires special tools including an angle drill, and safety goggles. I got branded on the chest by a falling sliver of drill droppings.

Attached to it is a 30 lb 1upusa bike rack that works great! Notice the load test. I actually jumped up and down so it's good to about 300 lb vertical load. It felt totally rigid.

The pictures are here at files.fm but I need to pay to embed pictures here.

The link http://files.fm/u/xksljth
 
Good Goin' GDB- The only concern I'll note is that the longitudinal loads seem to be centered on the rubber donut shock absorber. That thing gets yanked around a lot as the drivetrain rocks back and forth with every acceleration and decel, so could work the screws through your bumper loose over time.
One of our early members posted a video of that action that was eye-opening.

:roll: edit- DOH! You attached to the center pivot point that is part of a rigid frame- it's the outer ring around the rubber donut that the drivetrain is suspended from. Good on ya!
 
jray3 said:
Good Goin' GDB- The only concern I'll note is that the longitudinal loads seem to be centered on the rubber donut shock absorber. That thing gets yanked around a lot as the drivetrain rocks back and forth with every acceleration and decel, so could work the screws through your bumper loose over time.
One of our early members posted a video of that action that was eye-opening.

Thanks for sharing that high quality video, it shows a perfect view of the 2 bolt ends I used! I found it here: http://myimiev.com/forum/viewtopic.php?f=6&t=600

Look at the video to see the 2 bolts stay static. The rubber donut center (bolt) is held very rigid in place by the bracket welded to the steel tubing sub frame structure. The outside of the rubber donut is what moves with the aluminum transmission strut brace.

The bike rack link adds a very small load on the steel tubing sub frame structure relative to what it can handle.

The bolts are pretty well isolated from vibrations, but time will tell if my screws stay tight. I leave my bike rack on all the time it's so light and aerodynamically well located.
 
hi GdB,

I like your hitch, do you have a rough drawing with dimensions ? I like to duplicate it.

Thanks
 
The 1st post is everything you need except the plate notch dimensions, and the tube length and plate location on it.

I'll get those and post...
 
This is great, thanks for sharing!

Tomorrow I think I'll post this on the Electric Vehicle Wiki so that the images and content are archived for others...

http://www.electricvehiclewiki.com/Mitsubishi_iMiev
 
iMiEV_custom_hitch_receiver.png
 
The screws in the above diagram upper plate area (shaded grey) go into the back of the steel bumper. I used two 1/4" x 2-1/4" thru bolts at the lower corners of this screw area to insure that if the self taping screws loosen, the bolts would be a backup.

I forgot to include dimensions for the two links on the end of the receiver tube.

The side link is at most 18.5", with the distance between the receiver tube center-line and Dedion bolt being 17".

The vertical link is at most 9", with the distance between the receiver tube center-line and engine Dedion bolt being 7". This link needs to be angled back far from perpendicular, which makes a welded tab helpful for installation...

I welded two tabs on the receiver tube to be sure I could connect the links I wanted to use. I did not want to put bolts thru the receiver tube for fear of those obstructing during usage... But that's not likely an issue with a 12 inch tube.
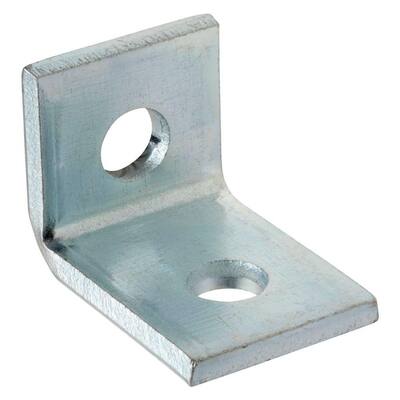
2-Hole 90-Degree Angle Bracket - similar to the scrap pieces I used.
http://www.homedepot.com/p/Superstrut-2-Hole-90-Degree-Angle-Bracket-ZAB201EG-10/100390324
630c335f-635c-40fb-a88d-f18ed499e4f0_400.jpg


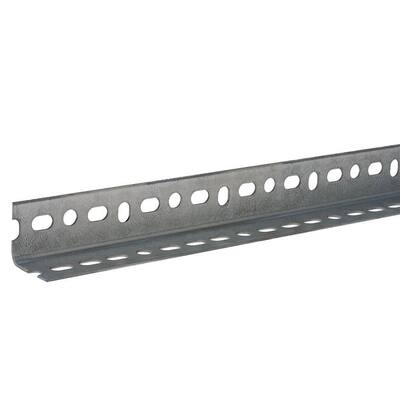
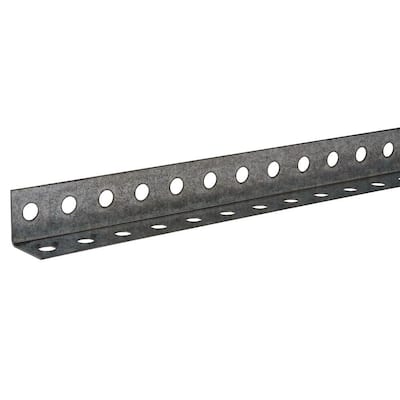
For the links I used some extra pieces from an old baby bike seat, but the hole punched angle available at hardware stores is totally suitable. These links are minimally loaded, and I expect thinner to be better in a minor rear end impact. Thin links will crumple and rotate at the bolts (USE ONLY 1 BOLT AT EACH LINK END!). A hard rear end impact will likely be a total loss anyway. The heavy hitch kit might help reduce damage but for a hard impact I don't think it will make much difference.

1-1/2 in. x 14-Gauge x 36 in. Zinc-Plated Slotted Angle
http://www.homedepot.com/p/Everbilt...=REC-_-PIPHorizontal1_rr-_-NA-_-204225759-_-N
febbf841-47ad-4956-bb12-7daf66d9bb3f_400.jpg


or

1-1/4 in. x 48 in. Zinc-Plated Punched Angle
http://www.homedepot.com/p/Crown-Bolt-1-1-4-in-x-48-in-Zinc-Plated-Punched-Angle-41790/202183466
36d60609-49e5-44d3-935f-b8470e9f8794_400.jpg
 
Thru bolts should not be longer to not interfere with bumper foam. I used a little spray can polyurethane foam to hold the loose bumper foam. The bumper foam was already loose from the factory so that would hold it a little better.
 
GdB - Thanks so much for the detailed instructions, dimensions and parts sources. I've been waiting for something like this. Time to break out the welder!

Don
 
Back
Top